

If you're looking for a seasonal treat that's cute, portable, and delicious, then look no further. Shaped like pumpkins, filled with a creamy pumpkin filling, and topped with a maple glaze, these pumpkin hand pies are sure to be a huge hit!

Save This Recipe to Your Inbox
By signing up, you’ll join our email list and can unsubscribe anytime.
These little pumpkin pies are almost as adorable as they are tasty. I'm not kidding when I say they won't last long. When we made this batch of small pumpkin pies, they were gone before the icing had even set. They're just irresistibly good!
Like Homemade Strawberry Pop Tarts, but with your favorite pumpkin pie filling inside instead, these seasonal treats are perfect for all of Autumn.
Looking for more pumpkin pie recipes? Check out my No Bake Pumpkin Cheesecake and Easy Pumpkin Cupcakes. They're fabulous and work well all season long too.
Jump to:
💛 Why You'll Love This Recipe
- Simple ingredients. The ingredients needed to make this recipe are very simple and basic. You may be pleasantly pleased to find that many of them are already in your pantry.
- Easy steps. The steps to make this recipe are very simple and easy. Mix, brush, press, and bake. No fancy kitchen equipment or appliances are needed (besides your oven, of course).
- Perfect for parties. These little hand pies allow you to skip the pie cutter, plates, and forks. Serve up these tasty personal-sized pies at your next party, and they'll be a great addition to the appetizer or dessert table.
🛒 Ingredients

Eggs- You will need eggs for the filling as well as the eggwash that gets brushed on top of the pie crust. This is what gives them a nice golden color when baked.
Pumpkin puree- For real pumpkin taste, you will need canned or fresh pumpkin puree. Note that this is NOT the same as canned pumpkin pie filling. If you have puree leftover, you're in luck! We also use it in our Pumpkin Swirl Cheesecake and Edible No Cook Pumpkin Playdough.
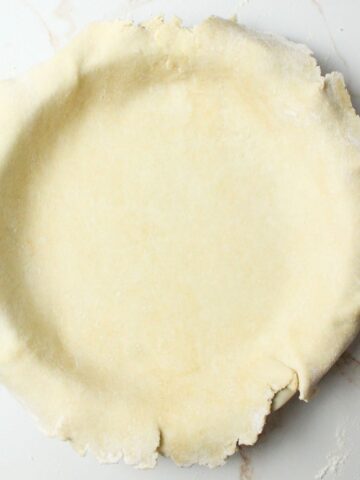
Refrigerated pie crust- Save time and effort by using thawed storebought pie crust. You can replace this with Homemade Pie Crust if desired.
Maple glaze- You will make a simple glaze made from maple syrup, powdered sugar, and water.
See the recipe card below for full ingredients and instructions.
💰 Budget-Friendly Tips
Use store-brand pie crusts. Refrigerated crusts are almost always cheaper than name-brand and taste exactly the same once baked, perfect for big batches or party trays.
Stretch your pumpkin puree. This recipe only uses a small amount, so plan multiple pumpkin recipes in the same week. One can of pumpkin puree can cover these hand pies and recipes like Pumpkin Swirl Cheesecake or Pumpkin Banana Bread.
Choose budget spices. Pumpkin pie spice can be pricey, so use store-brand or make a homemade blend using cinnamon, nutmeg, ginger, and allspice you already have in your pantry.
🥄 Instructions for Pumpkin Hand Pies
Step 1: Preheat the oven to 400 degrees F and line a large baking sheet with parchment paper. Set aside.

Step 2: Add your water and egg to a small bowl (Image 1).
Step 3: Whisk together to create the eggwash (Image 2) and then set it aside.
Step 4: In a large mixing bowl, add the pumpkin pie filling ingredients (Image 3).
Step 5: Mix together until well combined (Image 4). Set aside.
Step 6: Roll out one thawed pie crust and set it on the counter.

Step 7: Strategically press your pumpkin-shaped cookie cutter onto the crust, cutting out as many pumpkins as you can fit (Images 5&6). Note that you may get more or less than I did based on the size of your cookie cutter.
Step 8: Make holes in these pumpkins. You can press the prongs of a fork into the pumpkin for lines, draw lines, or make a jack o lantern face depending on what you want to do (Image 7). This will help the pies vent so they don't burst while baking. Set aside.
Step 9: Roll out the next pie crust and cut just as many pumpkins from it as you did the previous crust.
Step 10: Place these pumpkins onto the parchment paper-lined baking sheet, evenly spaced (Image 8). Brush egg wash around the edges of each pumpkin.

Step 11: Place 1 tablespoon or so of pumpkin pie filling into the center of each pumpkin. Be careful not to overfill it (Image 9).
Step 12: Gently lay the top pieces of pie crust over the top of the pumpkins on the baking sheet (Image 10). These are the ones you sliced and set aside earlier.
I find that it helps to run my finger along the edge to help the eggwash bind the two pieces together.
Step 13: Use the prongs of a fork to press down along the edges of all of the pumpkins (Image 11). This will seal the edges together so that the pumpkins don't leak that yummy filling when they bake.
Step 14: Brush the tops of the pumpkins with some more eggwash (Image 12). If desired, you can sprinkle some sugar over the top before baking.
Step 15: Bake in the oven for 12-15 minutes or until they're a nice golden color. Allow to cool completely.
Step 16: Prepare the glaze by mixing the ingredients together in a mixing bowl until smooth.
Step 17: Drizzle over the tops of the pumpkin hand pies.
Step 18: Let set before serving. Enjoy!

👩🏻🍳 Expert Tips
- Eggwash Importance: Do not skip the eggwash! It acts as glue, securing the top and bottom crusts together while giving the pumpkins a glossy golden sheen. Without it, pies may leak more, and their tops can appear pale and underdone.
- Filling Tips: When filling your pies, be cautious as the filling may seep out before sealing. Add filling gradually, one small scoop at a time, and work on one pumpkin pie at a time for easier estimation of filling amount. A 4-inch cookie cutter will use no more than 2 tablespoons of filling.
❄️ Storage, Reheating & Make Ahead
Storage: Store cooled pumpkin hand pies in an airtight container in the fridge for up to 3-4 days. The crust stays flaky and the filling stays creamy when chilled properly.
Freezer: You can freeze baked hand pies for up to 3 months. Once cooled, wrap individually in plastic wrap and place in an airtight container. Thaw in the fridge overnight before serving.
Reheating: Warm a pie in the microwave for 15-20 seconds for that fresh-from-the-oven feel without drying it out.
Make Ahead: These pies should not be assembled ahead of time, as the filling will begin to leak and soften the crust. Only assemble right before baking, then store or serve once cooled.
🥗 Side Dishes or Pairing Ideas
Serve these pumpkin hand pies with warm apple cider, hot chocolate, or a pumpkin spice latte. They also pair wonderfully with vanilla ice cream, whipped cream, or a simple caramel drizzle.
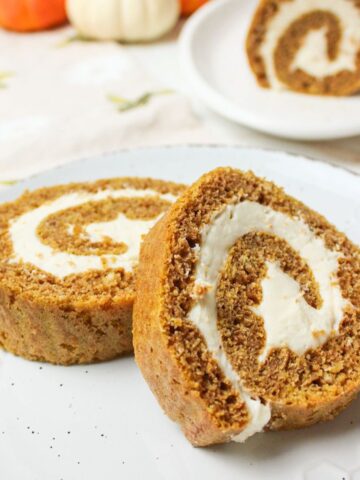
- Sourdough Pumpkin RollRecipe $3.78 / Serving $0.38
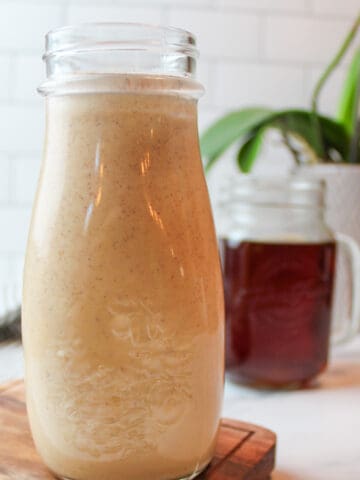
- Homemade Pumpkin Spice Coffee CreamerRecipe $2.59 / Serving $0.08
- Cherry Apple CrispRecipe $9.06 / Serving $1.13
- Cookies and Cream PizookieRecipe $3.27 / Serving $1.10


❓ Pumpkin Hand Pies FAQs
You can keep these mini pies in the fridge in an airtight container for up to 3-4 days.
No, these pumpkin pies should be made and baked pretty quickly. Allowing the assembled raw pies to rest for too long will cause the filling to begin to leak and the crusts to become soggy. For best results, only assemble before baking. Then eat or store away as the case may be.
We used Greek yogurt in this recipe to help moisten the filling and keep it thick. You can replace it with a smaller amount of heavy cream (about 1 tablespoon), or you can swap it out for some room temperature cream cheese. Sour cream also works great in a pinch!

🍽️ More Recipes You'll Love
- Pumpkin White Chocolate Chip CookiesRecipe $3.64 / Serving $0.20
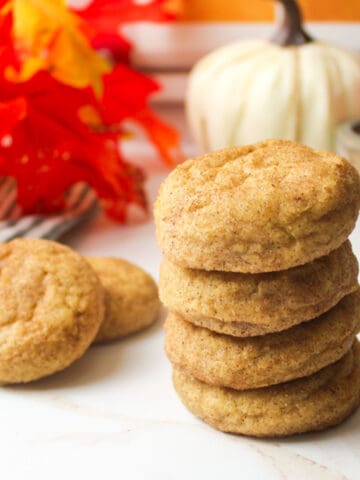
- Pumpkin Spice SnickerdoodlesRecipe $2.43 / Serving $0.24
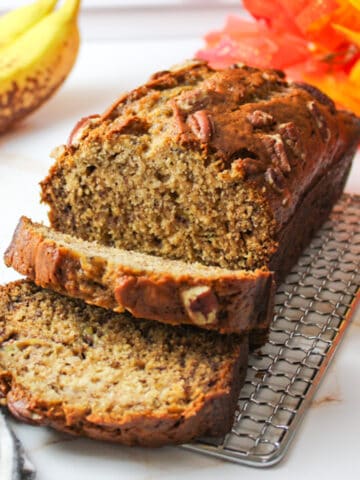
- Pumpkin Spice Banana BreadRecipe $1.94 / Serving $0.20
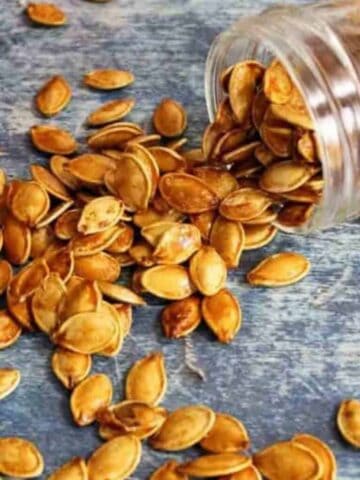
- Honey Roasted Pumpkin SeedsRecipe $0.77 / Serving $0.19

🐝 If you tried these Pumpkin Hand Pies, please leave a ⭐️ star rating and share your buzz in the 💬 comments below. I'd truly appreciate it!
📖 Recipe

Pumpkin Hand Pies
Ingredients
Egg Wash
- 1 large egg - ($0.15)
- 1½ tablespoon water - ($0.00)
Pumpkin Pie Filling
- 1 large egg - ($0.15)
- ½ cup pumpkin puree - ($0.44)
- ¼ cup brown sugar - ($0.11)
- 2 tablespoon Greek yogurt - ($0.08)
- ¼ teaspoon vanilla extract - ($0.01)
- 1 teaspoon pumpkin pie spice - ($0.08)
Hand Pies
- 2 refrigerated pie crust - ($2.77)
Maple Glaze
- 1 cup powdered sugar - ($0.36)
- 1 tablespoon maple syrup - ($0.04)
- 1-2 teaspoons water, as needed - ($0.00)
Instructions
- Preheat. Preheat the oven to 400°F and line a large baking sheet with parchment paper.
- Egg Wash. In a small bowl, whisk together the egg and water. Set aside.
- Make Filling. In a bowl, whisk together the egg, pumpkin puree, brown sugar, Greek yogurt, vanilla extract, and pumpkin pie spice until smooth.
- Cut Crust. Roll out one pie crust and cut pumpkin shapes using a cookie cutter. Add vent holes using a fork or small cuts. Set aside. Roll out the second crust and cut the same number of solid pumpkin shapes.
- Assemble. Place the solid pumpkin cutouts on the prepared baking sheet. Brush the edges with egg wash. Spoon about 1 tablespoon of filling into the center of each. Top with the vented pumpkin cutouts. Press edges together and seal with a fork. Brush the tops with egg wash.
- Bake. Bake for 12 to 15 minutes, or until golden brown. Cool completely on the baking sheet.
- Make Glaze. Whisk together the powdered sugar, maple syrup, and water until smooth.
- Finish. Drizzle the glaze over the cooled hand pies and let set before serving.
Notes
- Egg Wash. Helps seal the edges and creates a golden, glossy finish.
- Filling Amount. About 1 tablespoon per hand pie prevents leaking during baking.
- Storage. Refrigerate for 3 to 4 days and reheat in the microwave for about 20 seconds using a damp paper towel.
Nutritional Information
Save This Recipe to Your Inbox
By signing up, you'll join our email list and can unsubscribe anytime.


Comments
No Comments