

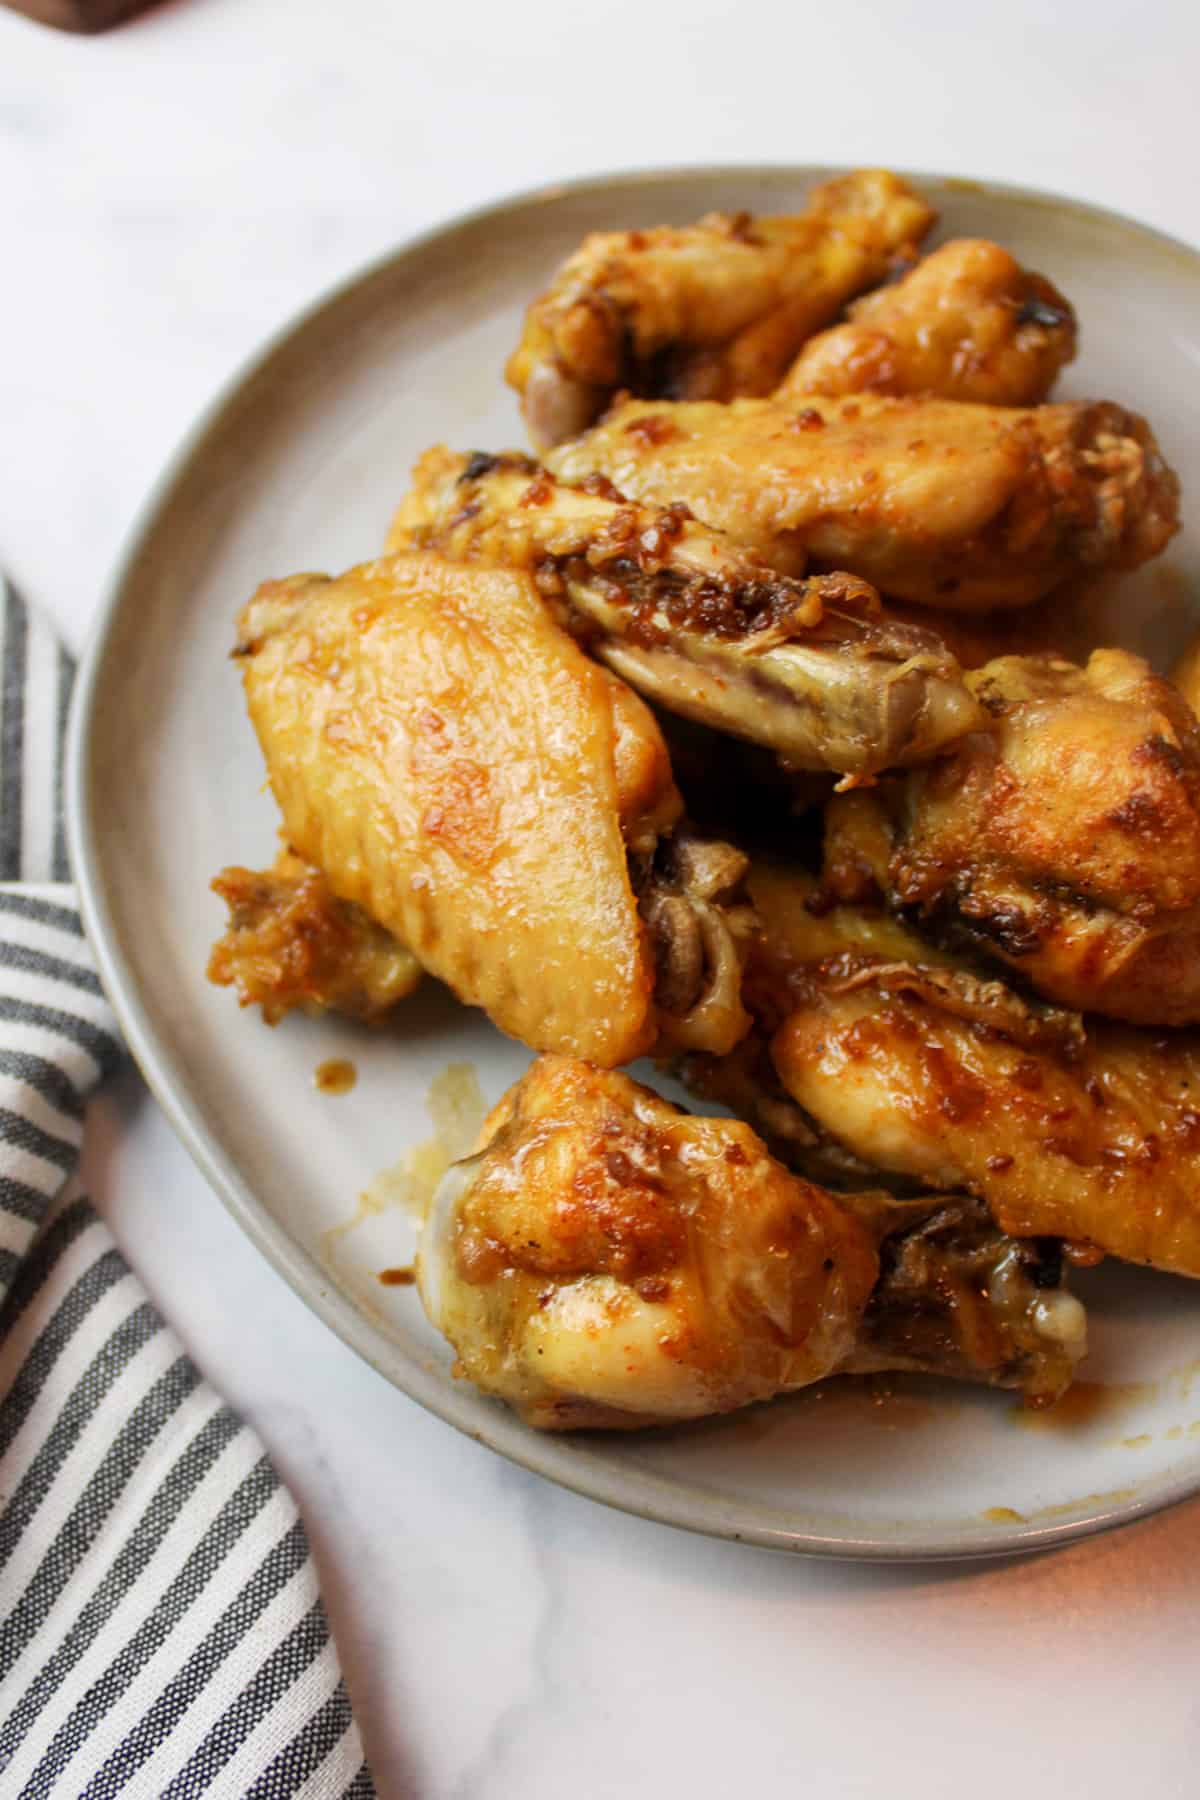
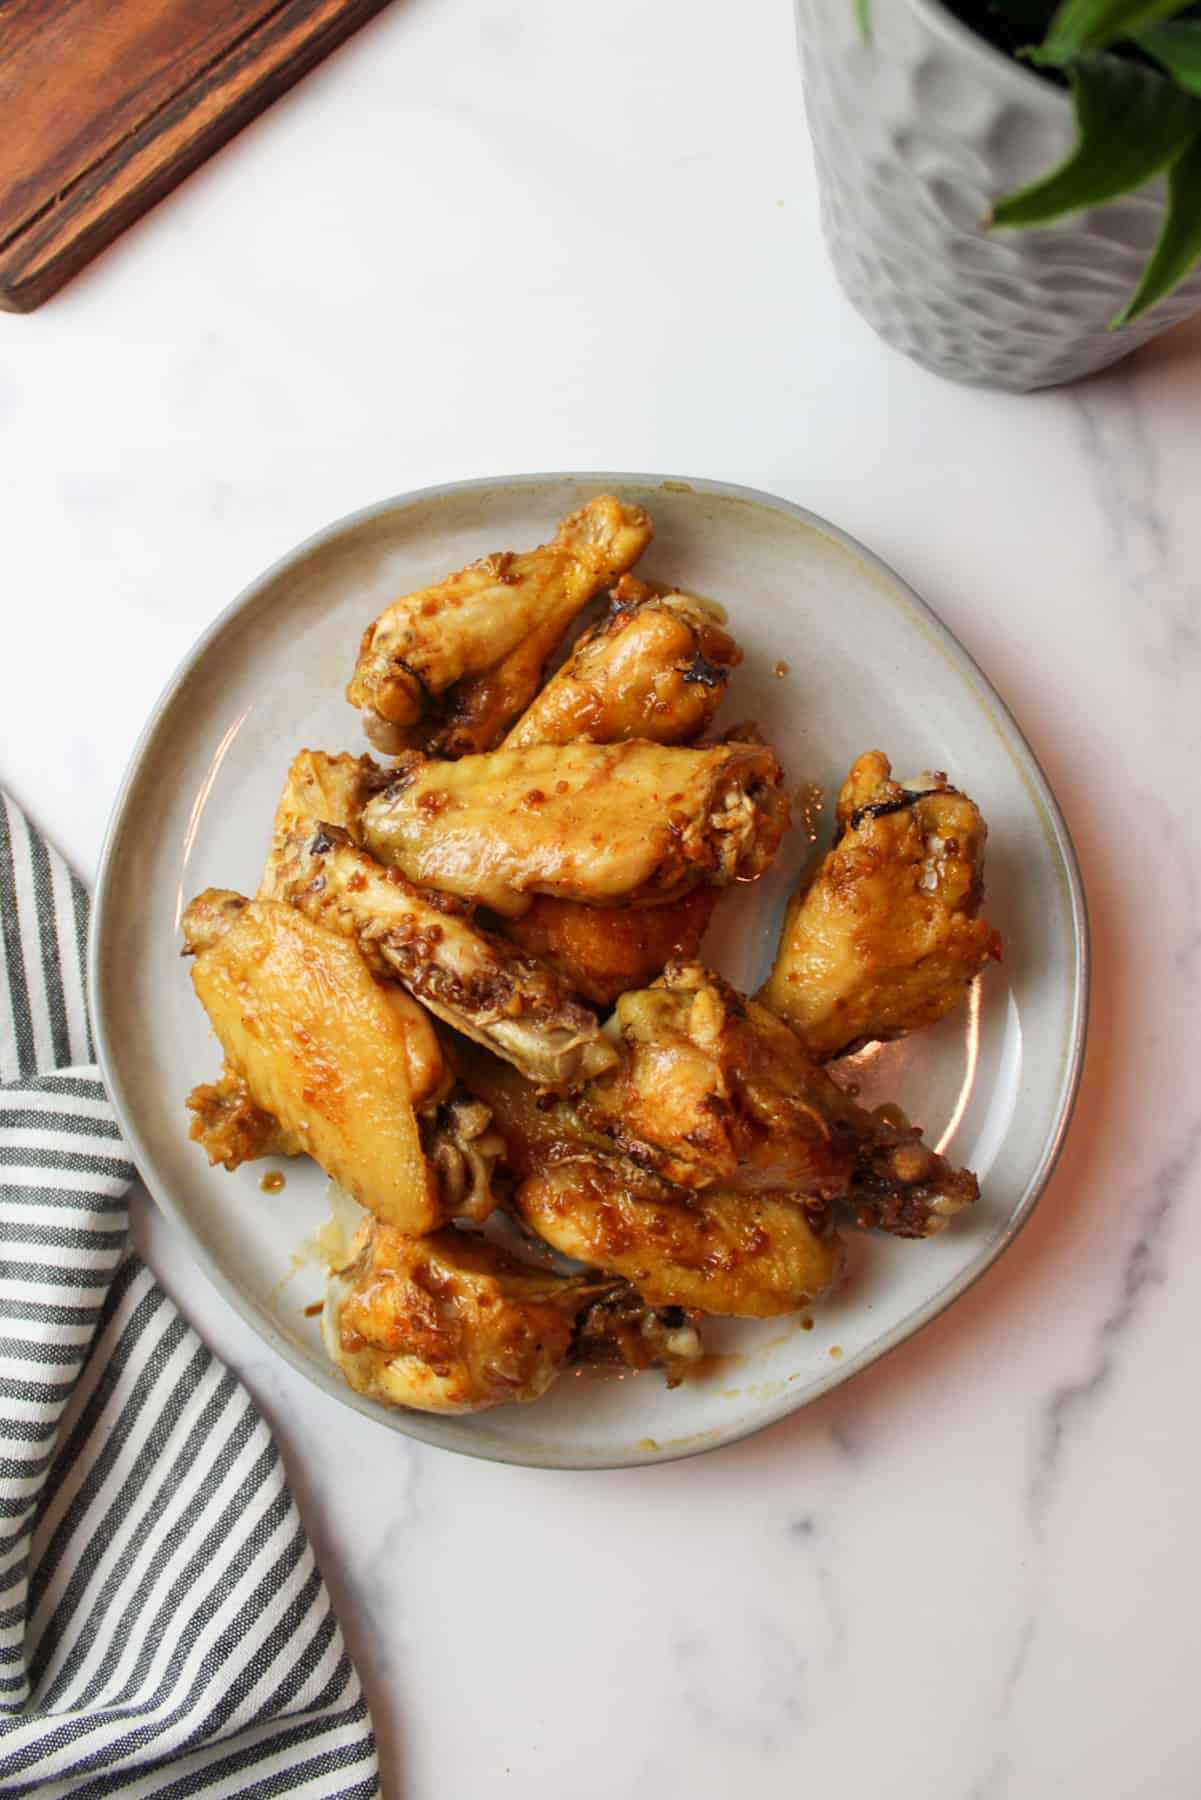
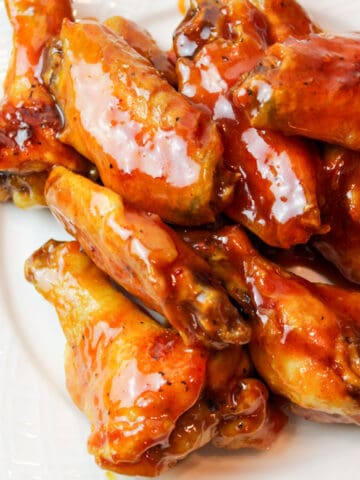
Soy garlic chicken wings are a tasty bit of everything in one. From salty and savory to sweet and crispy, these wings have it all. You're going to love serving them up sometime soon!
Save This Recipe to Your Inbox
By signing up, you’ll join our email list and can unsubscribe anytime.
These soy garlic wings are a little bit savory, salty, and sweet all rolled into one. Tender chicken with crispy skin and a wonderful flavor too. Pair them with some cooked white rice for a tasty meal, or keep them as a simple appetizer on game night.
Speaking of rice, the sauce and flavor from this recipe was so good we actually made it into a dinner. Our Honey Soy Chicken Bites were inspired by these incredible wings!
For more of our favorite chicken wing recipes, make sure to check out our Air Fryer Garlic Parmesan Wings and Beer Brine Chicken Wings.
Jump to:
💛 Why You'll Love This Recipe
- Simple ingredients. We don't need anything too fancy to make this recipe work, and that's awesome. With simple ingredients like wings, soy sauce, garlic, and honey, we get fantastic results, and minimal shopping is needed.
- Easy to follow steps. There is very little hands-on work needed for this recipe, keeping it very simple and basic. Just bake the wings, prep the sauce, and toss them together at the end. We follow the same method with our Honey Buffalo Wings, and Honey Gold Wings too.
- Cheap alternative. Buying chicken wings precooked from anywhere can be pricey, but making them yourself can definitely help to save a few dollars here and there. Enjoy your favorite appetizer but with a frugal twist.
🛒 Ingredients
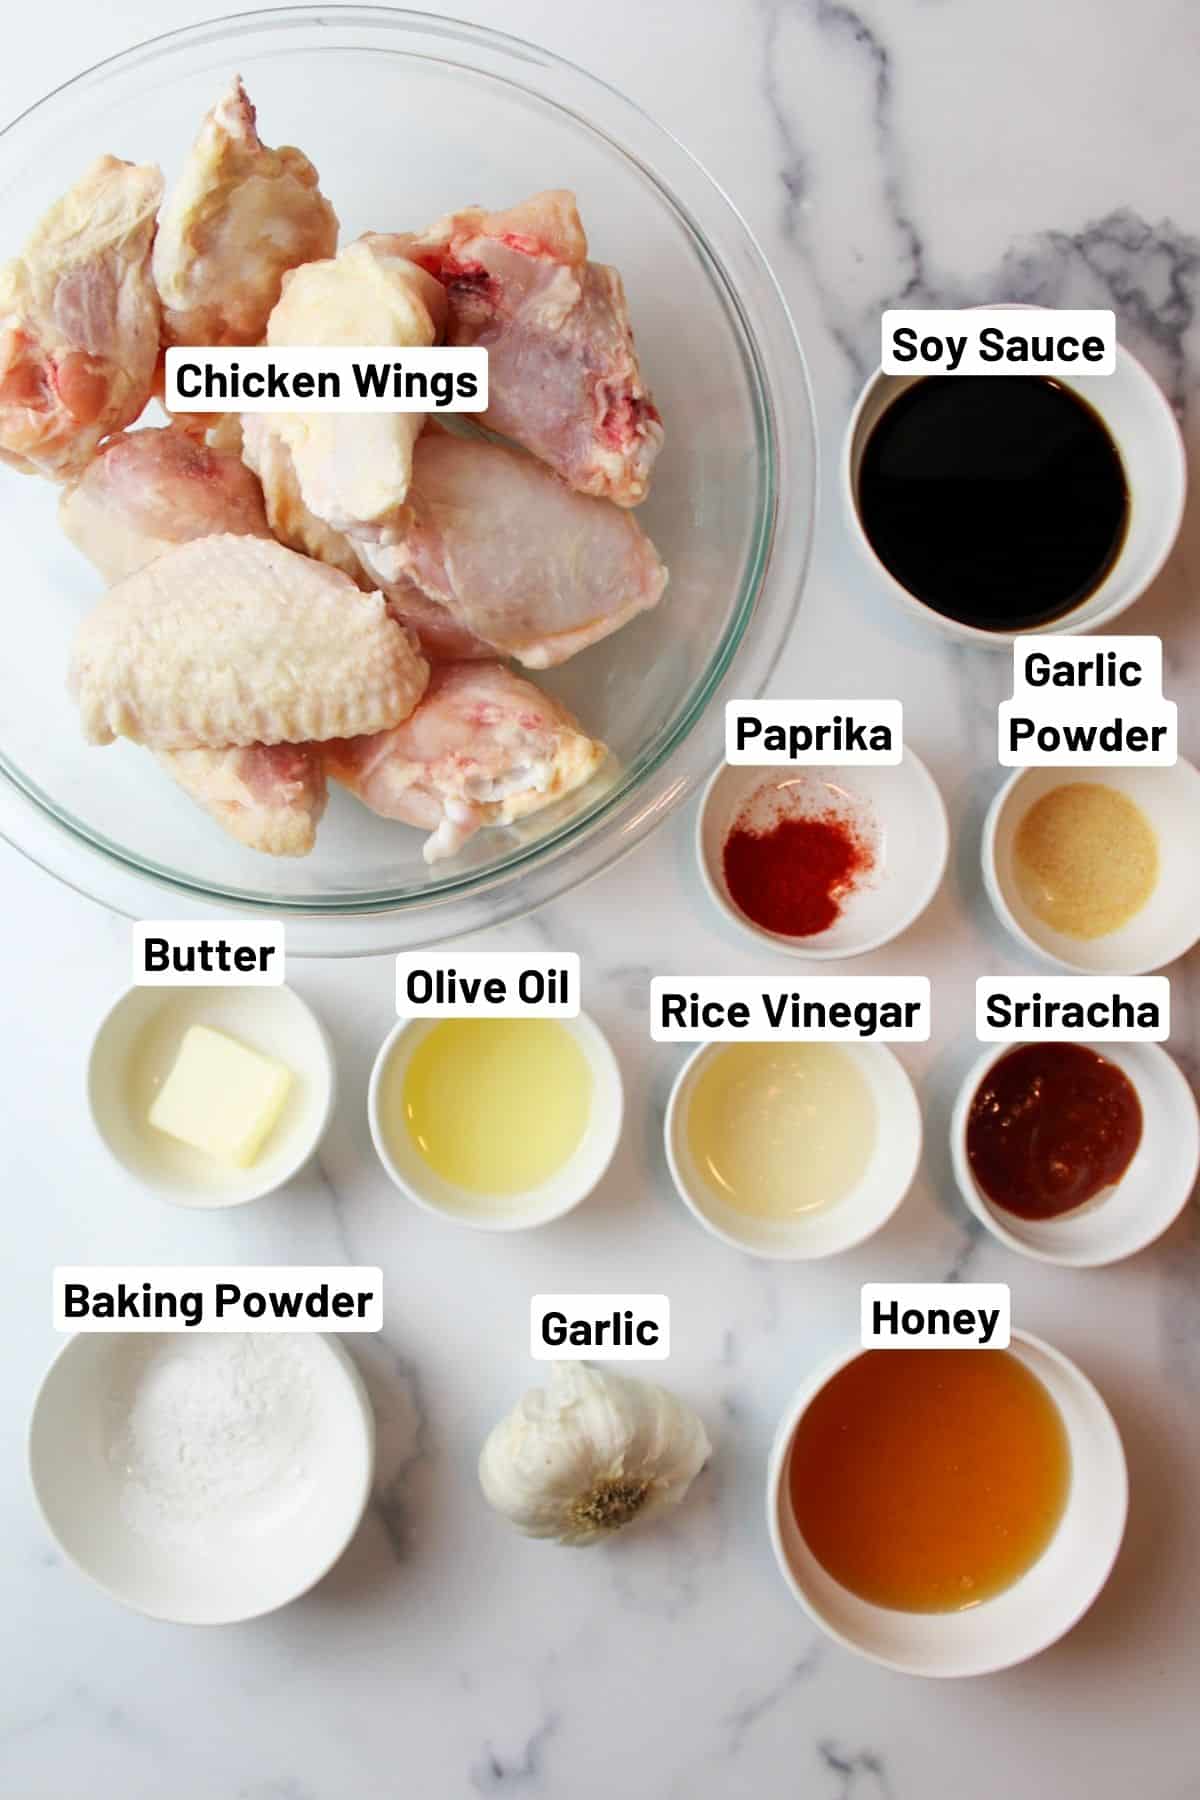
Chicken wings- You will need 2 pounds of chicken wings (thawed) for this recipe. Most of the time you'll find frozen wings in a 4lb bag, so if you have some leftover, make sure to try our Honey Lemon Pepper Wings too.
Baking powder- Add baking powder to help make the wings nice and crispy.
Rice vinegar- Adding in some vinegar will help to make the sauce a little tangier in flavor.
Sriracha- Use some sriracha or chili sauce to give the sauce a little kick of heat and flavor. Note that we also use sriracha in our Spicy Tuna Sandwich and Spicy Deviled Eggs and Sesame Garlic Ramen Noodles.
See the recipe card below for full ingredients and instructions.
💰 Budget-Friendly Tips
Use store-brand wings: Frozen store-brand wings are often $2-$4 cheaper per bag and work just as well as name-brand.
Swap the honey: Use brown sugar or maple-flavored pancake syrup for a cheaper sweetener in the sauce.
Stretch the sauce: Add a splash of water or broth to create extra glaze without increasing costs.
Buy in bulk: Larger bags of wings (4-5 lb) have a lower cost per pound and can be used for multiple wing recipes.
🥄 Instructions for Soy Garlic Chicken Wings
Step 1: Remove your thawed chicken wings from the fridge and pat dry with a paper towel. Allow them to rest as you prepare for the next few steps.
Step 2: Preheat the oven to 400 degrees F. Line a baking sheet with aluminum foil. Set aside.
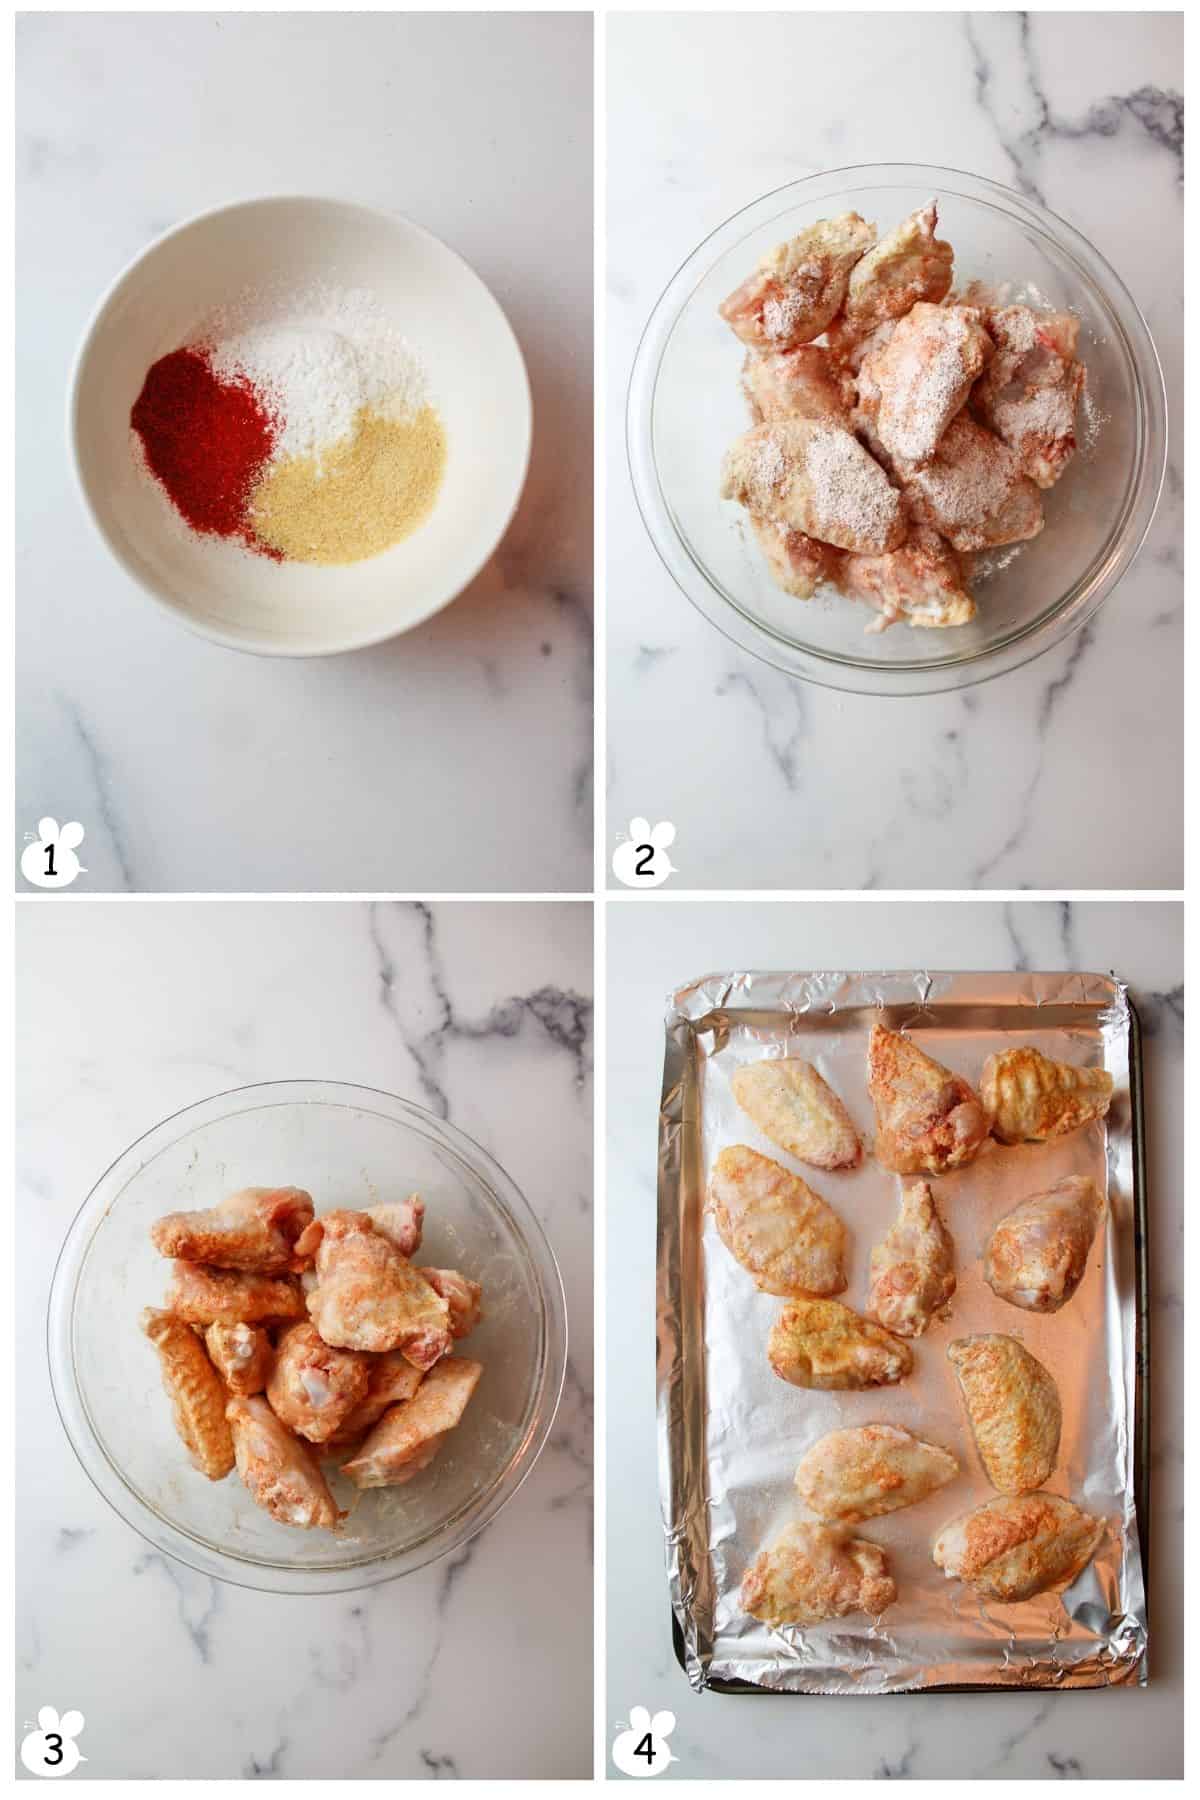
Step 3: Add the baking powder, paprika, and garlic powder to a small bowl (Image 1).
Step 4: Mix well to combine.
Step 5: Add your chicken wings to a large mixing bowl. Drizzle in the olive oil and toss well to coat.
Step 6: Add in the seasoning mixture you just made(Image 2).
Step 7: Toss well to combine (Image 3). You want all of the chicken to be well coated.
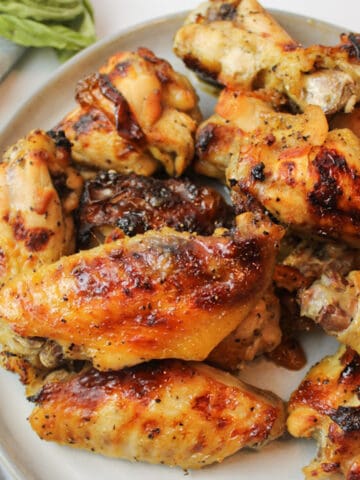
Step 8: Transfer the seasoned wings to your prepared baking sheet (Image 4). Bake for 50-60 minutes, until the wings are golden and cooked through. Flip halfway through.
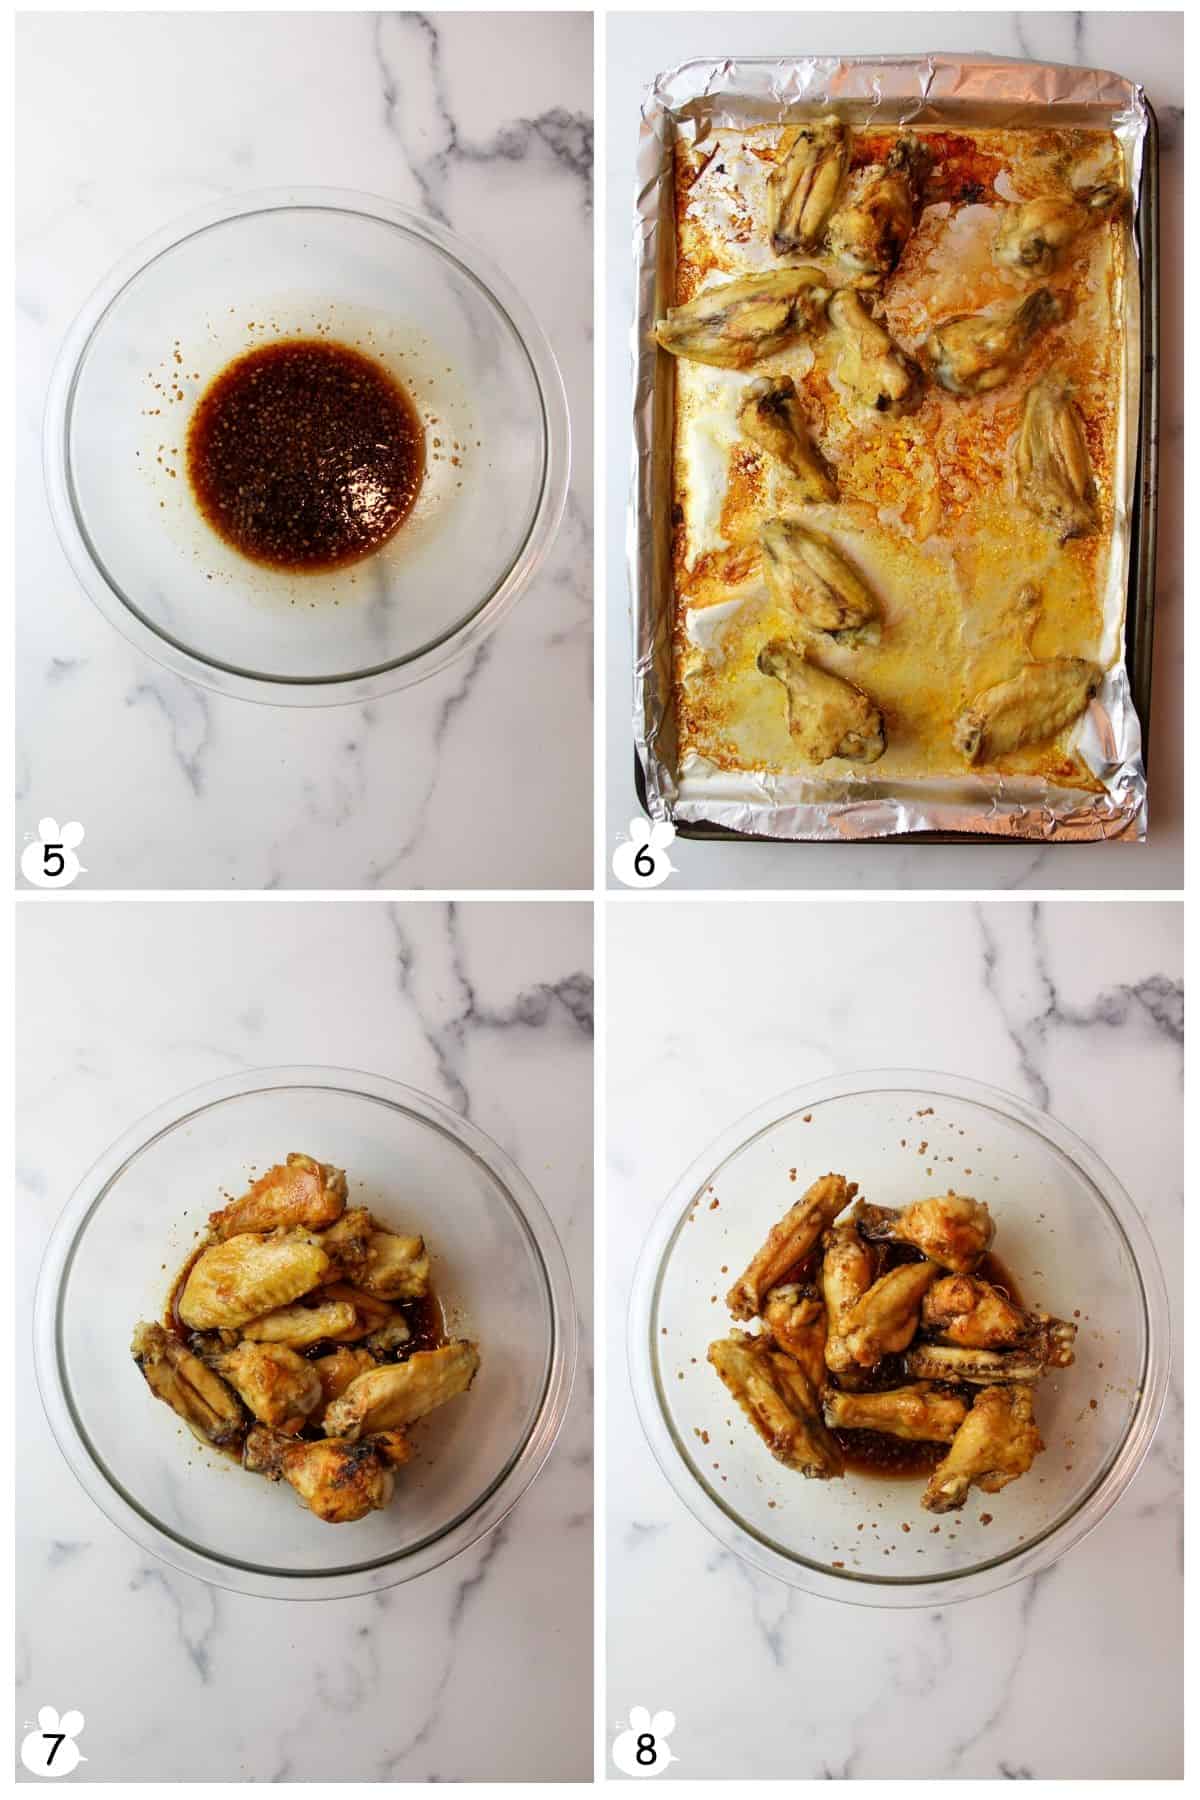
Step 9: While the wings are cooking, add all of the garlic sauce ingredients to a microwave-safe mixing bowl.
Step 10: Microwave for 2 minutes and whisk to combine (Image 5).
Step 11: Remove the chicken from the oven (Image 6).
Step 12: Add to the large bowl of prepared sauce (Image 7). Toss well to combine (Image 8).
Serve warm and enjoy!
👩🏻🍳 Expert Tips
- For crispier wings, I recommend lining the baking sheet with foil instead of parchment paper. Foil also makes for an easier cleanup afterward!
- To melt the sauce ingredients, you can use a small saucepan instead of a microwave. However, you'll still need a large mixing bowl to combine the sauce with the wings.
- Chicken Food Safety Warning. Ensure chicken is cooked properly by inserting an instant-read food thermometer; it should register 165°F. While the meat and juices may have a slight pink color, they should not appear raw.
❄️ Storage and Reheating
Storage: Store cooled Soy Garlic Chicken Wings in an airtight container in the fridge for up to 4 days (best within 2 days).
Reheating:
- Air Fryer: Air fry at 360°F for 5 minutes, flipping halfway.
- Microwave: Place wings between slightly damp paper towels; heat 1-2 minutes.
- Oven: Bake at 350°F for 10-20 minutes until hot and crisp.
📖 Air Fryer Version
Preheat the air fryer to 390 degrees F for 2 minutes.
- Prepare the wings as directed.
- Add wings to the basket of your air fryer in an even layer. Try to allow space between each for the air to circulate.
- Cook at 390F for 10 minutes.
- Flip the wings over to reveal the bottom sides.
- Cook for another 10 minutes.
- Create sauce as directed and toss the chicken in the sauce.
- Serve and enjoy.
🥗 Side Dishes or Pairing Ideas
This Soy Garlic Chicken Wings recipe would pair nicely with just about anything, but it's also really tasty on its own too. We like to eat it with some fresh cooked white rice and sliced green onion. This turns our little appetizer into a full meal.
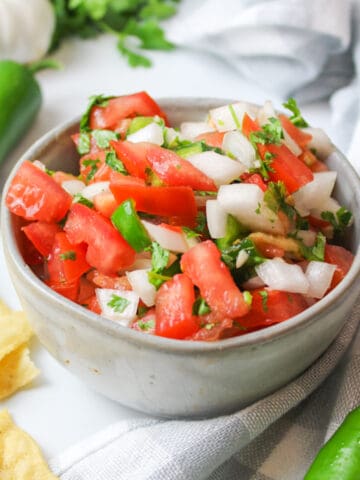
For more tasty appetizers, though, I'd recommend serving up some Crack Chicken Bombs, Guacamole Without Cilantro, and Mini Pigs in a Blanket.
- Chicken Bacon Ranch BombsRecipe $11.47 / Serving $0.72
- Tomato Jalapeno SalsaRecipe $3.67 / Serving $0.61
- Mini Spinach Dip Bread BowlsRecipe $9.54 / Serving $0.40
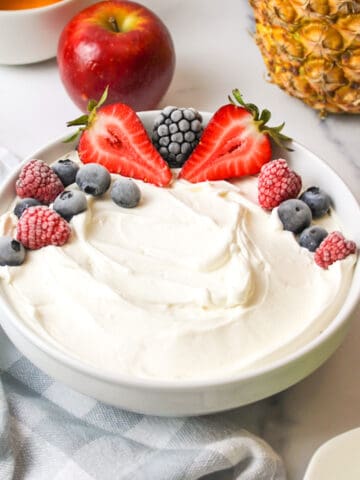
- Creamy Vanilla Fruit DipRecipe $3.17 / Serving $0.40


❓ Recipe FAQs
It'll take about 40 minutes to fully cook your chicken wings at 400 degrees F. That said, leaving the chicken in the oven for a few extra minutes only helps to crisp the skin even more, which is why we cook the chicken for about 50-60 minutes. Perfectly crispy and juicy results.
No, you should not cover the wings while they are cooking. This is because covering the chicken will cause steam and moisture to be trapped around the wings as they bake, and this means that the skin will not become crisp.
While chicken is safe to consume at 165 degrees F, you will find that chicken meat becomes fall-off-the-bone tender at closer to 185-190F. If your wings are fully cooked and tough, cook them a little longer for the meat to be more tender. Note you don't want to cook past 190F as that is when they'll start to dry out.

🍽️ More Recipes You'll Love
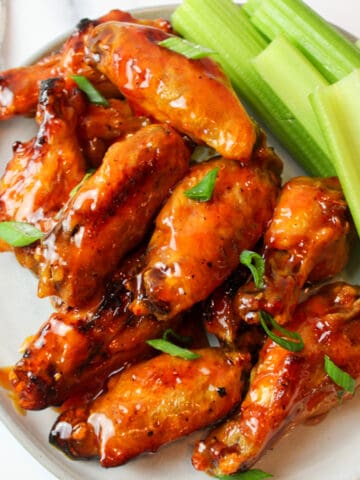
- Honey Buffalo WingsRecipe $10.79 / Serving $2.70
- Air Fryer Garlic Parmesan WingsRecipe $5.83 / Serving $1.47
- Honey Gold WingsRecipe $8.73 / Serving $2.18
- Honey Lemon Pepper Chicken WingsRecipe $9.14 / Serving $2.29

🐝 If you tried this soy garlic chicken wings, please leave a ⭐️ star rating and share your buzz in the 💬 comments below. I'd truly appreciate it!
📖 Recipe

Soy Garlic Chicken Wings
Ingredients
Crispy Baked Wings
- 2 pounds chicken wings, thawed - ($5.96)
- 1 tablespoon baking powder - ($0.15)
- ½ teaspoon paprika - ($0.04)
- ½ teaspoon garlic powder - ($0.04)
- 1 tablespoon olive oil - ($0.14)
- salt and ground black pepper, to taste
Soy Garlic Sauce
- 1 tablespoon unsalted butter - ($0.12)
- 4 cloves garlic, minced - ($0.32)
- ¼ cup honey - ($0.96)
- ¼ cup soy sauce, low-sodium preferred - ($0.20)
- 1 tablespoon rice vinegar - ($0.04)
- 1 tablespoon sriracha or chili sauce - ($0.12)
Instructions
- Prep wings. Pat chicken wings completely dry with paper towels and let sit at room temperature while preparing seasoning.
- Preheat oven. Preheat oven to 400°F. Line a baking sheet with foil.
- Season wings. In a small bowl, mix baking powder, paprika, and garlic powder. Add wings to a large bowl, drizzle with olive oil, and toss to coat. Sprinkle seasoning over wings, season with salt and pepper, and toss until evenly coated.
- Bake. Arrange wings in a single layer on the prepared baking sheet. Bake 50 to 60 minutes, flipping halfway, until golden and cooked through.
- Make sauce. While wings bake, add butter, garlic, honey, soy sauce, rice vinegar, and sriracha to a microwave-safe bowl. Microwave 2 minutes, whisking until smooth.
- Toss and serve. Transfer hot wings to the sauce and toss until fully coated. Serve warm.
Notes
- Crispiness Tip. Use foil instead of parchment for better browning and easier cleanup.
- Sauce Option. Sauce ingredients can also be simmered on the stove until melted and combined.
- Air Fryer. Cook wings at 390°F for 10 minutes, flip, then cook 10 more minutes. Toss with sauce before serving.
- Reheating. Microwave 1 to 2 minutes between damp paper towels. Oven at 350°F for 10 to 20 minutes. Air fryer at 360°F for about 5 minutes, flipping halfway.
- Storage. Store leftovers in an airtight container in the refrigerator up to 4 days. Best within 2 days.
Nutritional Information
Save This Recipe to Your Inbox
By signing up, you'll join our email list and can unsubscribe anytime.


Comments
No Comments