

For a festive Easter cake this year, try your hand at this Easter Confetti Cake. Made with a doctored box cake mix and homemade buttercream frosting, this cake is easy to make and delicious to eat.
Save This Recipe to Your Inbox
By signing up, you’ll join our email list and can unsubscribe anytime.
This funfetti Easter cake is a simple and easy way to make a show-stopping dessert and feature all of your favorite Easter candies! Packed with colors and fun, this cake is sure to be a huge hit.
I love to use cake mixes to make semi-homemade desserts. For example, my Cake Mix Coffee Cake, Devil's Food Cake Mix Brownies, and Cake Mix Peanut Butter Cookies use boxed cake mixes as a base. The results are fluffy, flavorful cakes with a lot less effort and time needed to make them.
Serve this Easter themed dessert at your next holiday gathering and be prepared for the praises. This Easter Confetti Cake is just as much of a show-stopping centerpiece as it is delicious.
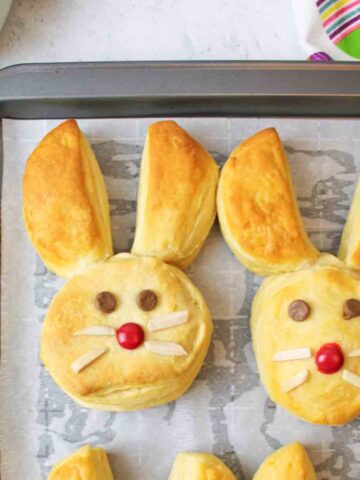
Just make sure to serve Easter Confetti Cake up with some tasty Easter Egg Hot Chocolate and Easy Easter Bunny Biscuits.
Jump to:
💛 Why You'll Love This Recipe
- It's simple. Boxed cake mixes make this recipe incredibly easy since most of the basics are already included. We just add a few ingredients to boost the flavor and texture.
- It's cheaper than buying a cake. Custom cakes can easily cost over $100, but making your own Easter Confetti Cake is far more budget-friendly, and you get to build a new skill. For more frugal Easter ideas, check out these Easy Ways To Celebrate Easter On A Budget.
- It's customizable. Switch up the cake flavor, filling, or Easter candies to make your own unique version of this Easter Confetti Cake.
🛒 Ingredients

Cake Mix: Use a white (or light-colored) cake mix so the rainbow sprinkles show well. Use the dry mix only, do not prepare cake mix beforehand.
Pudding Mix & Filling: Use vanilla instant pudding (or cheesecake/white chocolate) in the batter for a moist, bakery-style crumb (dry mix only). For the filling, prepare cook-and-serve vanilla pudding as directed, then chill completely before assembling.
Sprinkles: Rainbow jimmie sprinkles are essential for the "confetti" look because they don't bleed when baked. Save leftover sprinkles for other recipes like Birthday Cake Stuffed Cookies or Birthday Cake Overnight Oats.
Buttercream: Butter (or a butter/shortening mix) creates a smooth, stable frosting that's easy to color and decorate.
Food Coloring & Decorations: Use gel food coloring for vibrant colors, and finish with your favorite Easter candies if desired.
See the recipe card below for full ingredients and instructions.
🔀 Substitutions & Variations
Cake Mix: You can use any boxed cake mix, but white or yellow cake gives the best color contrast for the sprinkles in this Easter Confetti Cake.
Sour Cream: Swap sour cream with plain Greek yogurt for a similar texture and a slightly lighter option.
For Any Occasion: Change out the candies and skip the Easter decorations to make this cake fit birthdays or any celebration.
Variety of Fillings: Try different fillings between the layers, strawberry or blueberry pie filling adds a fun fruity twist.
Added Color: For extra color, you can mix in up to 1 cup more rainbow jimmie sprinkles.
💰 Budget-Friendly Tips
Choose Store-Brand Ingredients. Store-brand cake mix, pudding mix, sprinkles, butter, and food coloring work perfectly and taste just as good, often saving several dollars per recipe.
Buy Sprinkles & Candy After the Holiday. Easter candy and sprinkles go on clearance right after the holiday. Grab them when discounted and store for next year's cake or other themed bakes.
Stretch Decorations You Already Have. Instead of buying multiple bags of Easter candy, use small amounts of whatever you have on hand. Peeps, jelly beans, chocolate eggs, or leftover sprinkles all work well.
🥄 Instructions for Easter Confetti Cake
Step 1: Preheat the oven to 350 degrees F.
Step 2: Spray the inside of 3 8-inch round cake pans with nonstick cooking spray and cut a circle of parchment paper to fit at the bottom of the pan. The spray will hold the paper in place, and the paper will prevent the cake from sticking.

Step 3: Place your dry cake mix, dry pudding mix, flour, salt, and sugar in a large mixing bowl (Image 1).
Step 4: Whisk together until well blended (Image 2).
Step 5: In another mixing bowl, add your sour cream, milk, vanilla, oil, and eggs (Image 3).
Step 6: Whisk together until well blended (Image 4).

Step 7: Add the wet mixture to the bowl with the dry mixture (Image 5).
Step 8: Whisk together until the cake batter comes together, and no flour streaks remain (Image 6). Do not overmix.
Step 9: Add your rainbow colored sprinkles to the cake batter (Image 7).
Step 10: Mix well until evenly distributed (Image 8).

Step 11: Divide the cake batter between your prepared cake pans (Image 9).
Step 12: Bake in the oven for 25-30 minutes or until a toothpick can be inserted into the center and come out clean (Image 10).
Step 13: Let the cake rest in the pan for 10 minutes before flipping it onto a wire rack and removing the pan and parchment.
Step 14: Allow to rest until fully cooled. You can place the cakes into the freezer for faster prep if needed.
I recommend freezing the cake layers after they've cooled. Partially or fully frozen layers are much easier to handle. Freeze them while you prep the filling and buttercream, then pull them out when you're ready to assemble.
Prepare the Filling
Step 15: Make your cook and serve pudding according to the package directions. Let cool completely before using.
If desired, you can make the filling lighter in texture and more mousse-like, by folding in an 8-ounce tub of thawed cool whip.
Prepare the Buttercream

Step 16: In a large mixing bowl, cream together 3 sticks of softened butter and 4.5 cups of powdered sugar (Image 11).
Step 17: Add in 1.5 teaspoons of vanilla extract and 3-4 tablespoons of milk. Beat again until incorporated (Image 12).
Assembly
Step 18: Place some or most of the buttercream into a piping bag and snip a large corner off of the end. You won't need a fitted tip for this part.

Step 19: Place a layer of cake onto your cake board or display surface (Image 13).
Step 20: Pipe a round rim around the top of the layer of cake (Image 14). This will work like a dam to prevent the filling from leaking out. Go over the rim twice if needed.
Step 21: Spoon your filling into the center and gently spread it out to the edges (Image 15).
Step 22: Add a layer of cake on top (Image 16). Try to position it evenly centered above the other layer.

Step 23: Repeat the frosting rim and filling as you did before (Image 17).
Step 24: Add the final cake layer on top (Image 18). Center it well.
If it's slippery, you can use plastic straws or wooden dowels in the center of the cake to help give it support. You can also freeze the cake at this point for an hour to make it easier to handle.
Step 25: Add your frosting around the edges and the top of the cake (Image 19).
Step 26: Spread the frosting around until smooth (Image 20). There should be just enough frosting to coat the cake without embellishments.
Step 27: Place the cake into the freezer to chill for an hour.
Step 28: Repeat the buttercream frosting instructions and make a second batch of frosting.
Step 29: Take out about (4) ¼ cup portions of buttercream into separate bowls.
Step 30: Add a little food coloring to each bowl, a different color per bowl. I chose pink, blue, yellow, and purple. Mix well until the color is evenly distributed.

Step 32: Spoon a little bit of differently colored frosting around the sides of the cake. Scatter them around so that they don't look uniform (Image 21).
Step 33: Spread the frosting around the sides using a cake scraper or frosting spreader. As you go around, the colors will fade together and create a fun design.
Step 34: Continue to spread the frosting around until you're happy with the results (Image 22).
Step 35: Place your remaining white frosting into a piping bag with a large fitted tip (I like 1M).
Step 36: Pipe a border or peaks around the top of the cake (Image 23).
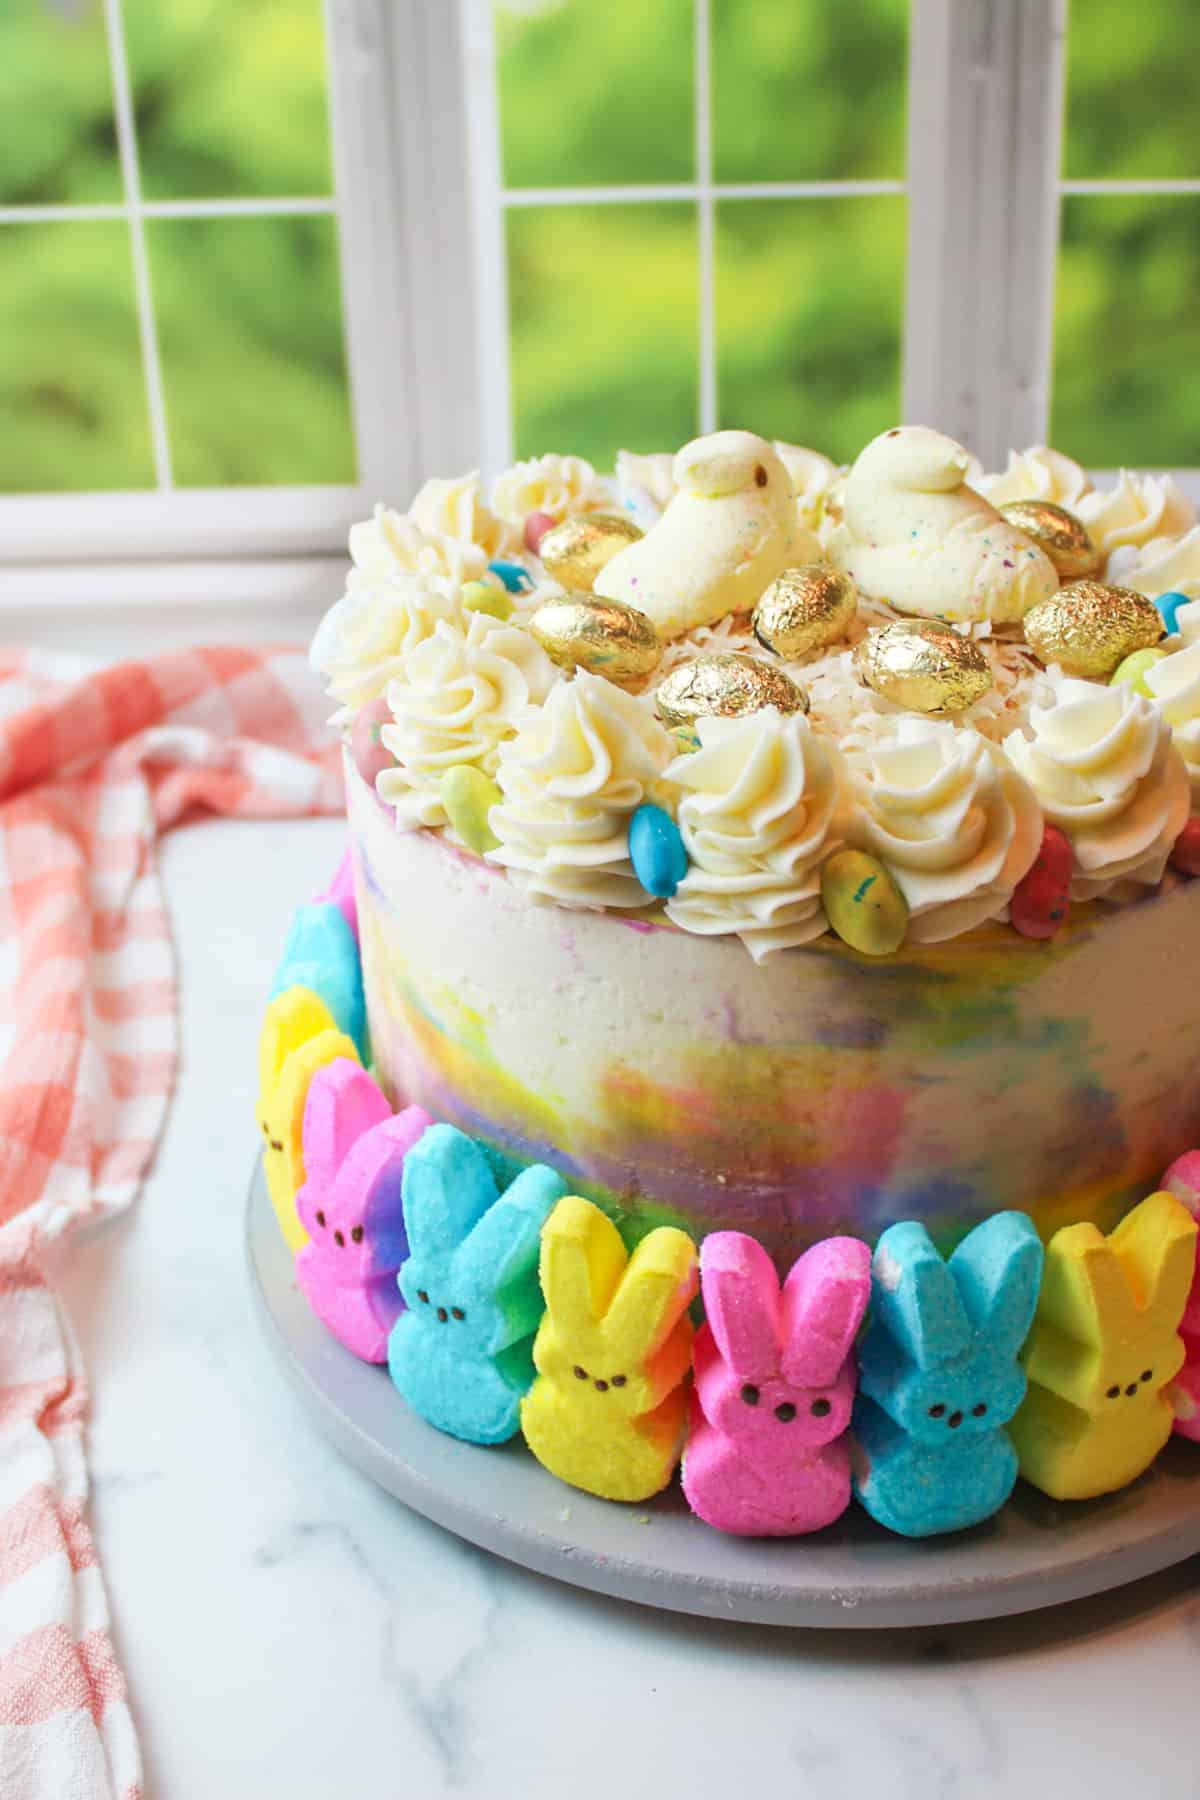
Step 37: Line some bunny peeps along the bottom edge of the cake (Image 24). If they won't stick to the frosting, pipe a small dollop of frosting on the back to help them adhere.
Step 38: Decorate the cake with shredded coconut, Easter egg candies, and more peeps if desired.
Step 39: Place your cake into the fridge and allow to chill until ready to serve.
Step 40: Slice into it and enjoy the fun rainbow colors throughout the cake layers.
Happy Easter!

👩🏻🍳 Expert Tips
- Don't be afraid to chill. If the frosting gets messy, chill the Easter Confetti Cake in the freezer and the frosting in the fridge for 10-15 minutes. I share this trick in my Southern Banana Pudding Cake and Tres Leches Layered Cake, many decorators chill between steps for cleaner results.
- Straight edges matter. Use a large frosting leveler (Amazon has budget options), or a butter knife or clean ruler. These tools work great for cakes like my Easy Rainbow Unicorn Cake Recipe.
- Hide imperfections creatively. If the sides look uneven, simply cover trouble spots with candy. It's an easy way to make your Easter Confetti Cake look polished without extra effort.
❄️ Storage and Make Ahead
Refrigeration: Store the finished Easter Confetti Cake in the fridge, well covered, for up to 5 days.
Room Temperature: Keep the cake out no longer than 1-2 hours at a time.
Make Ahead - Cake Layers: Bake the cake layers up to 2 weeks in advance. Wrap tightly in plastic and freeze until needed.
Make Ahead - Buttercream: Buttercream can be made ahead and stored for 1 month in the fridge or up to 3 months in the freezer. Thaw overnight in the fridge and remix before using.
🥗 Side Dishes or Pairing Ideas
Pair this easter cake with some delicious easter recipe favorites!
- Easter Egg Hot ChocolateRecipe $7.78 / Serving $3.89
- Easy Easter Bunny BiscuitsRecipe $2.14 / Serving $0.54
- Mini Spinach Dip Bread BowlsRecipe $9.54 / Serving $0.40
- Crustless Veggie QuicheRecipe $3.73 / Serving $0.47


❓ Easter Confetti Cake FAQs
What's in a name? The only difference between the two is that Funfetti is a trademarked word owned by Pillsbury. They both mean the same thing.
Not really. The confetti cake may have a stronger vanilla flavor to it than a regular vanilla cake, but it's all about personal tastebuds. The colors added can often make it feel fancier or more enhanced though.
Yes and no. While you can add any kind of sprinkle to cake batter, it's important to note that not all sprinkles work the same. Nonpariels and confetti sprinkles may cause color bleeding or textural changes in the cake, whereas Jimmie sprinkles won't bleed colors and will melt when baked so that there's no textural change in the cake.

🍽️ More Recipes You'll Love
- Southern Banana Pudding CakeRecipe $9.95 / Serving $0.62
- Tres Leches Layered CakeRecipe $18.24 / Serving $1.14
- Sour Cream Banana Pound CakeRecipe $7.57 / Serving $0.63
- Rainbow Heart CakeRecipe $6.92 / Serving $0.58


🐝 If you tried this Easter Confetti Cake, please leave a ⭐️ star rating and share your buzz in the 💬 comments below. I'd truly appreciate it!
📖 Recipe

Easter Confetti Cake
Equipment
Ingredients
Confetti Cake
- 1 box (15.25 ounces) white cake mix - ($1.00)
- 1 box (3.4 ounces) instant vanilla pudding mix - ($0.98)
- 1 cup all-purpose flour - ($0.13)
- ¾ teaspoon salt - ($0.01)
- 1 cup granulated sugar - ($0.36)
- 1 cup sour cream - ($1.00)
- 1 cup milk - ($0.20)
- 1 tablespoon vanilla extract - ($0.09)
- ½ cup vegetable oil - ($0.35)
- 4 large egg whites - ($0.30)
- 2 large egg yolks - ($0.15)
- ½ cup rainbow jimmie sprinkles - ($1.28)
Vanilla Filling
- 1 box (3 ounces) cook and serve vanilla pudding mix - ($1.32)
- 2 cups milk - ($0.40)
Vanilla Buttercream Frosting
- 3 cups unsalted butter, room temperature - ($5.94)
- 9 cups powdered sugar - ($3.24)
- 3 teaspoons vanilla extract - ($0.09)
- 6-8 tablespoons milk - ($0.07)
Optional Decorations
- gel food coloring
- Peeps
- toasted shredded coconut
- Easter egg candies
- sprinkles
Instructions
- Bake cake layers. Preheat the oven to 350°F. Spray three 8 inch round cake pans with nonstick spray and line each with parchment circles.
- Mix dry ingredients. Whisk together the cake mix, instant pudding mix, flour, salt, and granulated sugar in a large bowl.
- Mix wet ingredients. In a separate bowl, whisk together the sour cream, milk, vanilla extract, vegetable oil, egg whites, and egg yolks.
- Combine batter. Pour the wet ingredients into the dry ingredients and whisk just until combined. Do not overmix. Fold in the rainbow sprinkles.
- Bake. Divide the batter evenly between the prepared pans and bake for 25 to 30 minutes, until a toothpick inserted in the center comes out clean.
- Cool. Cool the cakes in the pans for 10 minutes, then turn out onto wire racks, remove parchment, and cool completely. Freeze layers until firm for easier assembly.
- Prepare filling. Cook the vanilla pudding according to package directions. Cool completely, then refrigerate until thick. For a lighter texture, fold in 8 ounces thawed whipped topping if desired.
- Make buttercream. Beat the butter and powdered sugar until smooth. Add the vanilla extract and milk and beat until light and fluffy. Reserve about half for assembly and coloring.
- Assemble cake. Place one cake layer on a cake board or stand. Pipe a thick ring of buttercream around the edge to create a dam, spoon pudding into the center, and spread gently.
- Stack. Add the second cake layer and repeat the frosting ring and filling. Top with the final cake layer and center. Insert dowels if needed for stability.
- Crumb coat. Frost the cake with a thin, even layer of buttercream and freeze for 1 hour to set.
- Decorate. Tint portions of the remaining buttercream with gel food coloring, dab around the cake sides, and smooth with a scraper for a watercolor effect.
- Finish. Pipe borders or swirls on top and decorate with Peeps, coconut, egg candies, or sprinkles as desired. Chill until ready to serve.
Notes
- Chilling Tips. If frosting softens or slides, chill the cake or frosting briefly before continuing.
- Decorating Tips. Simple tools like a butter knife or ruler work well for smoothing. Decorations can hide imperfections.
- Make Ahead. Cake layers can be baked and frozen up to 2 weeks. Buttercream keeps 1 month refrigerated or 3 months frozen; thaw and remix before using.
- Storage. Store the finished cake covered in the refrigerator for up to 5 days. Limit room temperature time to 1 to 2 hours.
Nutritional Information
Save This Recipe to Your Inbox
By signing up, you'll join our email list and can unsubscribe anytime.


Comments
No Comments