

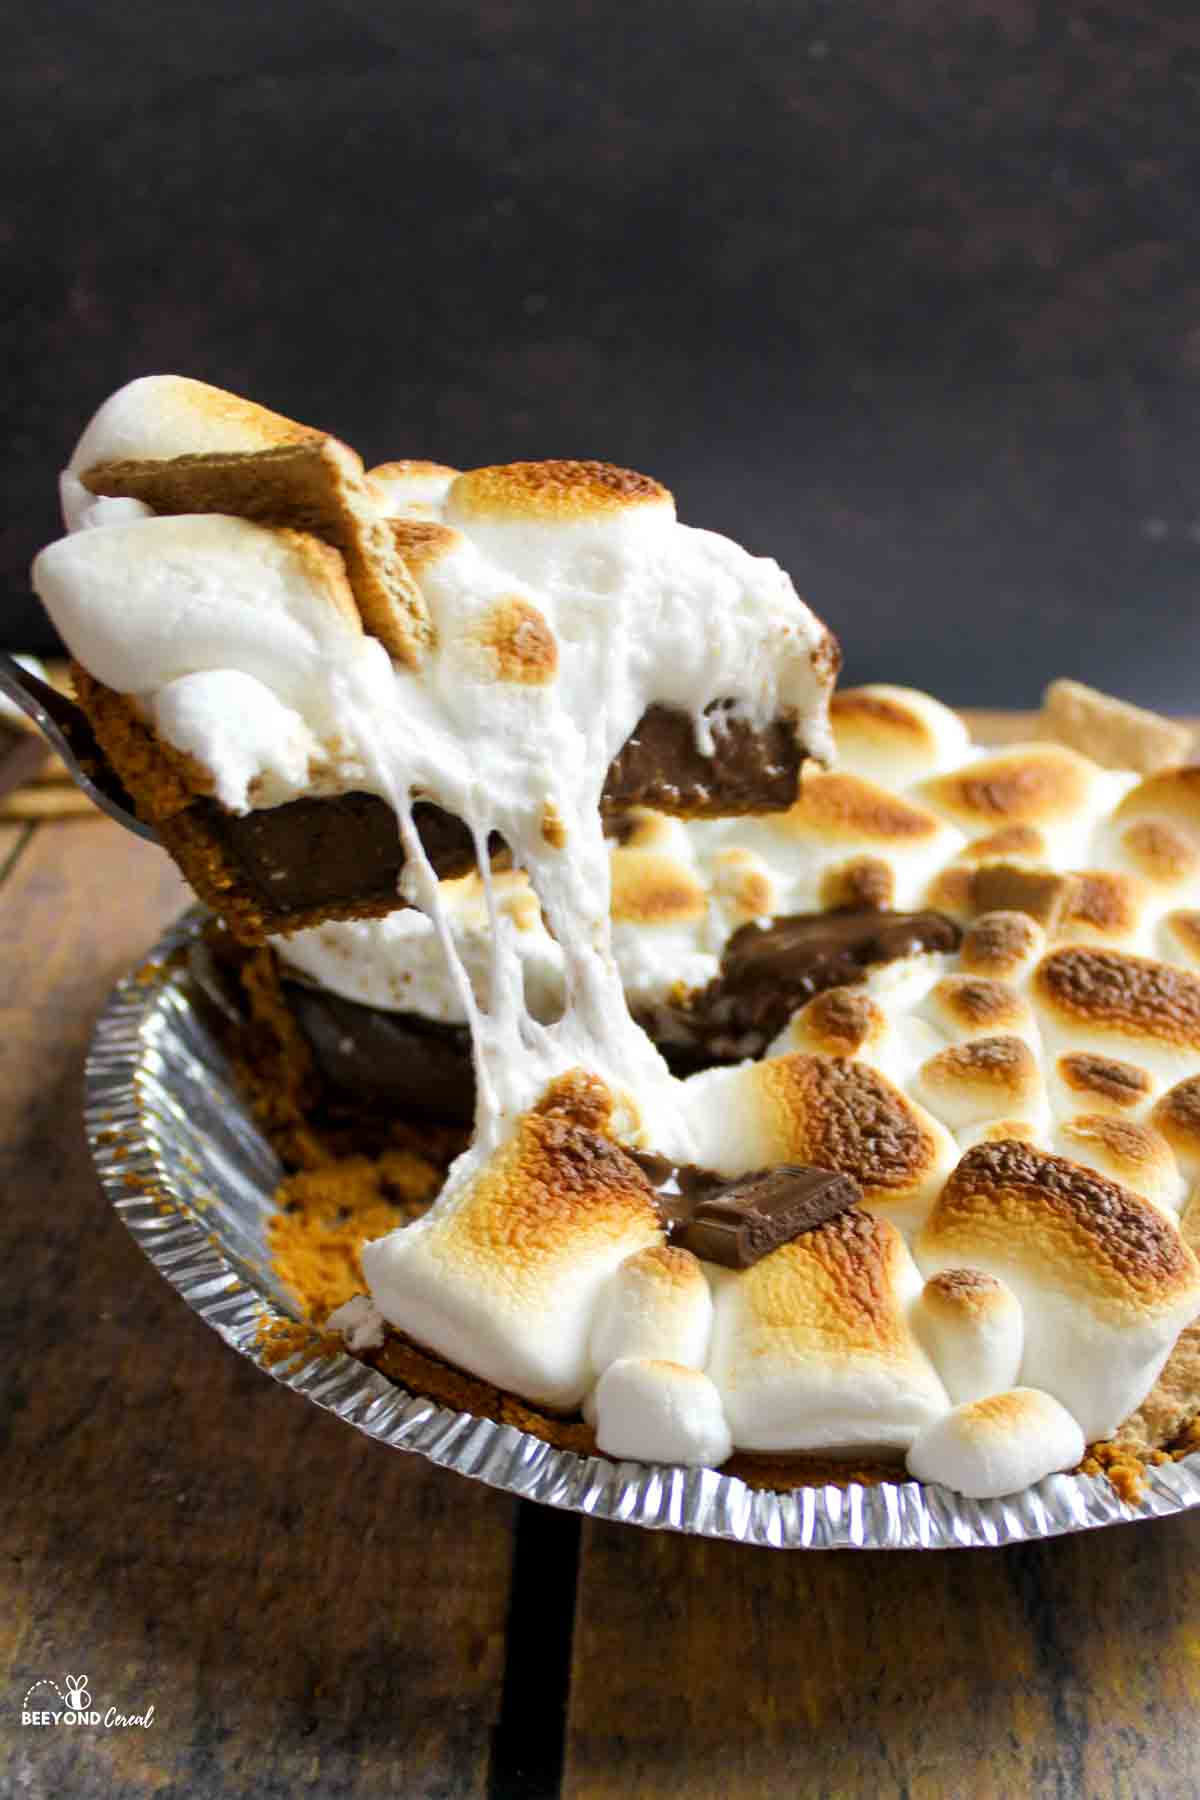
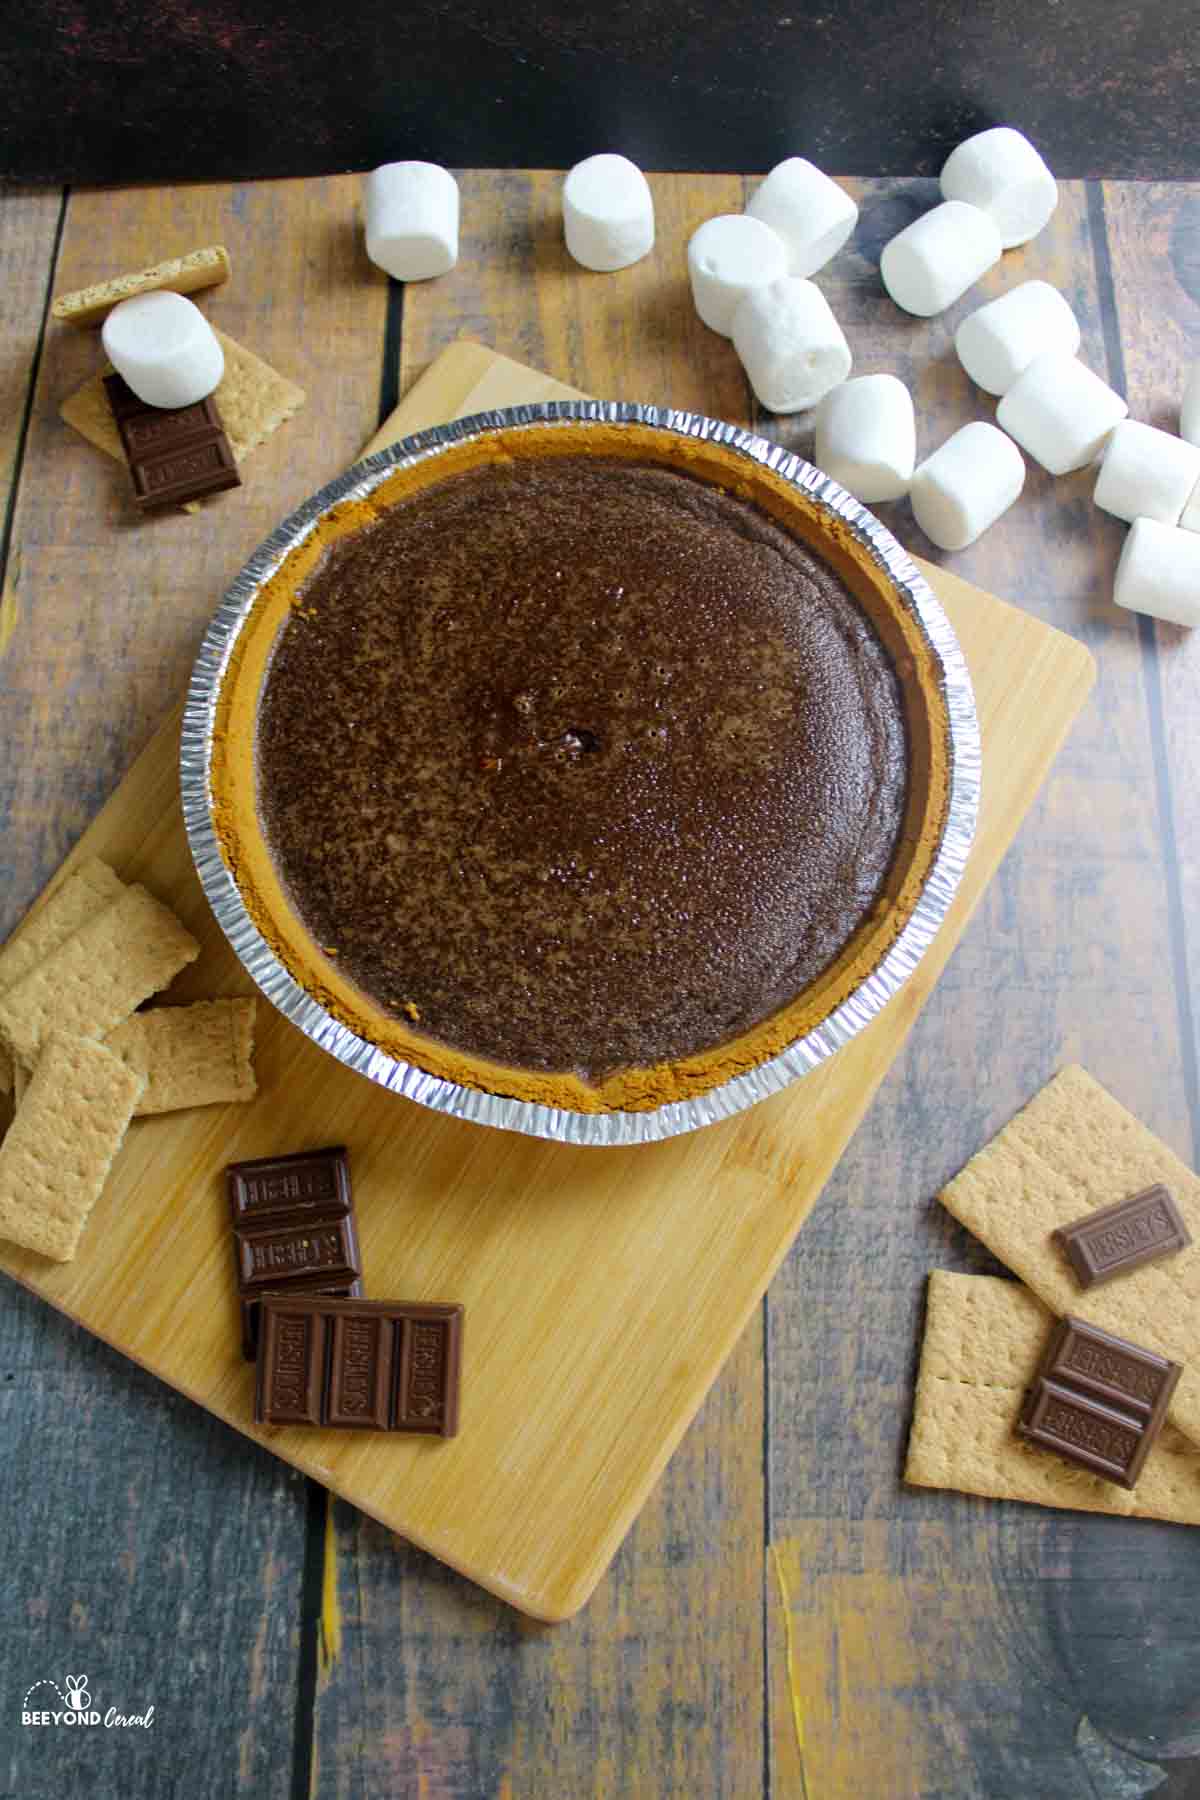
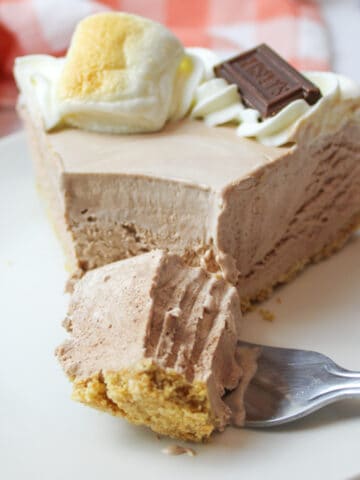
This s'mores pie recipe is rich, creamy, and topped with melted roasted marshmallows while nestled in a graham cracker crust. You may miss the campfire, but you won't miss the gooey smores experience with this easy smore pie.
Save This Recipe to Your Inbox
By signing up, you’ll join our email list and can unsubscribe anytime.
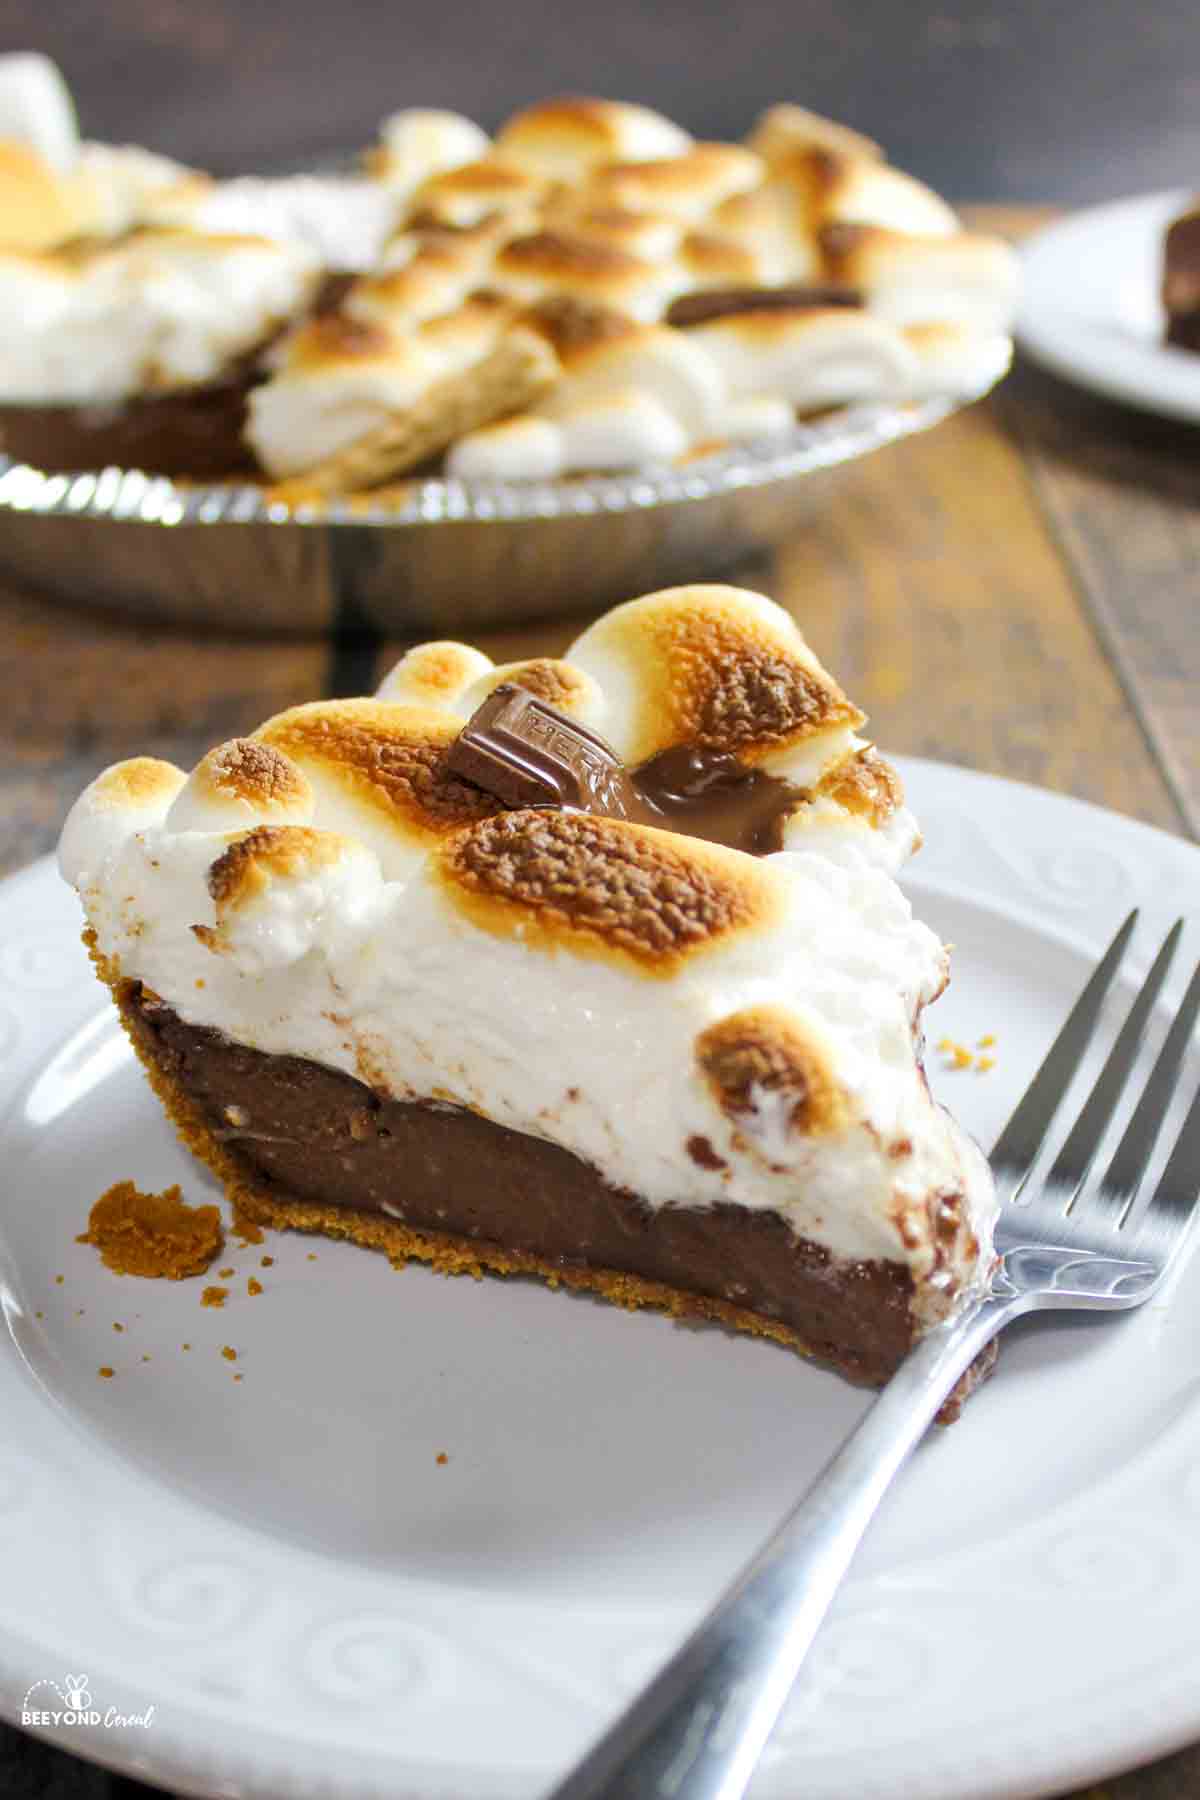
Not to be confused with my Smores Ice Cream Pie, this recipe uses milk chocolate and a homemade custard to get that perfect creamy consistency in every slice.
I love how easily and wonderfully this s'mores pie recipe comes together. It's all the things you love most about smores, but made in pie form. Perfect for a sweet summer dessert.
My husband says this S'mores Pie recipe is perfect the way it is and may have helped himself to more slices after I turned away, but I'm glad he likes it and I hope you do too.
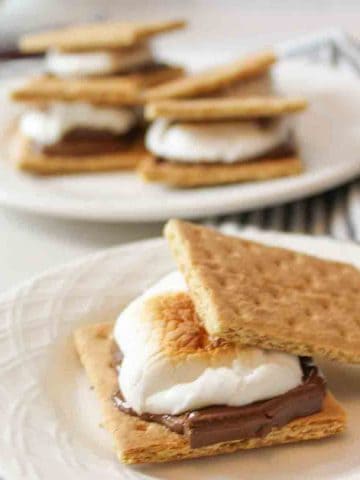
If you love smore recipes, make sure to check out my Easy Oven Broiled Smores, and S'mores Snack Mix.
Jump to:
💛 Why You'll Love This Recipe
- Minimal ingredients. The filling uses just four simple ingredients, with marshmallows added on top and broiled to your preferred level of doneness.
- Easy to make. The S'mores Pie filling comes together quickly, making this a great option for beginner bakers.
- Frugal dessert. At about $5 to make, this pie is budget friendly and perfect for BBQs or potlucks.
🛒 Ingredients
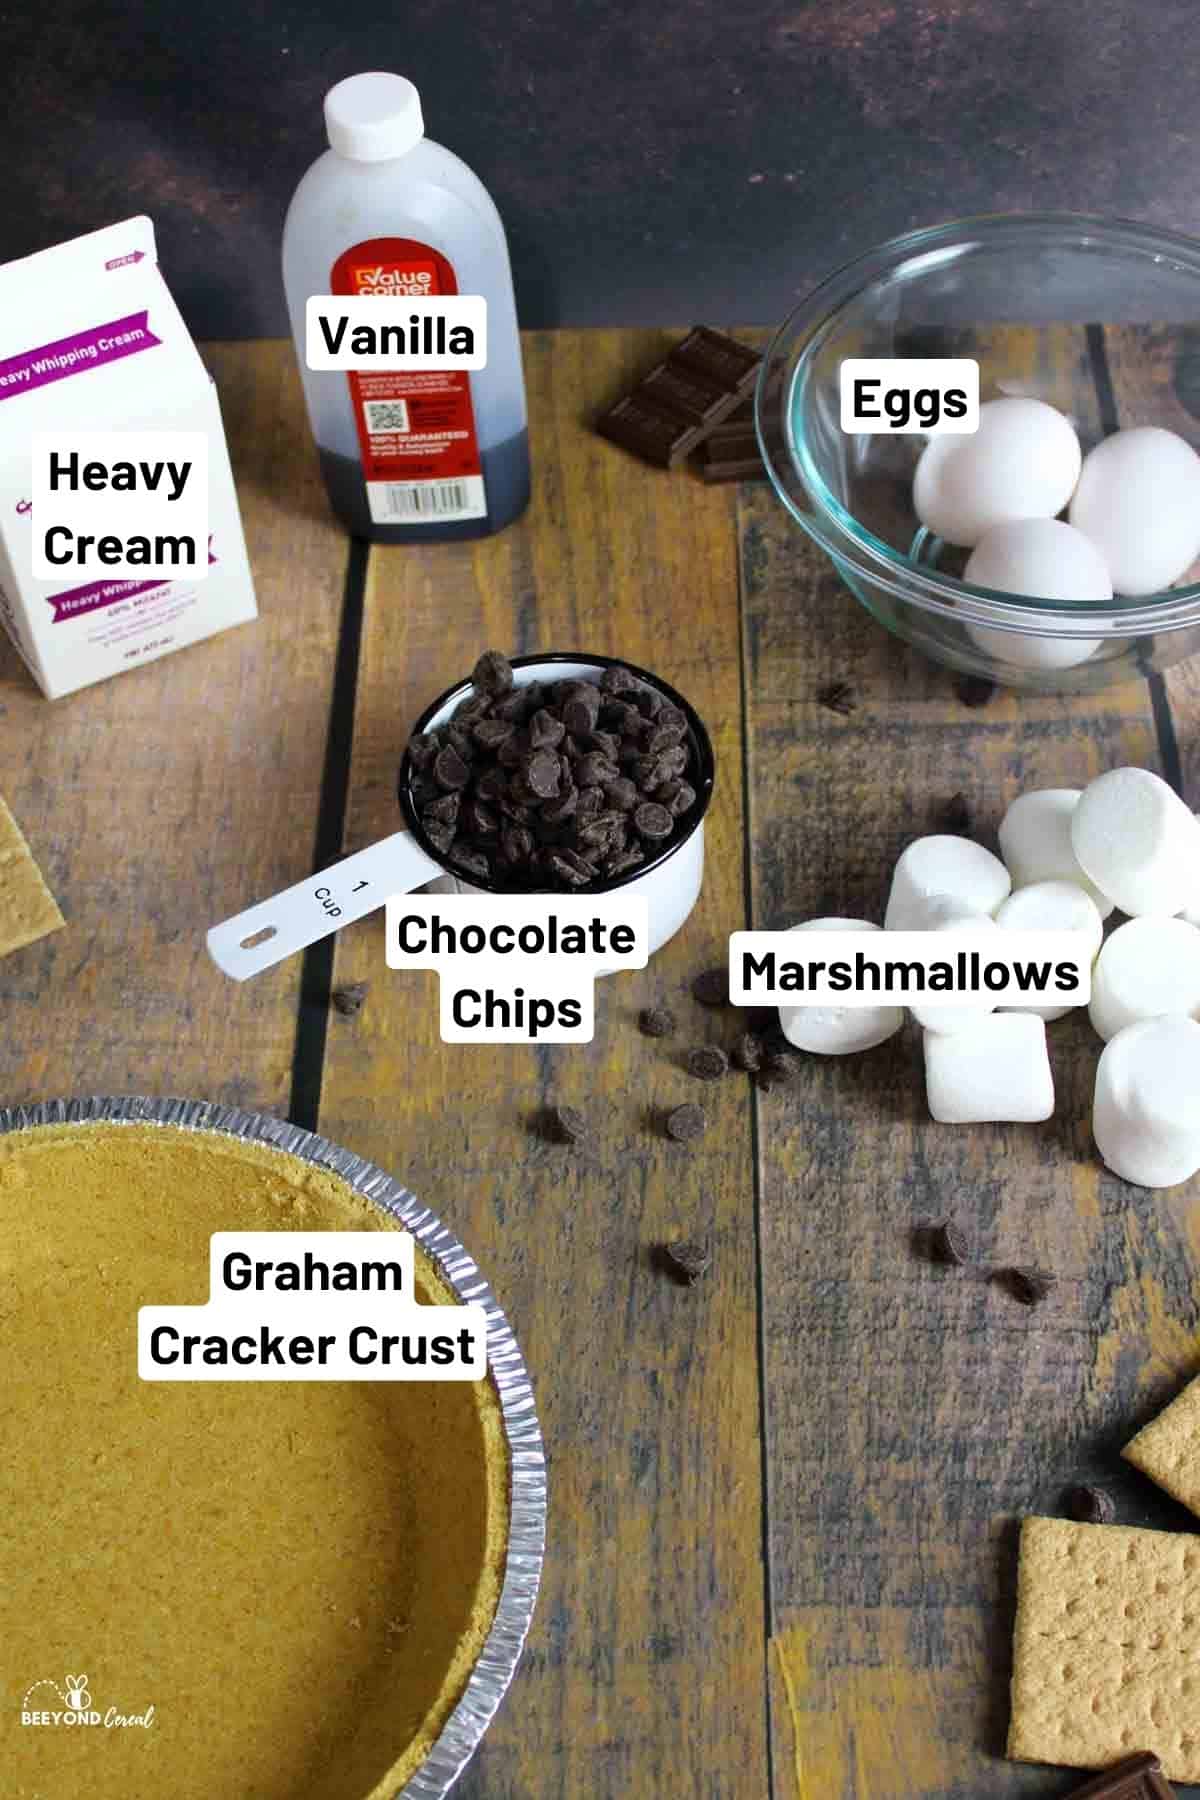
Prepared graham cracker crust. Use store bought to save time, or make your own like our No Bake Graham Cracker Crust.
Milk chocolate chips. Milk chocolate gives the classic s'mores flavor. Semi sweet can be used, but the taste will be different.
Marshmallows. Toasted marshmallows finish the pie and bring the s'mores flavor together.
See the recipe card below for full ingredients and instructions.
💰 Budget-Friendly Tips
Use a premade crust if it's on sale. Sometimes premade graham cracker crusts cost less than buying crumbs and butter separately, but a No Bake Graham Cracker Crust can also be a frugal choice.
Watch chocolate sales. Milk chocolate chips or bars are often discounted around holidays and bake sales.
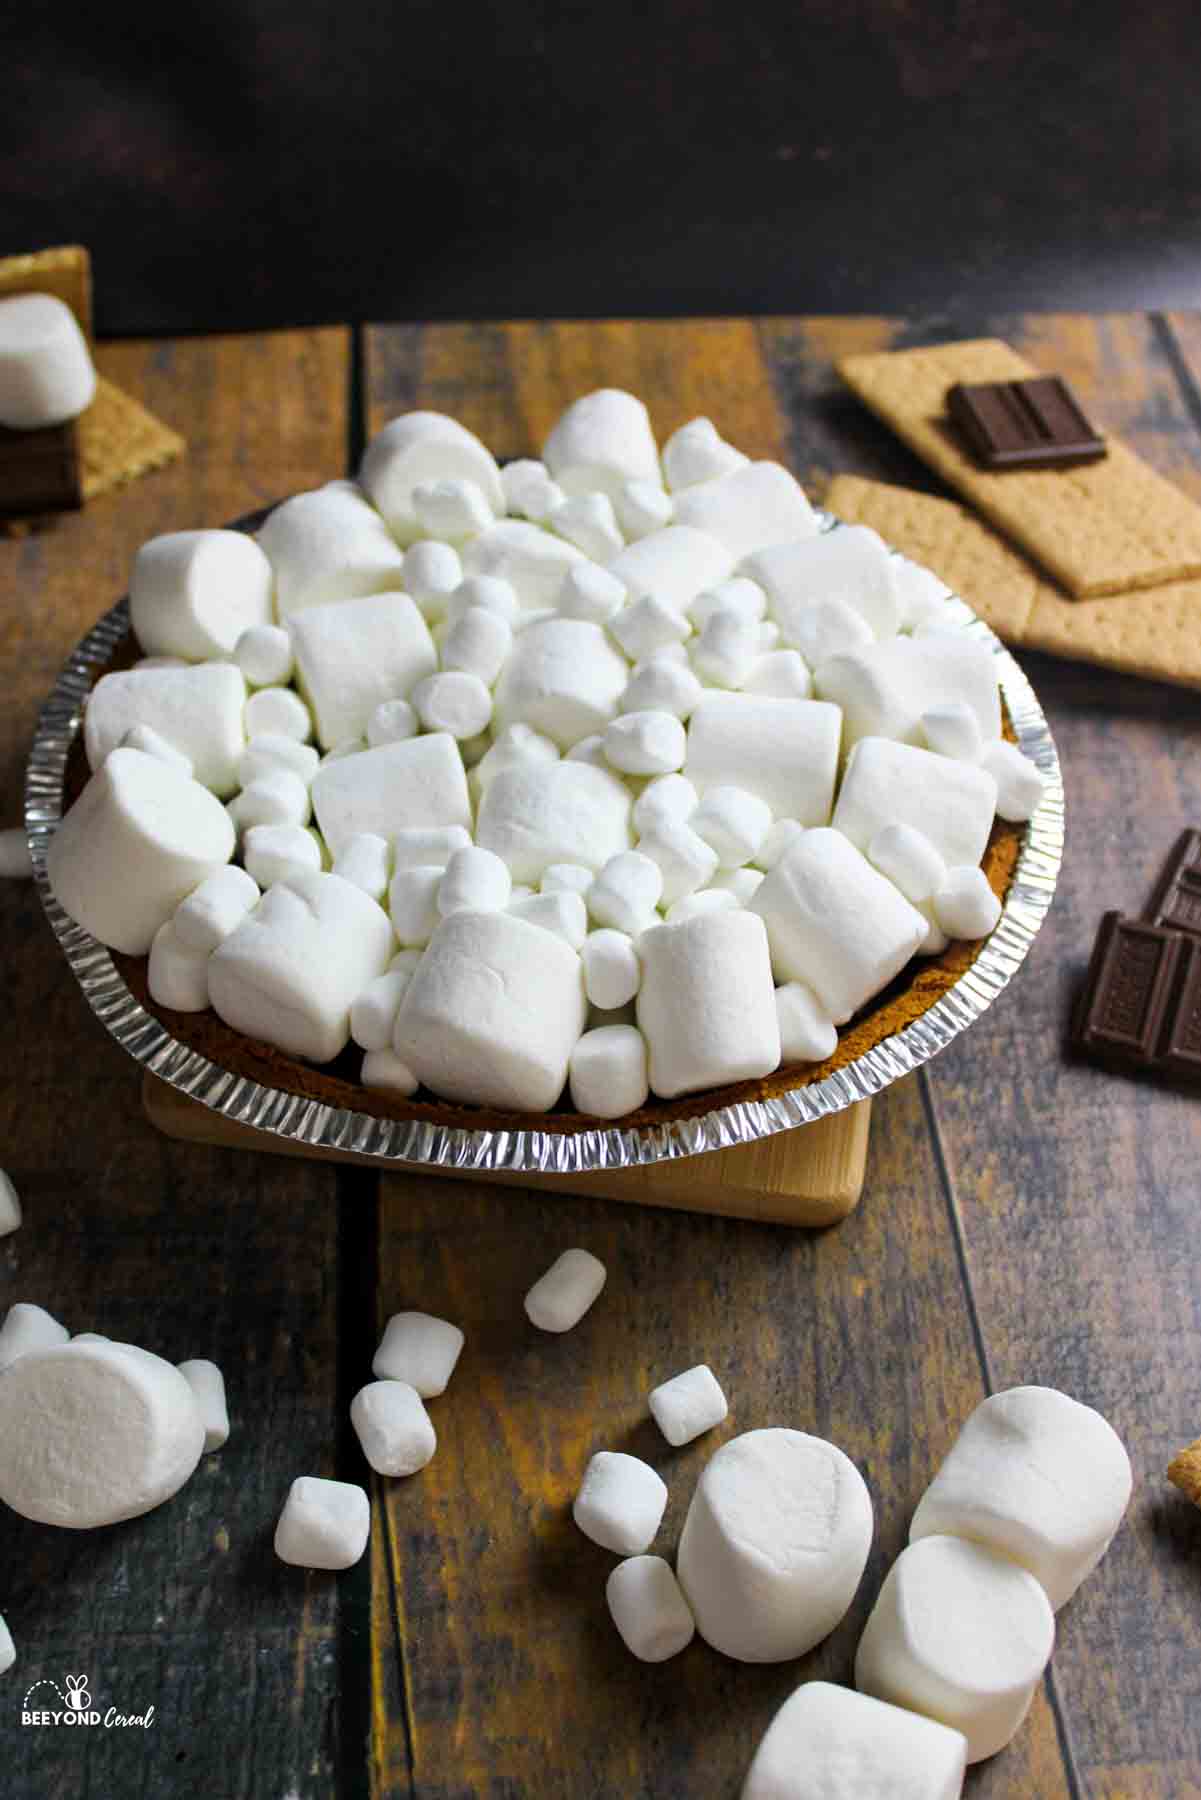
Stretch the marshmallows. You don't need to fully cover the top, spacing them slightly still gives that classic s'mores look.
Serve smaller slices. This pie is rich, so thinner slices help stretch the dessert for more people.
🥄 Instructions for S'mores Pie
Step 1: Preheat your oven to 350F degrees.
Step 2: In a mixing bowl, combine your graham cracker crumbs and melted butter until well mixed. Press evenly into a 9 inch pie plate and bake for 10 minutes while you make the filling.
Step 3: Pour your heavy cream into a microwave safe mixing bowl and microwave for 1-2 minutes until hot and bubbling. Add in the chocolate chips and let sit for about 5 minutes, do not stir.
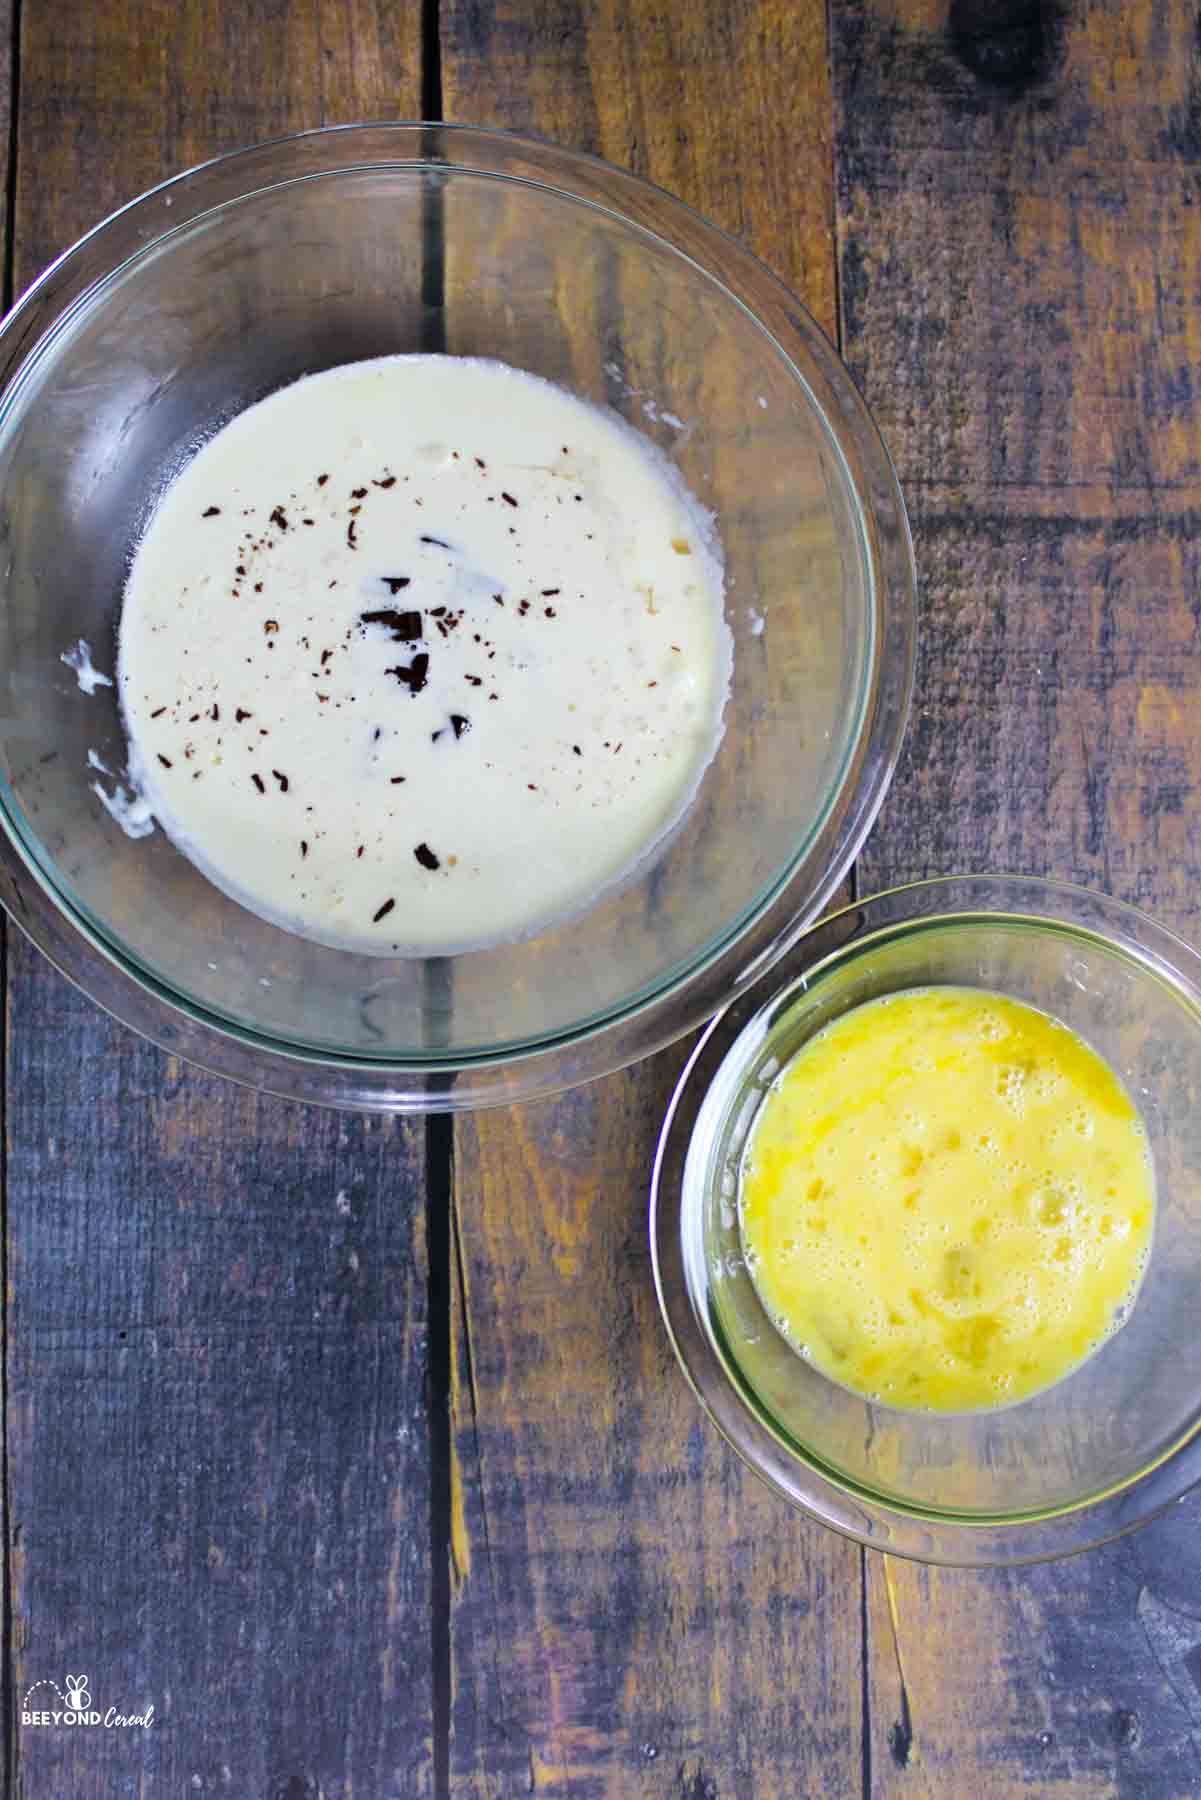
Step 4: Whisk the chocolate and cream together until smooth, adding in the vanilla.
Step 5: In another bowl whisk the eggs until beaten.
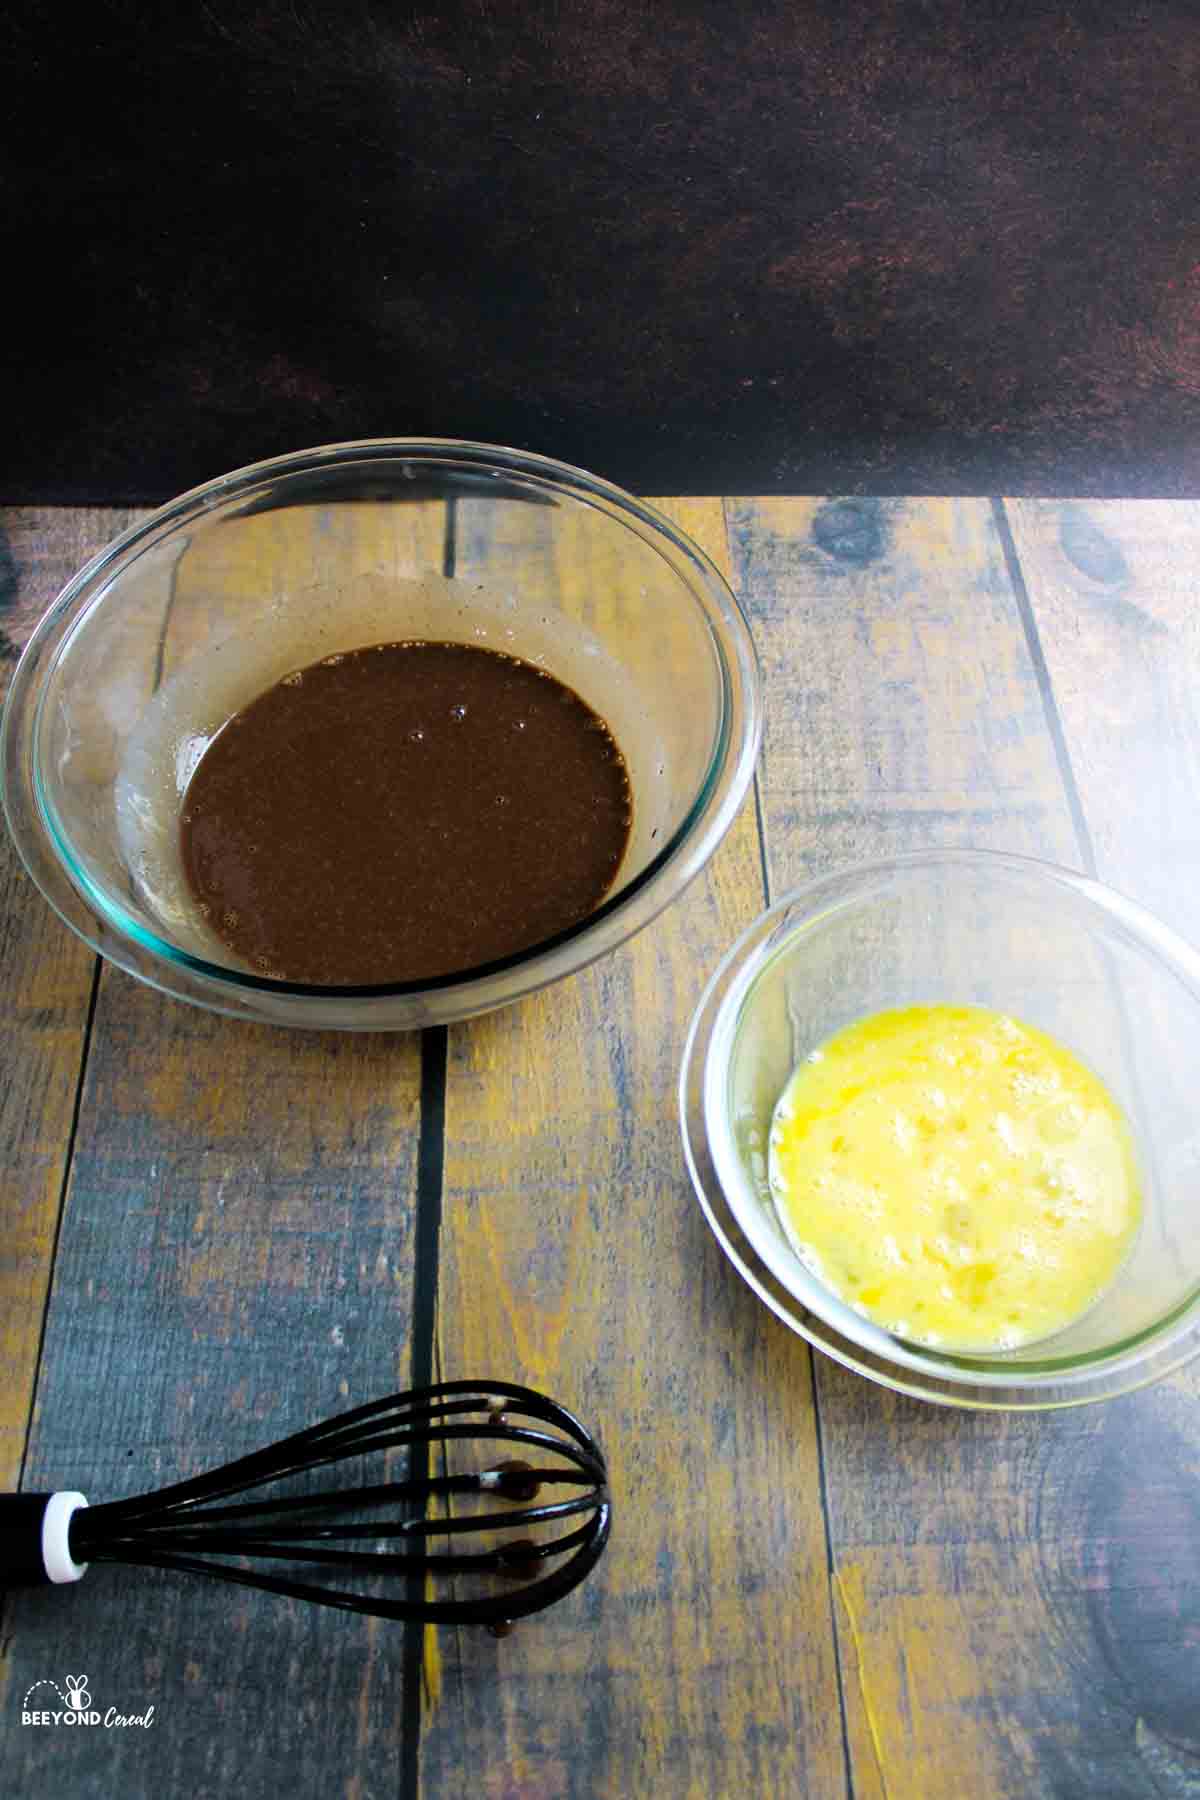
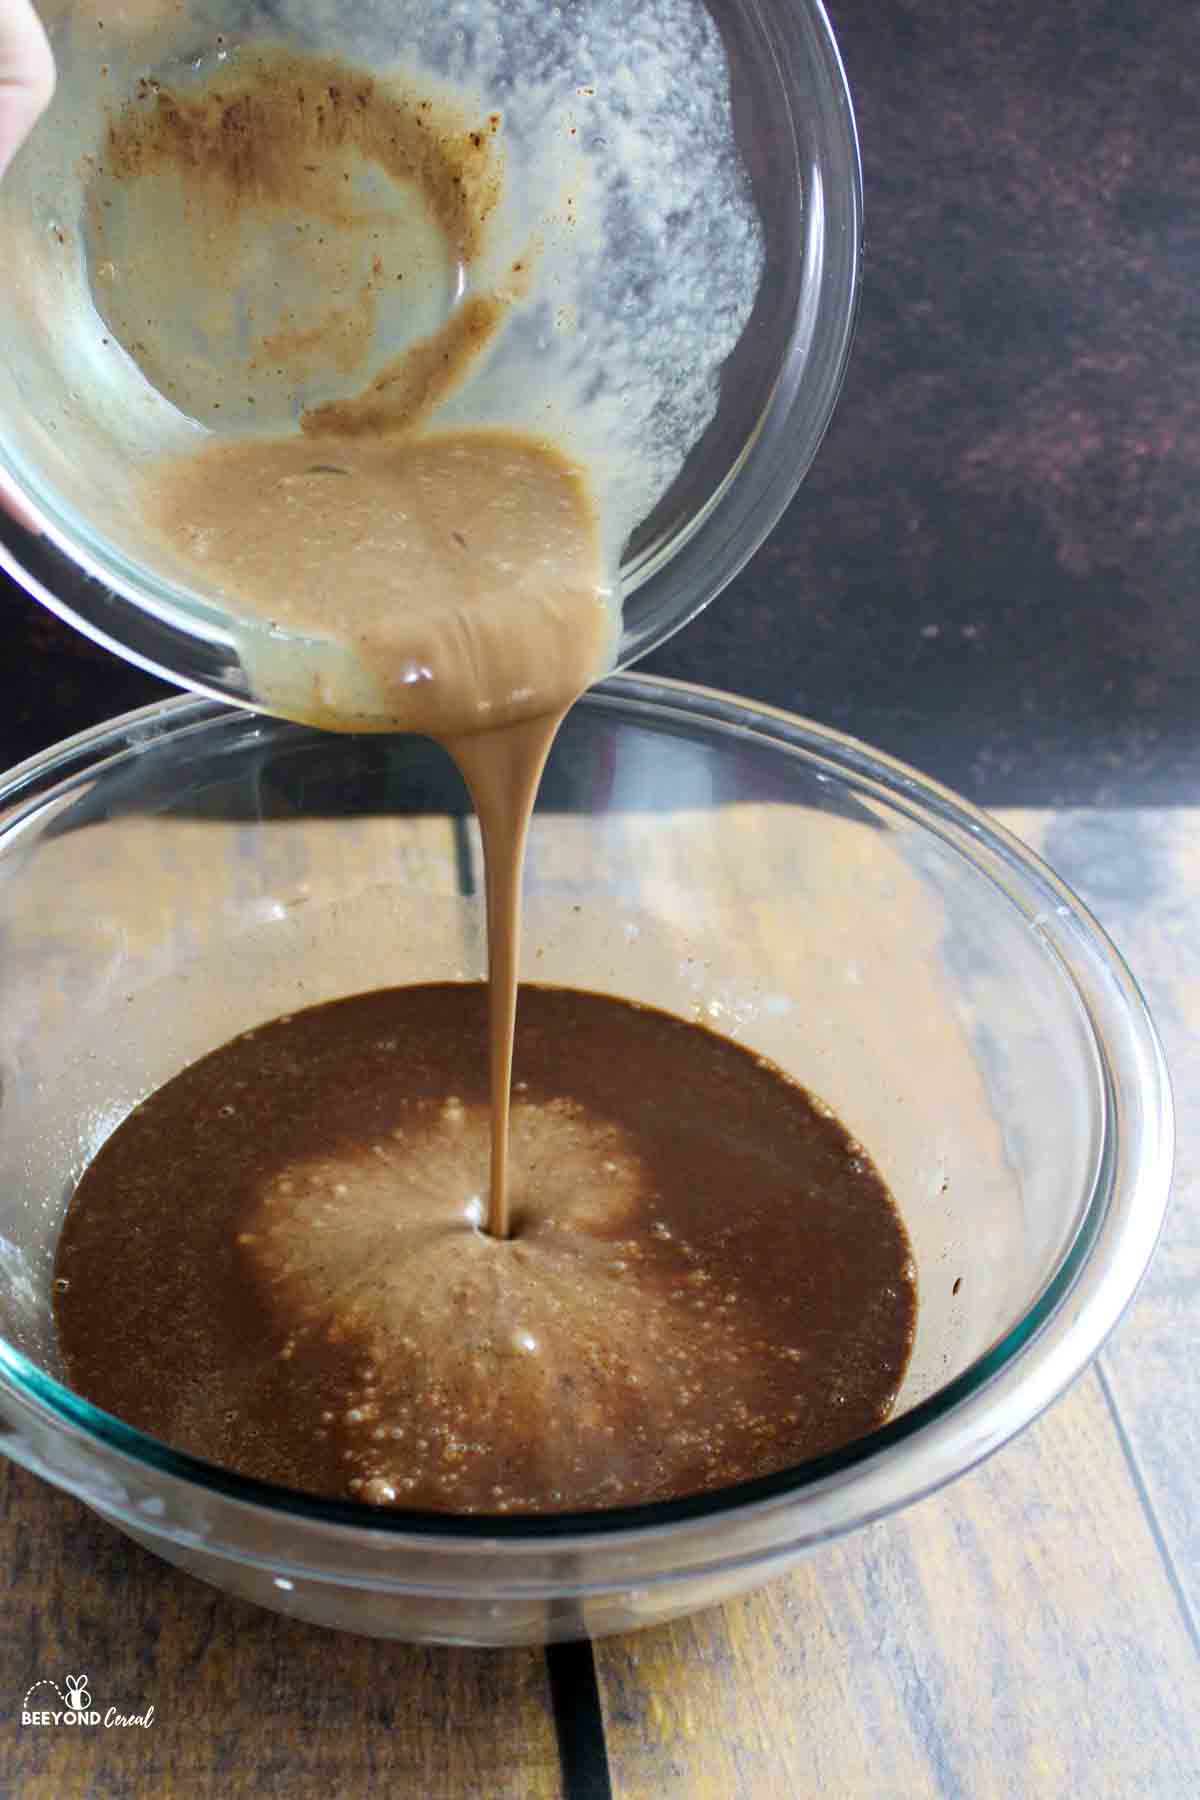
Step 6: Take some of the chocolate mixture and pour it into the eggs and whisk to temper the eggs.
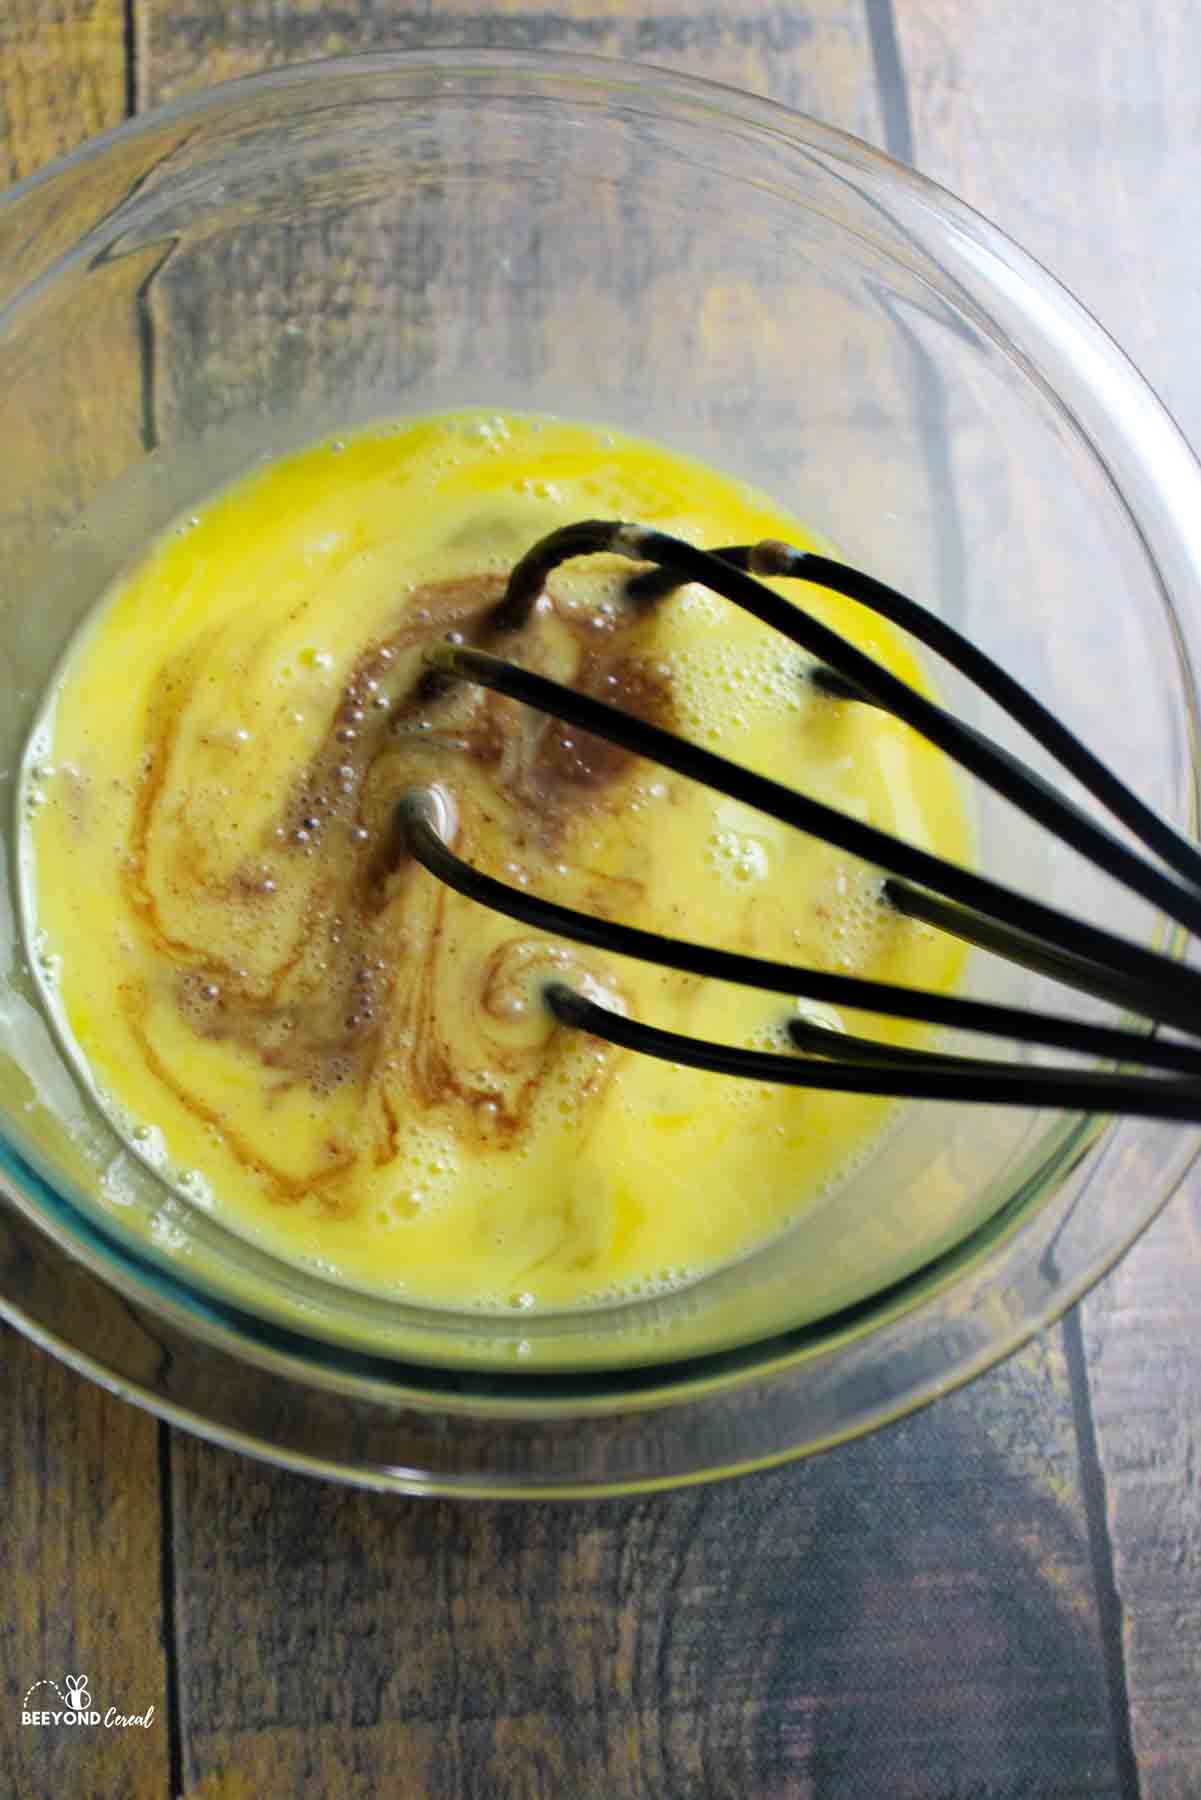
Step 7: Then pour the egg mixture into the heavy cream and whisk until well blended.
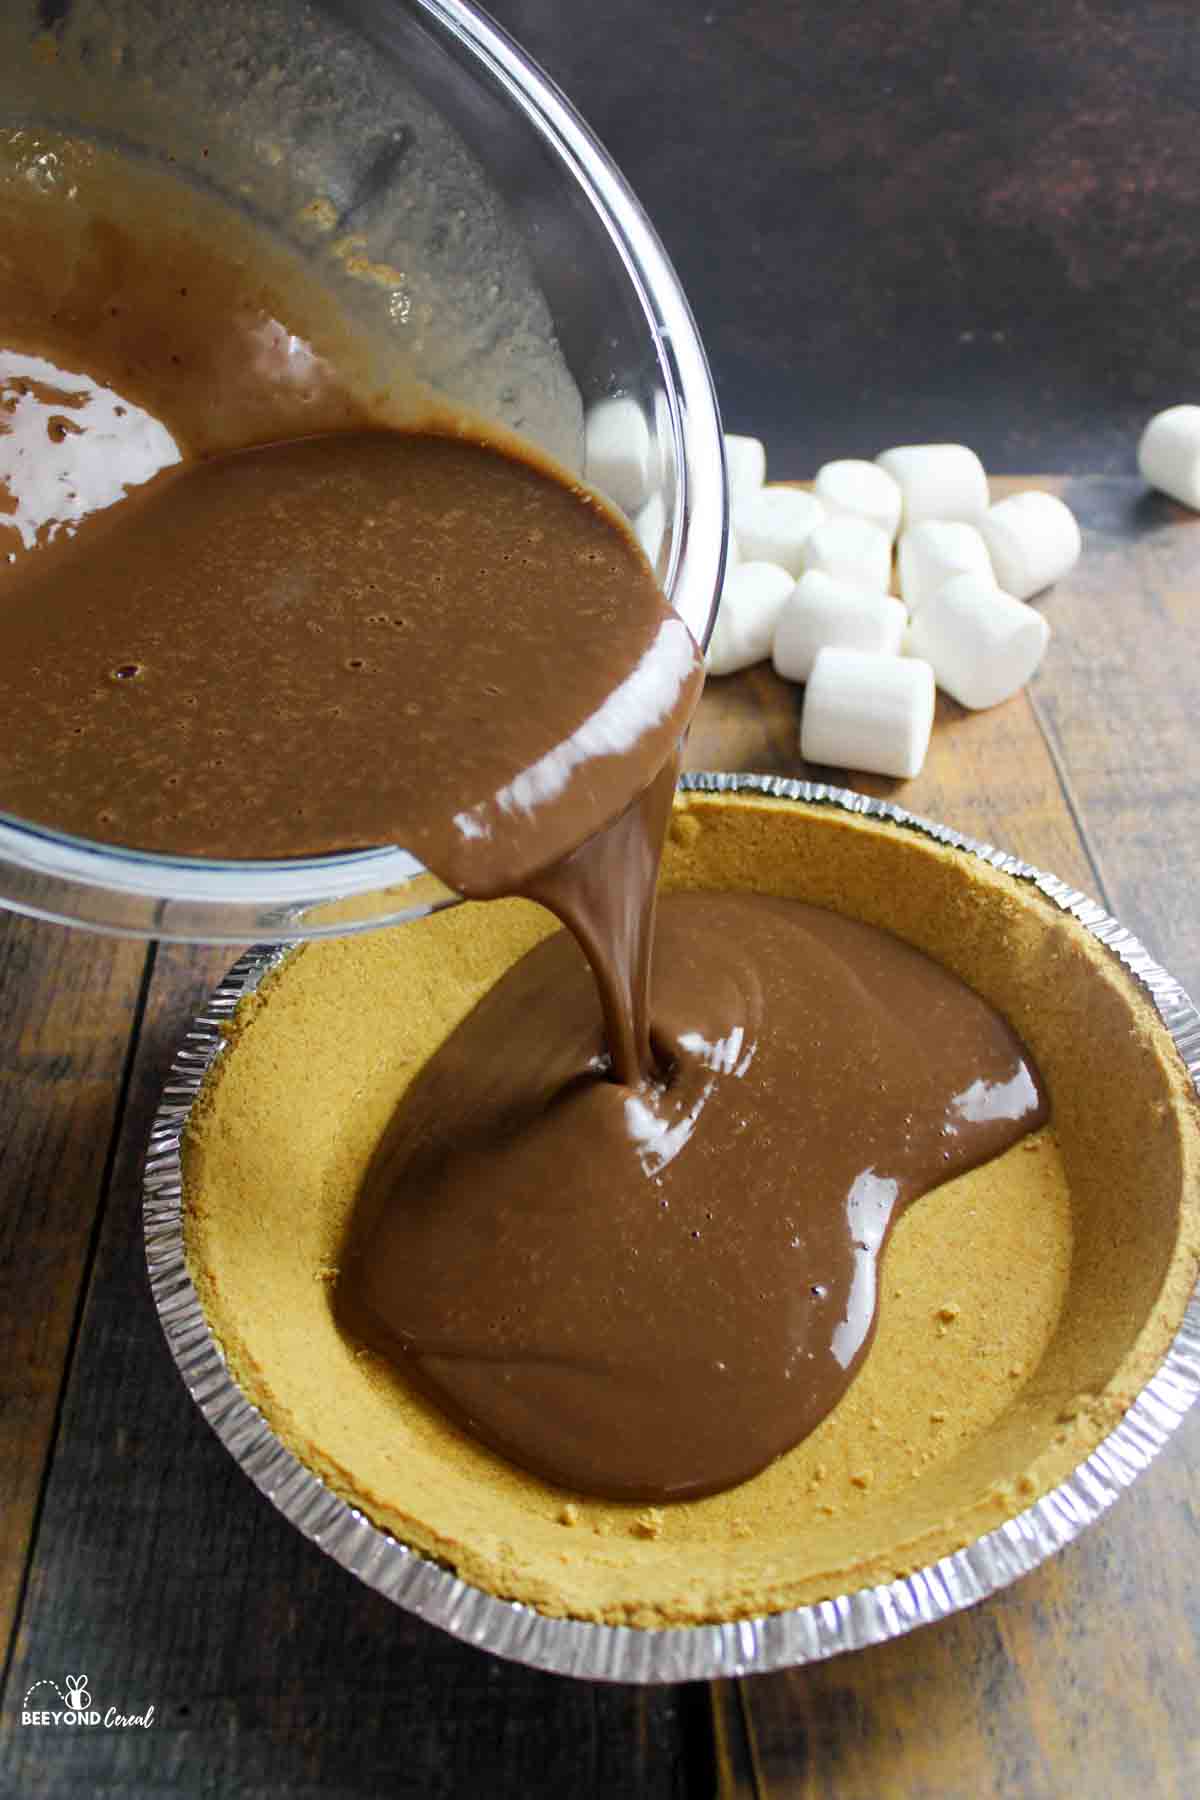
Step 8: Pour your filling into the prepared pie crust and then bake for 25 minutes until set.
Step 9: Let cool for about 30 minutes.
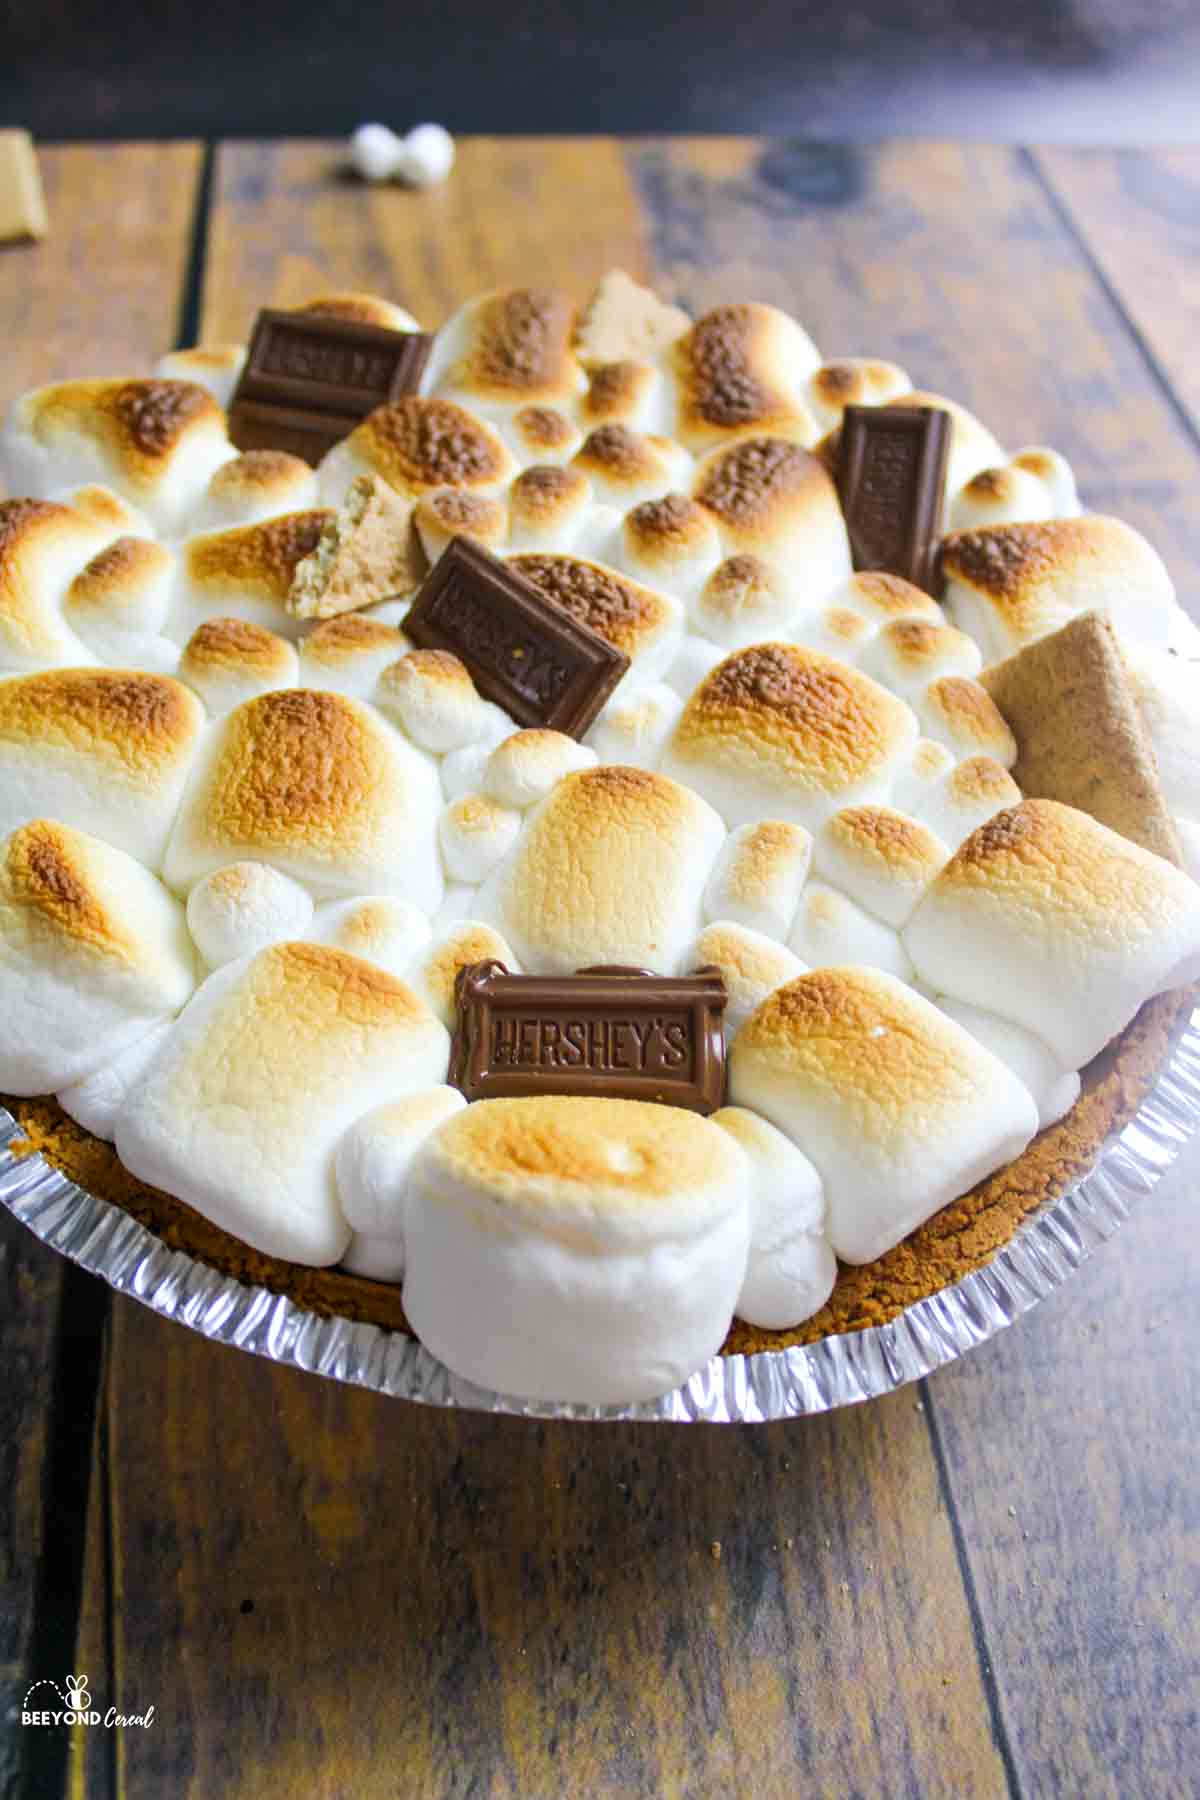
Step 10: Top with your large marshmallows. Turn your oven broiler on high and place your pie in there for a few seconds to a minute until the marshmallows are toasted to your desired level of doneness.
Step 11: Keep a careful and close eye on them as they can burn quickly.
Step 12: Let cool for about 5 minutes before slicing and serving.
Enjoy.
👩🏻🍳 Expert Tips
- Save time on your S'mores Pie. Using a premade graham cracker crust keeps prep quick and easy.
- Chocolate swap. Chopped Hershey bars can be used in place of milk chocolate chips for added texture.
- Watch the broiler. Stay close while broiling the marshmallows. They toast fast and are usually done in under a minute.
❄️ Storage and Make Ahead
Storage: Store the S'mores Pie covered in the refrigerator for up to 3-4 days.
Make Ahead: The pie can be baked and chilled a day in advance; add and toast the marshmallows shortly before serving.
🥗 Side Dishes or Pairing Ideas
This s'mores pie pairs well with fresh fruit, vanilla ice cream, dessert trays, or served as a fun finale to a casual or summer-style meal.
- Mixed Berry Pie FillingRecipe $7.91 / Serving $0.99
- Strawberry Blueberry ShortcakeRecipe $5.47 / Serving $0.91
- Armpit FudgeRecipe $0.42
- Strawberry Mason Jar Ice CreamRecipe $2.11 / Serving $1.06


❓ S'mores Pie FAQs
Keep your smores pudding pie covered and stored in the fridge for up to 3-4 days.
Yes, you could. Marshmallow fluff would create a great look once spread over the top but it might be a bit sticky and hard to spread.
Absolutely! It cuts down on time and effort that way. If you want to use a store-bought crust, feel free to go for it. You won't need to blind bake it so skip straight to the filling preparation and continue the recipe card from there.
🍽️ More Recipes You'll Love
- Smores Ice Cream PieRecipe $6.89 / Serving $0.86
- Broiler SmoresRecipe $3.06 / Serving $0.51
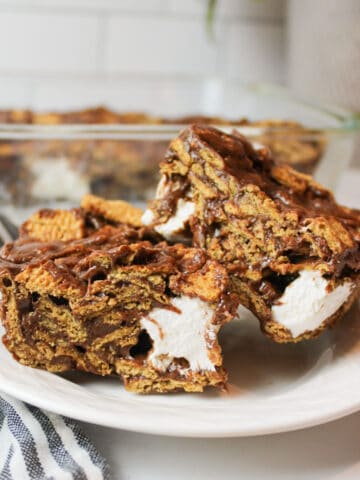
- Golden Graham Smores BarsRecipe $4.64 / Serving $0.39
- S'mores Sourdough BreadRecipe $3.02 / Serving $0.19

🐝 If you tried this S'mores Pie, please leave a ⭐️ star rating and share your buzz in the 💬 comments below. I'd truly appreciate it!
📖 Recipe

S'mores Pie
Ingredients
Crust
- 1 ½ cup graham cracker crumbs, about 1½ sleeves - ($1.11)
- 5 tablespoons unsalted butter, melted - ($0.62)
Filling
- 1 cup heavy whipping cream - ($1.49)
- 1 cup milk chocolate chips - ($1.00)
- 1 teaspoon vanilla extract - ($0.03)
- 3 large eggs - ($0.45)
Topping
- ½ bag large marshmallows - ($0.56)
Instructions
- Preheat the Oven: Preheat the oven to 350°F.
- Make the Crust: In a mixing bowl, combine the graham cracker crumbs and melted butter until evenly moistened. Press the mixture firmly into a 9-inch pie plate.
- Bake for 10 minutes, then set aside to cool.
- Heat the Cream: Pour the heavy cream into a microwave-safe bowl and microwave for 1 to 2 minutes until hot and bubbling.
- Melt the Chocolate: Add the chocolate chips to the hot cream. Let sit for 5 minutes without stirring, then whisk until smooth. Stir in the vanilla extract.
- Temper the Eggs: In a separate bowl, whisk the eggs until beaten. Slowly whisk a small amount of the warm chocolate mixture into the eggs to temper them, then pour the egg mixture back into the chocolate and whisk until fully blended.
- Bake the Pie: Pour the filling into the cooled crust. Bake for 25 minutes, or until the center is set. Let cool for about 30 minutes.
- Toast the Marshmallows: Arrange marshmallows evenly over the top of the pie. Turn the oven broiler to high and broil for several seconds to 1 minute, watching closely, until toasted to your liking.
- Serve: Let cool for 5 minutes before slicing and serving.
Notes
- Shortcut Option: A premade graham cracker crust may be used to save time.
- Chocolate Swap: Chopped milk chocolate bars work just as well as chocolate chips.
- Broiling Tip: Do not walk away while broiling. Marshmallows toast and burn very quickly.
- Storage: Store the pie covered in the refrigerator for up to 3 to 4 days.
Nutritional Information
Save This Recipe to Your Inbox
By signing up, you'll join our email list and can unsubscribe anytime.


Kristy says
Has anyone ever tried to bake this pie in the individual pre-made pie crusts? Trying to figure out how long to bake them since they are so small.
Nicole says
That's a wonderful question! I've never thought to make individual pies, but now I think I'll have to give it a shot and update the post with the information. For now though, I think starting at half the baking time (about 15 minutes) and then adjusting from there should suffice.
Debbie says
This pie looked so pretty when completed and the chocolate pie part was amazing but the marshmallow top was a disaster to cut. When I tried to slice it the entire topping wanted to come off in one big glob! My family did get a good laugh over it though!
Nicole says
Oh no! That can happen if you overcook the marshmallows. You want them lightly toasted so that they aren't too stuck together and can slice more easily. If they're too melted, they will join into one.
Sierra says
I followed the recipe exactly and it ended up coming out runny. Still tastes good though other than the runny part.
Nicole says
huh, that's so strange. I've made this recipe countless times and never had it turn out runny before. It is a custard pie so it should be set when finished baking and be pretty firm to slice once it's cooled down.