
If you're looking for a beginner-friendly crochet bento bag pattern that folds flat, holds your food containers securely, and looks great while doing it, this is it.
Estimated Project Cost $2-4

Save This Recipe to Your Inbox
By signing up, you’ll join our email list and can unsubscribe anytime.
Whether you're packing a midday meal like my tangy Dill Pickle Egg Salad, quick bites such as the freezer-friendly Tuna Cabbage Salad, or hearty options like the flavorful Blackened Chicken Salad, this crochet lunch bag is durable, lightweight, and ready to go wherever life takes you.
This bag folds flat for easy storage, holds your lunch or small essentials snugly, and replaces disposable bags or single-use containers.
Making your own crochet bento bag is a smart, sustainable choice that fits perfectly with the frugal lifestyle.
At Beeyond Cereal, we're all about practical, low-cost solutions that reduce waste, from pantry staples to budget-friendly freezer meals. A reusable lunch bag like this fits right into that mindset.
It's about more than just saving money; it's about adopting simple habits that support your home, your wallet, and the planet. Keep it handy in your bag or lunchbox so you're always prepared to ditch single-use plastics.
Pair this bag with our Crochet Market Bag, another beginner-friendly project using similar yarn. Both offer practical, low-waste alternatives that help you live more sustainably and intentionally.
Jump to:
🍯 Why This Pattern Works:
- Uses only 2 rolls of yarn. Easy on your wallet and great for using up stash. You can use any leftover yarn to make our Crochet Soap Saver.
- Beginner-friendly square construction. You'll master the granny square and feel confident.
- Multi-purpose. Perfect for lunch, small groceries, or even your WIP crochet projects.
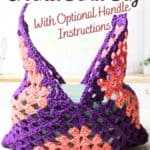
🪡 Materials Needed
- Worsted weight cotton yarn- You will need almost two full skeins of cotton yarn to make this pattern as-is. If you'd like yours bigger, you will need more yarn. If trying to make a solid colored bag, you'll want to make sure the yarn is all from the same dye lot so it doesn't vary too much.
- 4.5mm or 5mm crochet hook- (US 7 or H-8)
- Yarn needle- For weaving the yarn ends into the project.
- Scissors- For cutting the yarn as needed
💭Abbreviations to Remember (US terms)
- ch - chain
- dc - double crochet
- sl st - slip stitch
📖Variations
- Use 2-3 different colors of cotton yarn for a color-blocked look
- Add a fabric lining for extra durability (great if using for snacks!)
- Attach a crocheted strap or handles using leftover yarn
- Sew on a button and loop for added security
🧶Instructions for Crochet Bento Bag
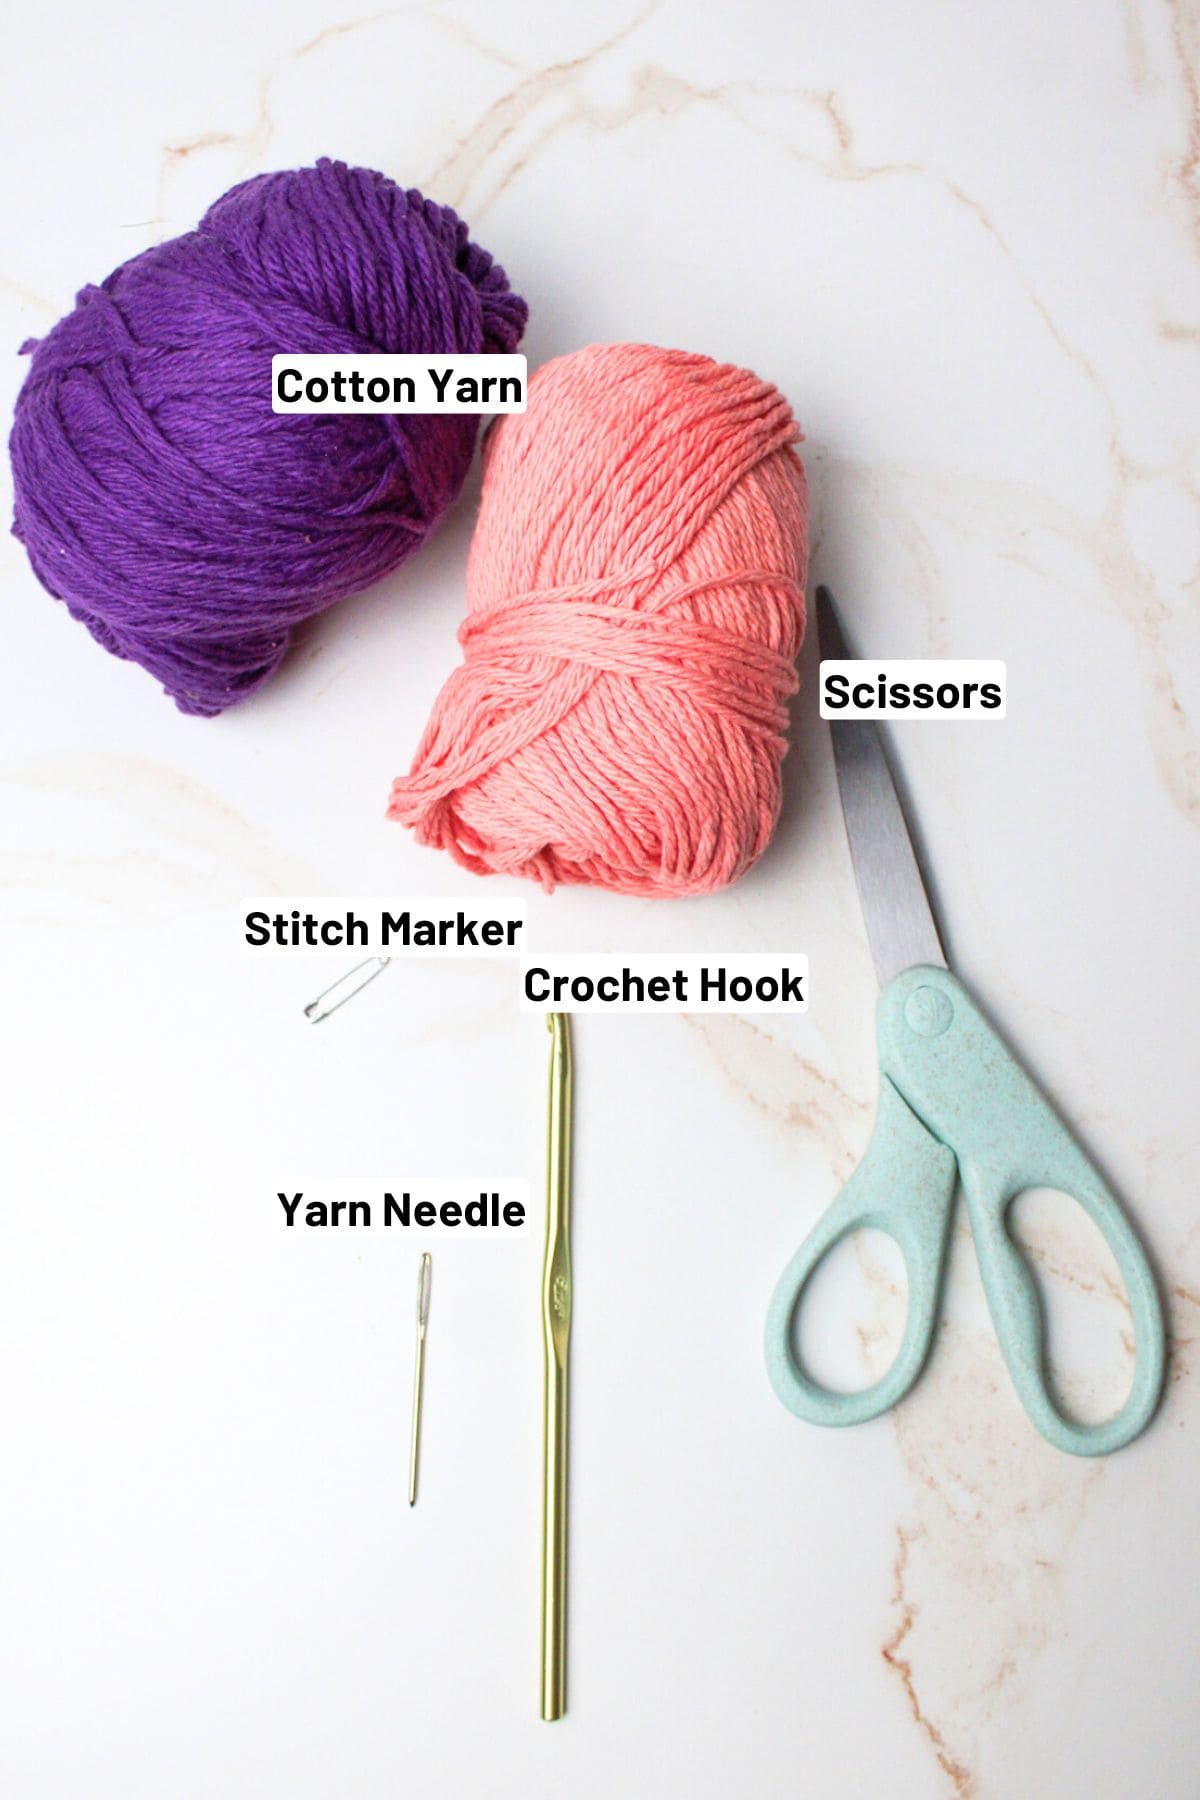
Make 3 Granny Squares
Chain 4 (see Image 1), then slip stitch to form a ring (Image 2).
Chain 3 (counts as first double crochet), then work 2 double crochets into the ring (Image 3). Chain 2. Repeat the sequence (3 double crochets, chain 2) three more times around the ring (Image 4). Slip stitch to join.
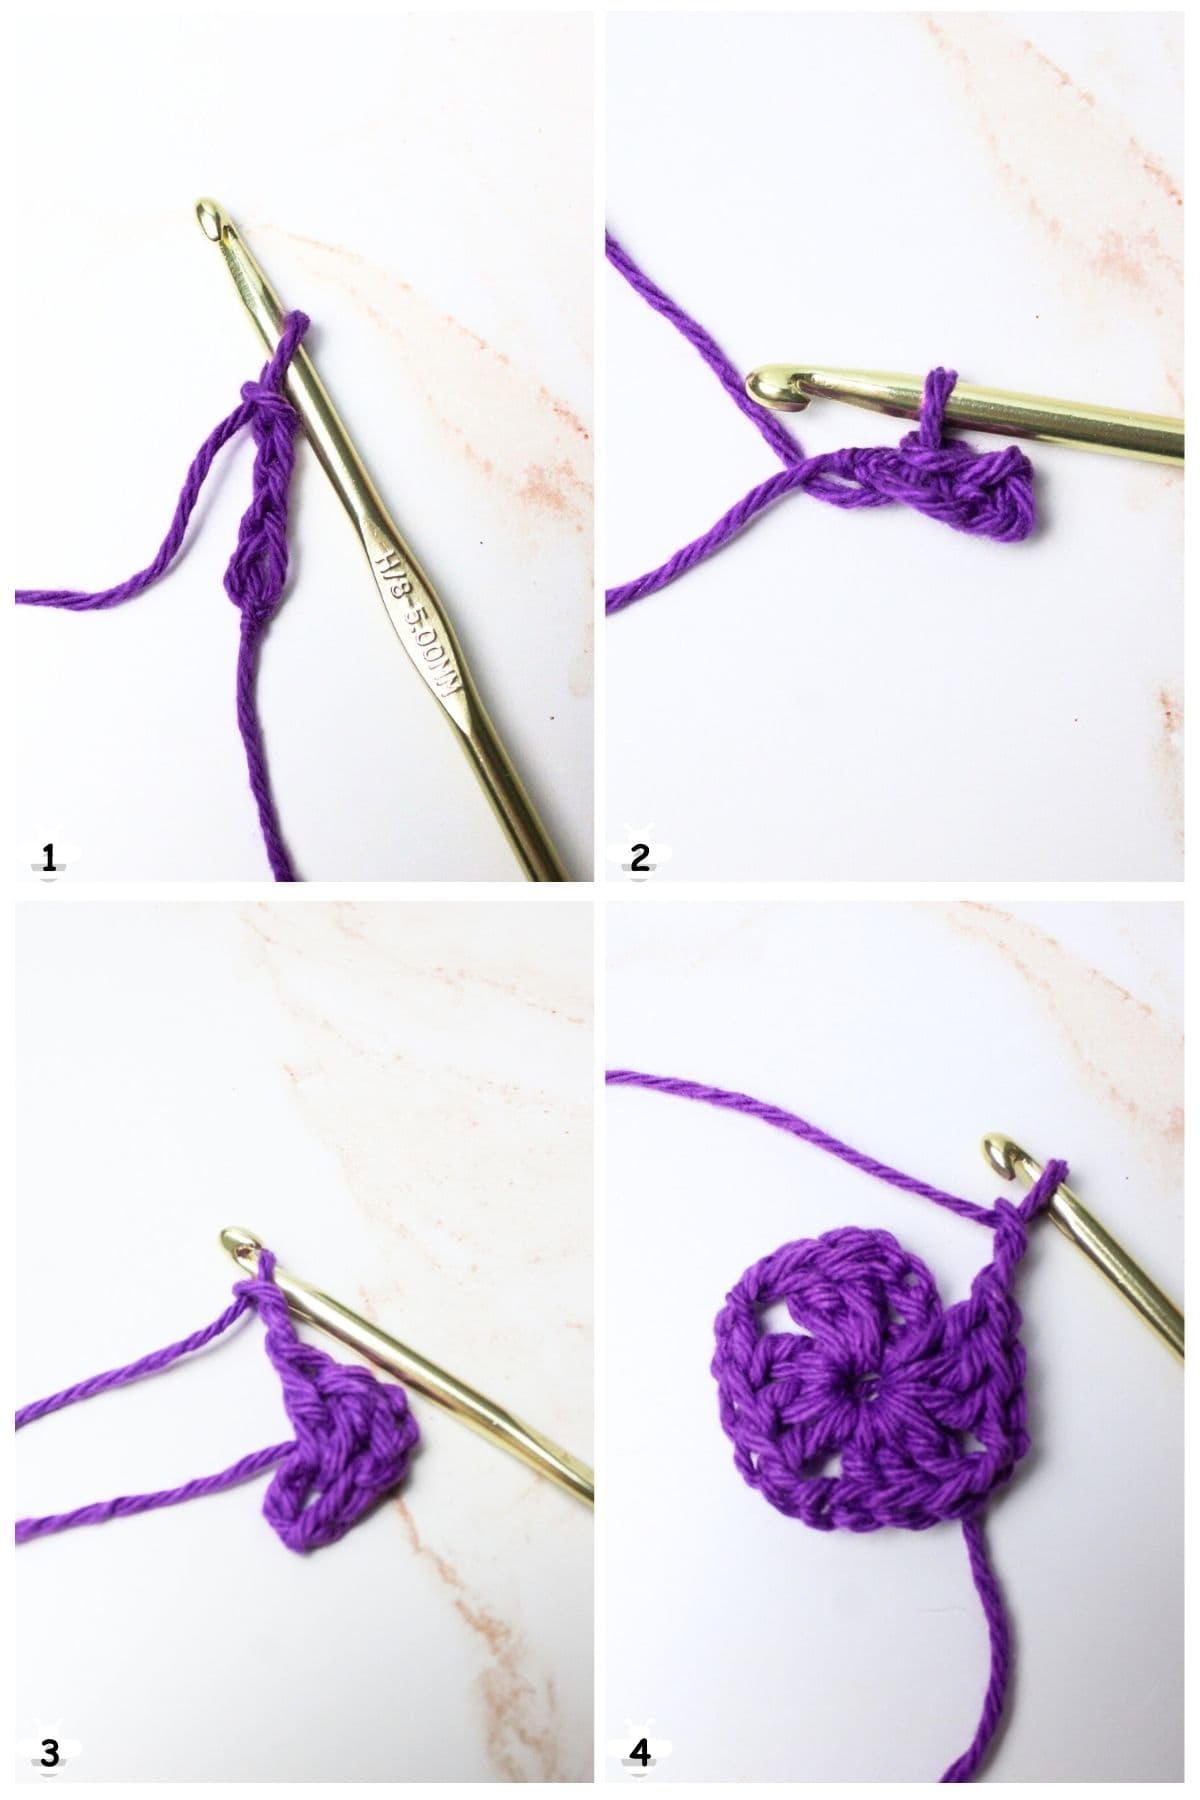
For each round, work 3 double crochet clusters into each side space, and (3 dc, ch 2, 3 dc) into each corner space (Image 5). This means each corner has two clusters separated by the chain-2 space.
Continue repeating rounds until your square measures about 8.5-9 inches across (Image 6).
Fasten off and make a total of three granny squares.
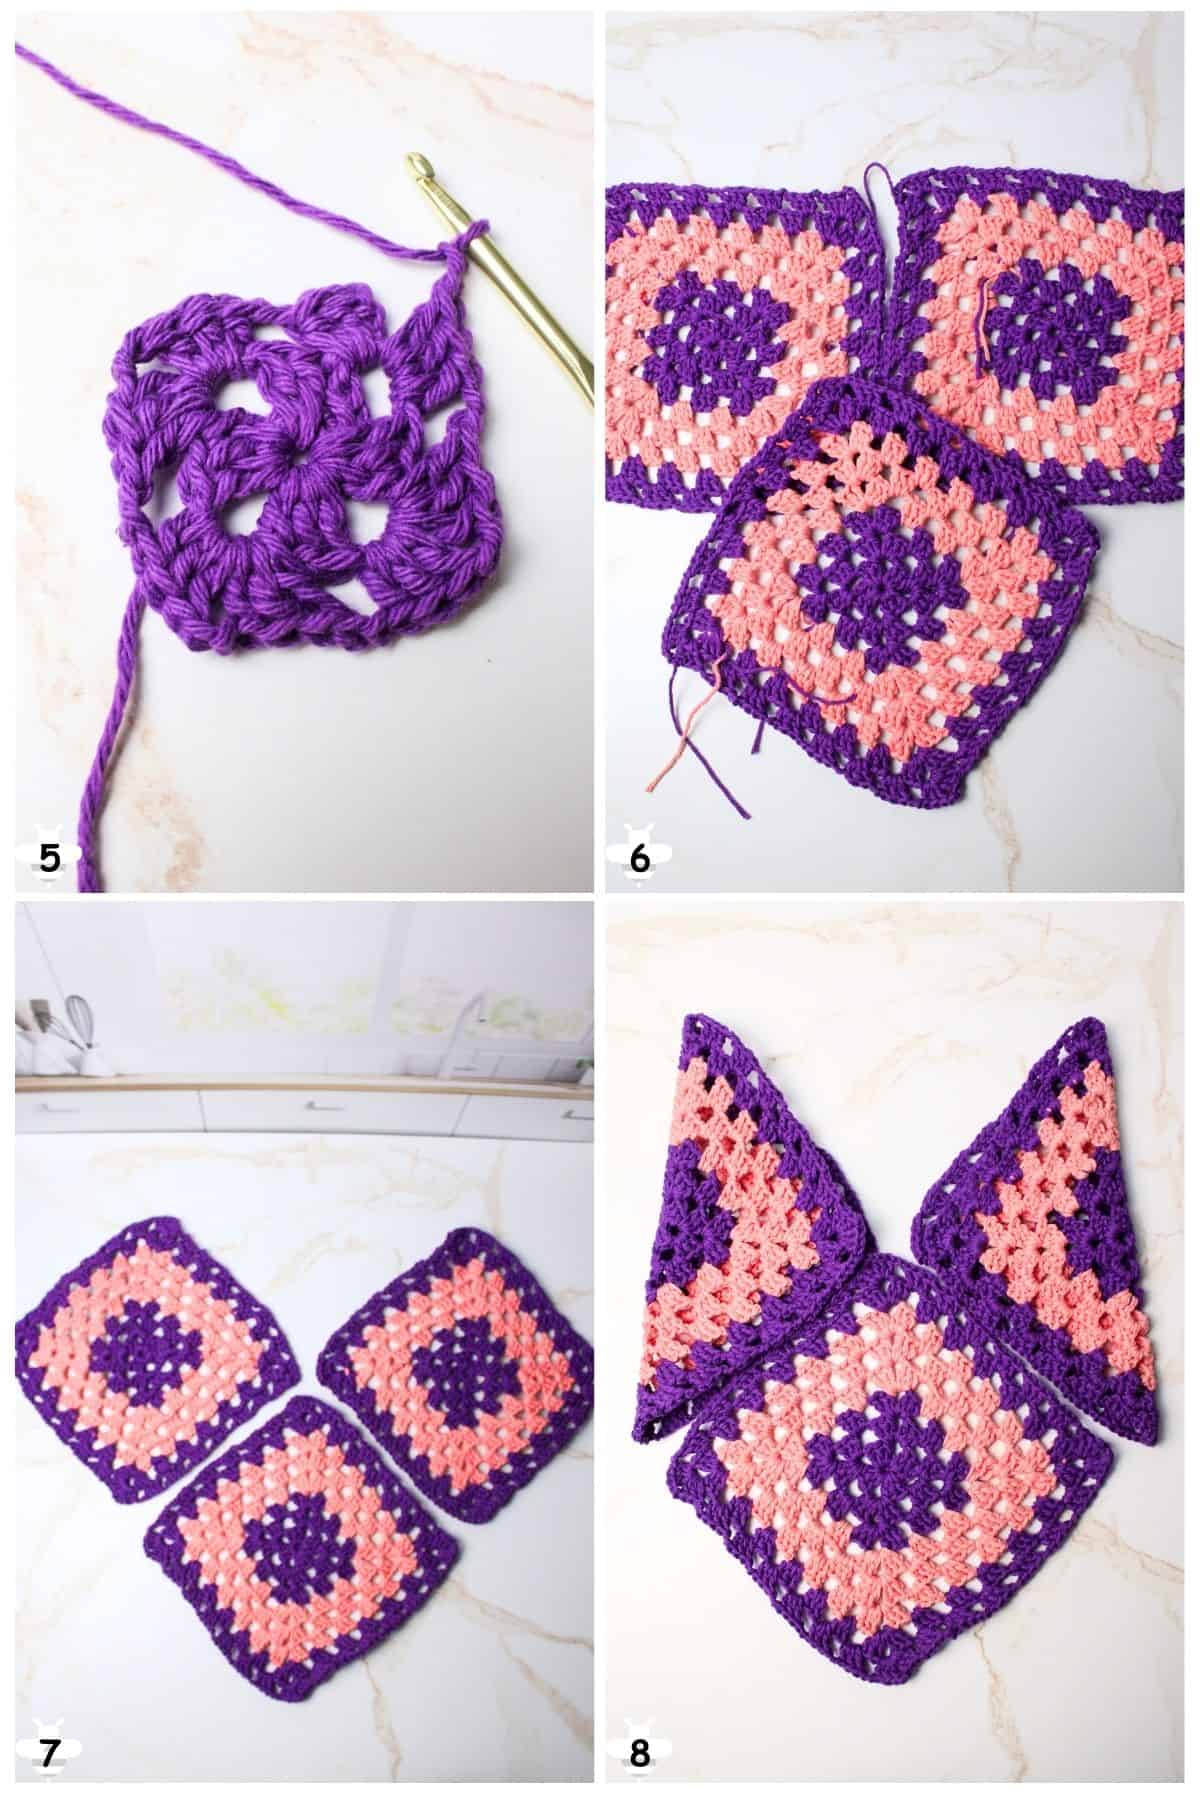
Layout and Assembly
Lay the three squares out in front of you so they form two diamonds touching at their corners, with the third square below them touching the full side of each top square (Image 7).
Fold the two top squares inward so their outermost points meet in the center, forming two triangles (Image 8).
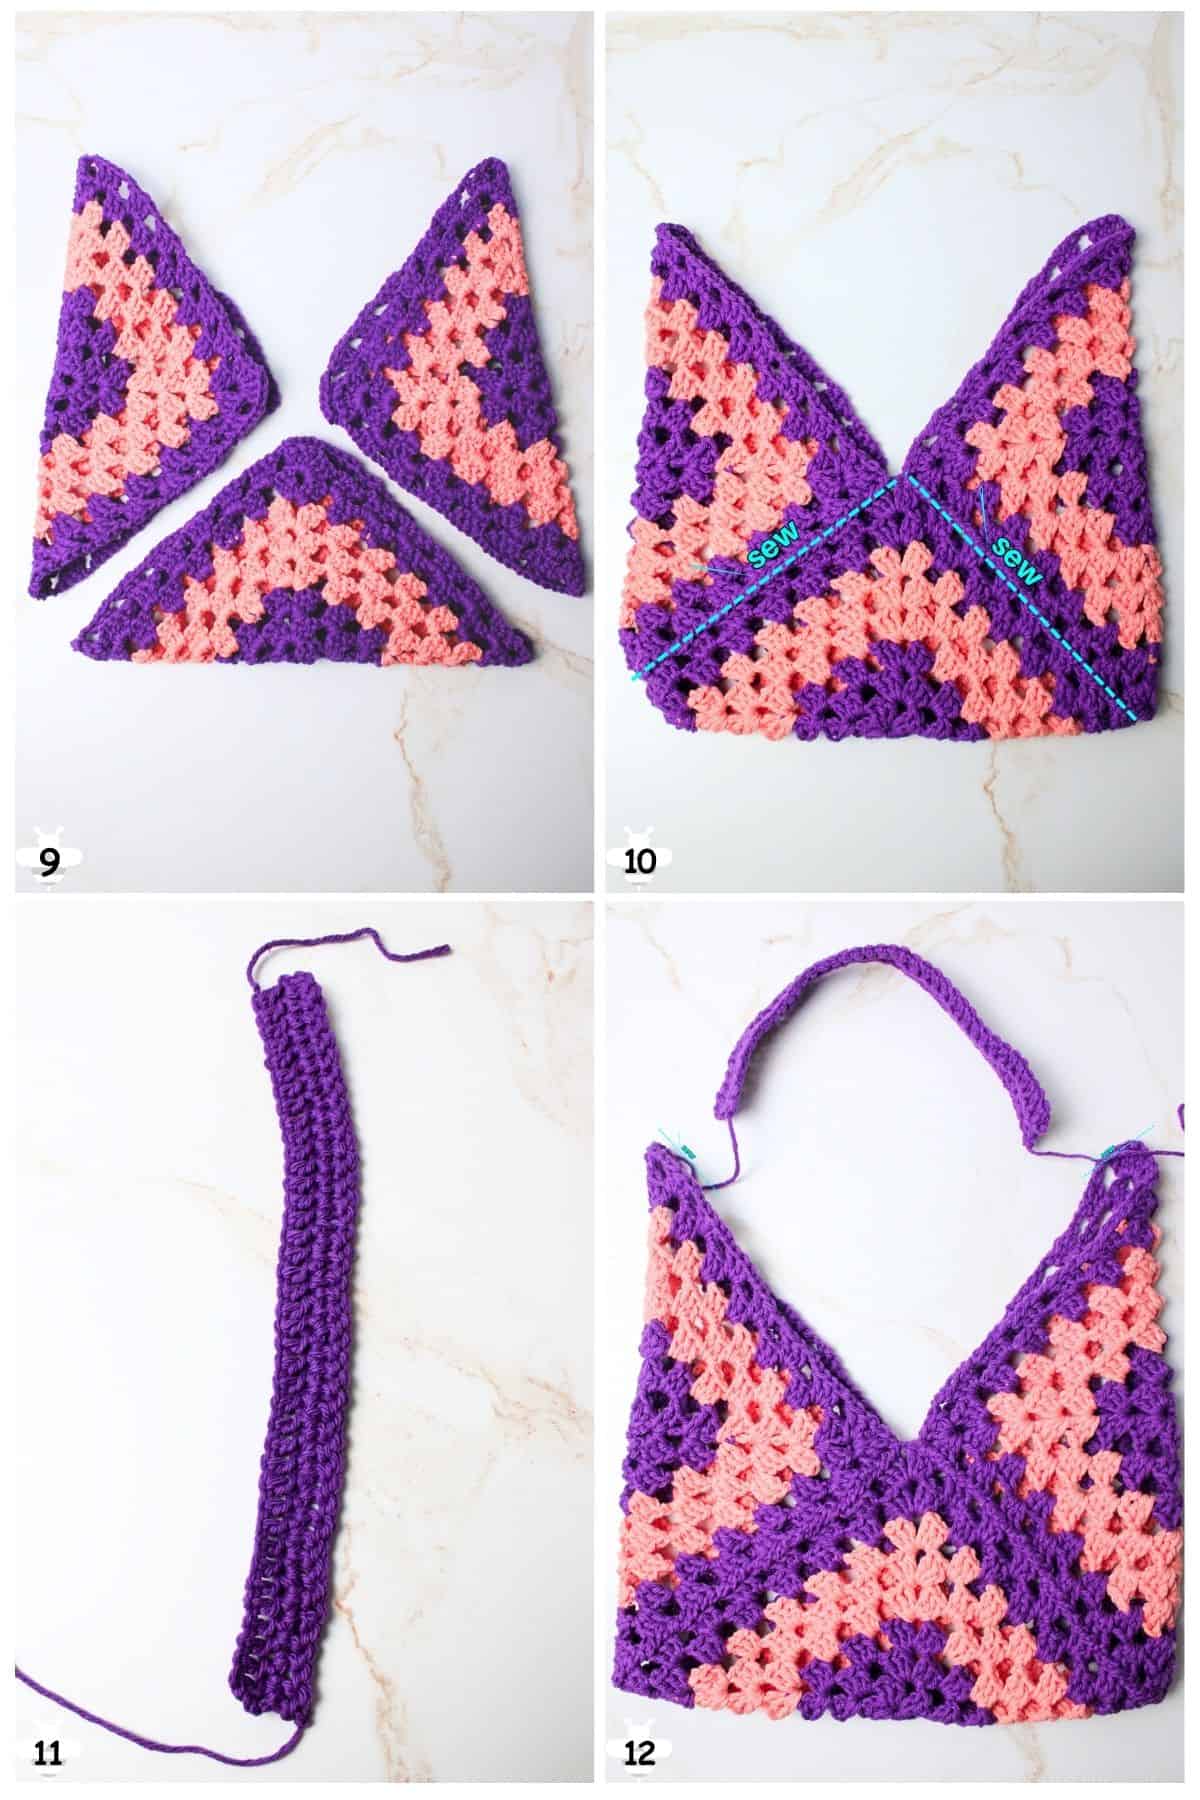
Next, fold the bottom square's tip upward to the center, creating a third triangle pointing toward the middle (Image 9). You should now have three triangular flaps all converging at the center.
Sew or seam the edges where the two top squares touch the bottom square. Work carefully around each side edge until all the edges of the bottom square are attached to the sides (Image 10).
Leave the open edges untied so they can be tied together to close the bag.
Tip: If your granny squares feel too small to tie comfortably, simply add more rounds to make them larger. This will require extra yarn, so plan accordingly.
Optional Handle
- To add a handle instead of ties, chain 42. In the third chain from the hook, double crochet 40 stitches. Chain 2 and turn, then double crochet 40 stitches across. Fasten off (Image 11).
- Attach the handle by sewing each end to the top corners of the folded sides of the bag. (Image 12).
✂️Expert Tips
- Use 100% cotton yarn. It's durable, easy to wash, and holds up well to daily use, especially when carrying food or heavier items.
- Block your squares before seaming. This helps them lay flat and match in size, making assembly much easier and neater.
- Fold and pin before seaming. Lay out the squares and fold them into place first. Pin or clip them to check the shape before committing to stitches.
- Take your time on the corners. Clean corner turns give the granny square a polished look and help the bag fold correctly.
- Don't worry about perfection. Slight size differences in the squares can be adjusted as you seam, cotton has some give.
- Try it with weight. Before finishing the seams, test how the bag hangs with a few small items inside. This helps check alignment and handle tension.
- Not lining it? Weave in ends securely. Unlined bags get more wear inside, so tuck those tails in firmly to prevent unraveling.
🧵Pattern FAQs
A bento bag is a traditional Japanese-style folded bag made from a single piece (or three pieces) of fabric or crochet. Its triangular design folds into a neat, origami-like shape, perfect for carrying lunch, produce, or small items without zippers or buttons.
With sturdy yarn (like 100% cotton) and tight seams, a crochet bag can last for years, even with regular use. Proper care, like gentle washing and drying flat, helps preserve its shape and strength.
Cotton is the best choice for most crochet bags. It's strong, has minimal stretch, and holds up well with repeated use and washing. Lily Sugar'n Cream is a budget-friendly favorite I use in many of my bag patterns.
Nope! You don't need to block your crochet every time-just when you want to reshape it. For bags, a light blocking after the first wash helps smooth edges and even out tension, but after that, a gentle reshape while drying is usually enough.
Cotton is usually better. Acrylic is stretchier and less durable, especially under weight. Cotton keeps its shape, is more heat-resistant (great for food-related bags), and just feels sturdier overall. Save acrylic for things like blankets or plushies instead.
🪢More Homestead and Homemade Favorites


If you tried this Crochet Bento Bag (or any other pattern on my website), please let me know how it went in the 📝 comments below. I'd love to hear from you!
Crochet Bento Bag
Materials
- 200 yd cotton yarn
- 4.5 mm or 5mm crochet hook US 7 or H-8
- Yarn needle
- Scissors
Abbreviations (US terms)
- ch - chain
- dc - double crochet
- sl st - slip stitch
Instructions
Make 3 Granny Squares
- Chain 4, then slip stitch to form a ring.
- Chain 3 (counts as first double crochet), then work 2 double crochets into the ring. Chain 2. Repeat the sequence (3 double crochets, chain 2) three more times around the ring. Slip stitch to join.
- For each round, work 3 double crochet clusters into each side space, and (3 dc, ch 2, 3 dc) into each corner space. This means each corner has two clusters separated by the chain-2 space.
- Continue repeating rounds until your square measures about 8.5-9 inches across.
- Fasten off and make a total of three granny squares.
Layout and Assembly
- Lay the three squares out in front of you so they form two diamonds touching at their corners, with the third square below them touching the full side of each top square.
- Fold the two top squares inward so their outermost points meet in the center, forming two triangles.
- Next, fold the bottom square's tip upward to the center, creating a third triangle pointing toward the middle. You should now have three triangular flaps all converging at the center.
- Sew or seam the edges where the two top squares touch the bottom square. Work carefully around each side edge until all the edges of the bottom square are attached to the sides.
- Leave the open edges untied so they can be tied together to close the bag.
- Tip: If your granny squares feel too small to tie comfortably, simply add more rounds to make them larger. This will require extra yarn, so plan accordingly.
Optional Handle
- To add a handle instead of ties, chain 42. In the third chain from the hook, double crochet 40 stitches. Chain 2 and turn, then double crochet 40 stitches across. Fasten off
- Attach the handle by sewing each end to the top corners of the folded sides of the bag.
Notes
- Use 100% cotton yarn - It's strong, washable, and perfect for holding heavier items.
- Block your squares - Helps them lay flat and match in size for easier assembly.
- Fold and pin first - Shape the bag before seaming to ensure alignment.
- Take your time on corners - Neat corners improve structure and appearance.
- Perfection isn't required - Cotton has give; slight size differences are okay.
- Test with weight - Load it lightly before finishing to check balance and tension.
- Not lining it? - Weave in ends securely to prevent wear and unraveling.


Comments
No Comments