
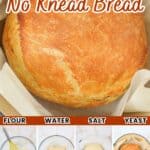
You are going to love this time-saving bread recipe. 2 Hour No Knead Bread is perfect for round loaves and loaf pans, so you can have artisan bread or sandwich bread ready in no time.
Save This Recipe to Your Inbox
By signing up, you’ll join our email list and can unsubscribe anytime.
There's nothing like the smell of good homemade bread! Unfortunately, bread can often require a lot of time and work to knead and rise. This 2 Hour No Knead Bread recipe offers a great alternative to those in a hurry.
If you have more time on your hands, make sure to check out my 5 Ingredient White Bread Recipe too! It takes a little more kneading and patience, but it's perfect for sandwiches.
This bread pairs well with everything from lunch meat to Copycat Texas Roadhouse Butter, Sugar Free Strawberry Jam, and Sugar Free Blueberry Jam.
Serve it up sliced with butter the next time you enjoy a bowl of Cheesy Potato Soup or turn it into lunch for the week. There's nothing better than the taste of homemade bread!
Jump to:
💛 Why You'll Love This Recipe
- Minimal ingredients and effort. While you don't need much to make bread at home, you can feel even better knowing that you don't need as much time and labor to bring the taste of freshly baked bread into your home.
- Two ways to bake it. You can make this 2 Hour No Knead Bread in a loaf pan for sliced sandwich bread, or you can bake it on a baking sheet for a round artisan-looking loaf.
- It's nice and chewy. While this bread isn't as chewy as homemade sourdough bread, it does still have a nice texture. From the chewy crust to the soft, chewy centers, this bread is one of my favorites for making on soup nights. It holds up well to being dunked in chowders, broths, and Tomato Soup Chili.
🛒 Ingredients
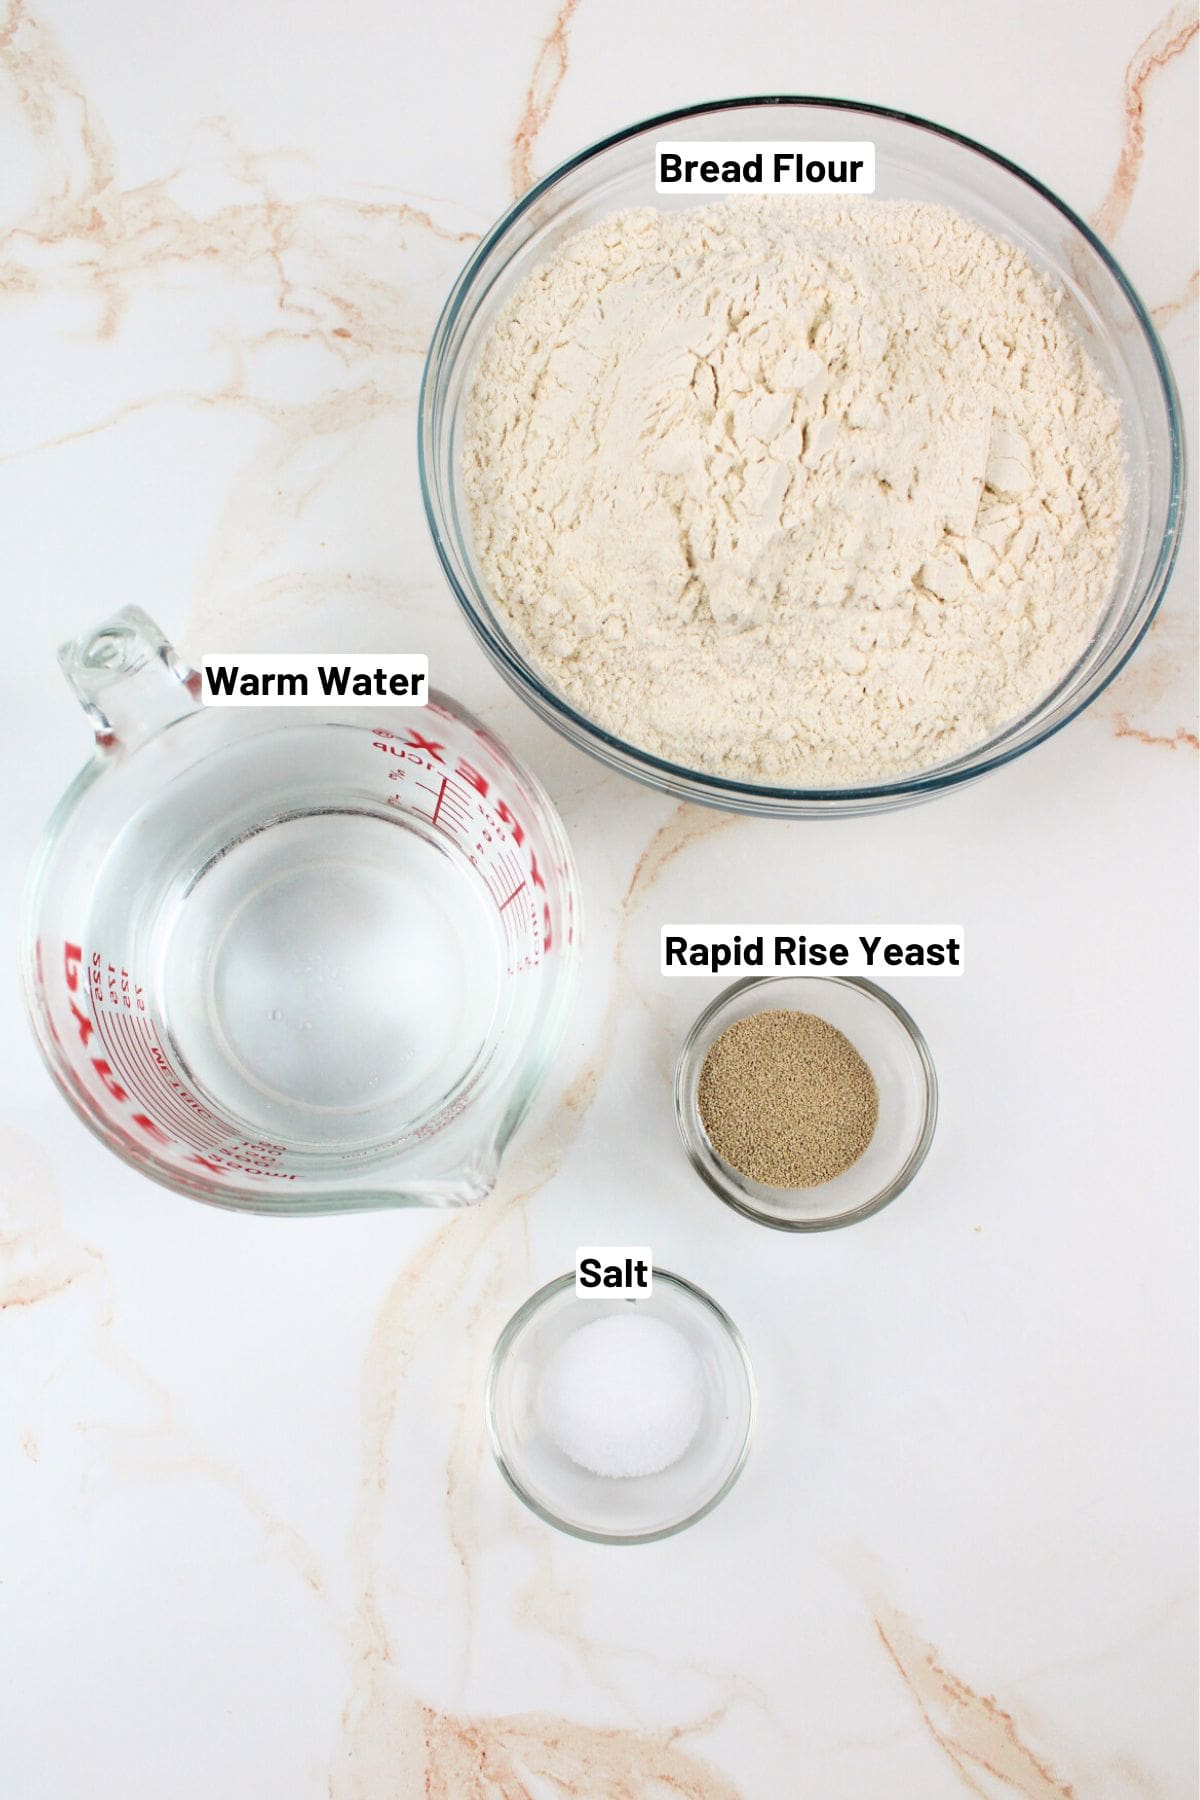
Flour- You'll need some bread flour or all-purpose flour for the gluten structure and base of this recipe. You'll also need a few extra tablespoons of flour for dusting the counter with as you prepare the dough.
Yeast- Use instant or rapid-rise yeast to help our bread proof more quickly.
Water- You'll need warm water to help hydrate the dough and activate the yeast. The ideal temperature will be about 110F.
See the recipe card below for full ingredients and instructions.
🔀 Substitutions & Variations
Flour. You can use all-purpose flour or bread flour for this recipe. Please note that if using bread flour, you may need additional water to hydrate the dough, so if you find your dough is dry, add in a tablespoon of warm water at a time until the consistency is correct.
💰 Budget-Friendly Tips
Use all-purpose flour. Bread flour works great, but all-purpose flour is usually cheaper and still produces a delicious loaf. Just add a splash more water if the dough feels dry. You can also learn How to Make Bread Flour to save additional costs.
Buy yeast in bulk. A jar or bag of yeast is far more cost-effective than individual packets. Store it in the fridge or freezer to extend its shelf life.
Use the bread in multiple meals. Stretch your budget by turning leftovers into toast, garlic bread, croutons, or sandwiches. Our Sourdough French Toast Bake works great for this!
🥄 Instructions for 2 Hour No Knead Bread
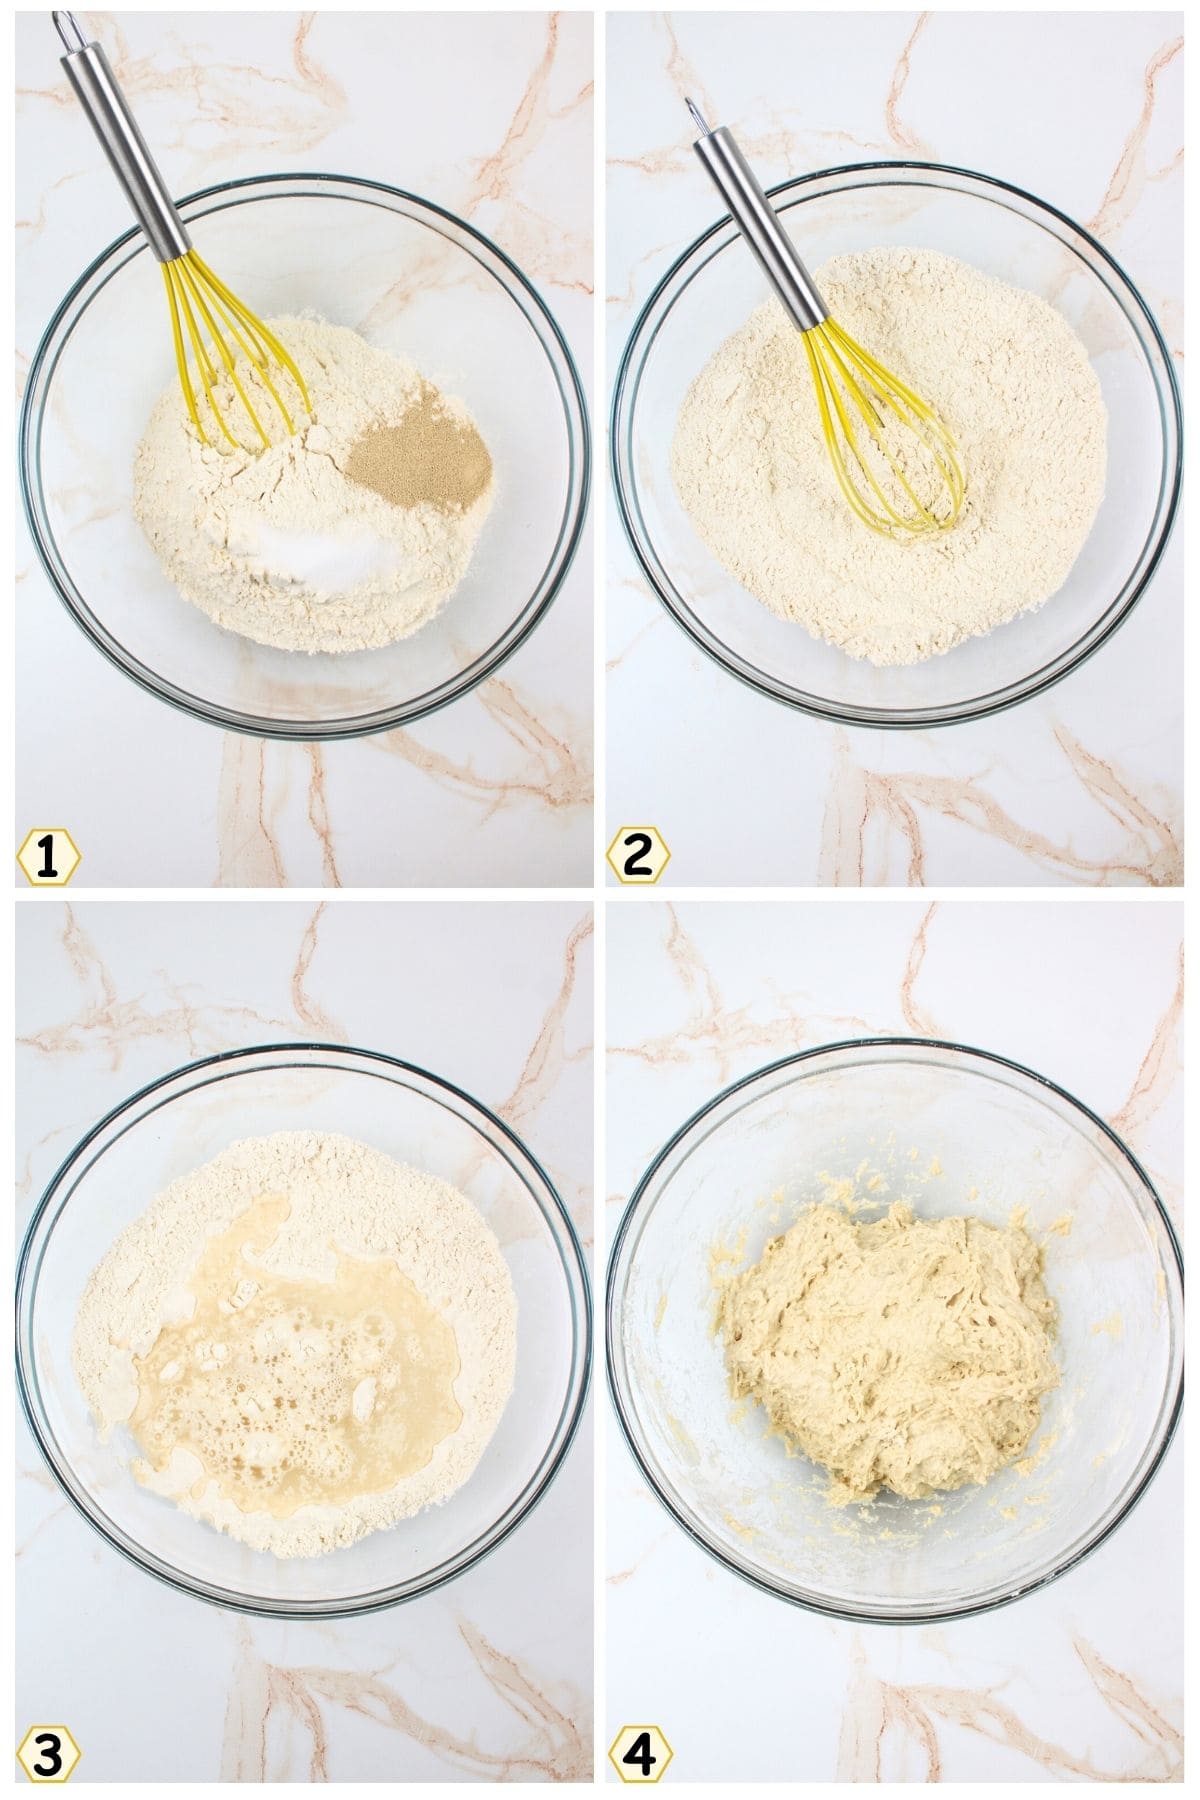
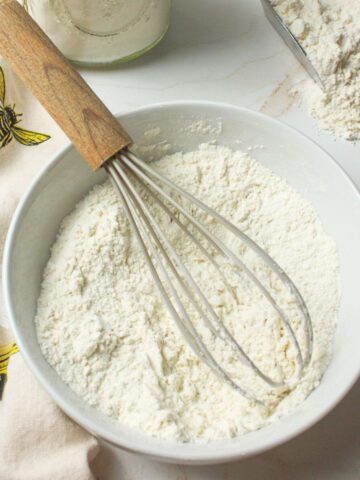
Step 1: Add the flour, yeast, and salt to a large mixing bowl (Image 1).
Step 2: Whisk well to combine (Image 2).
Step 3: Add in your warm water (Image 3).
Step 4: Stir until everything is fully combined (dough will be sticky and shaggy, this is perfect). (Image 4).
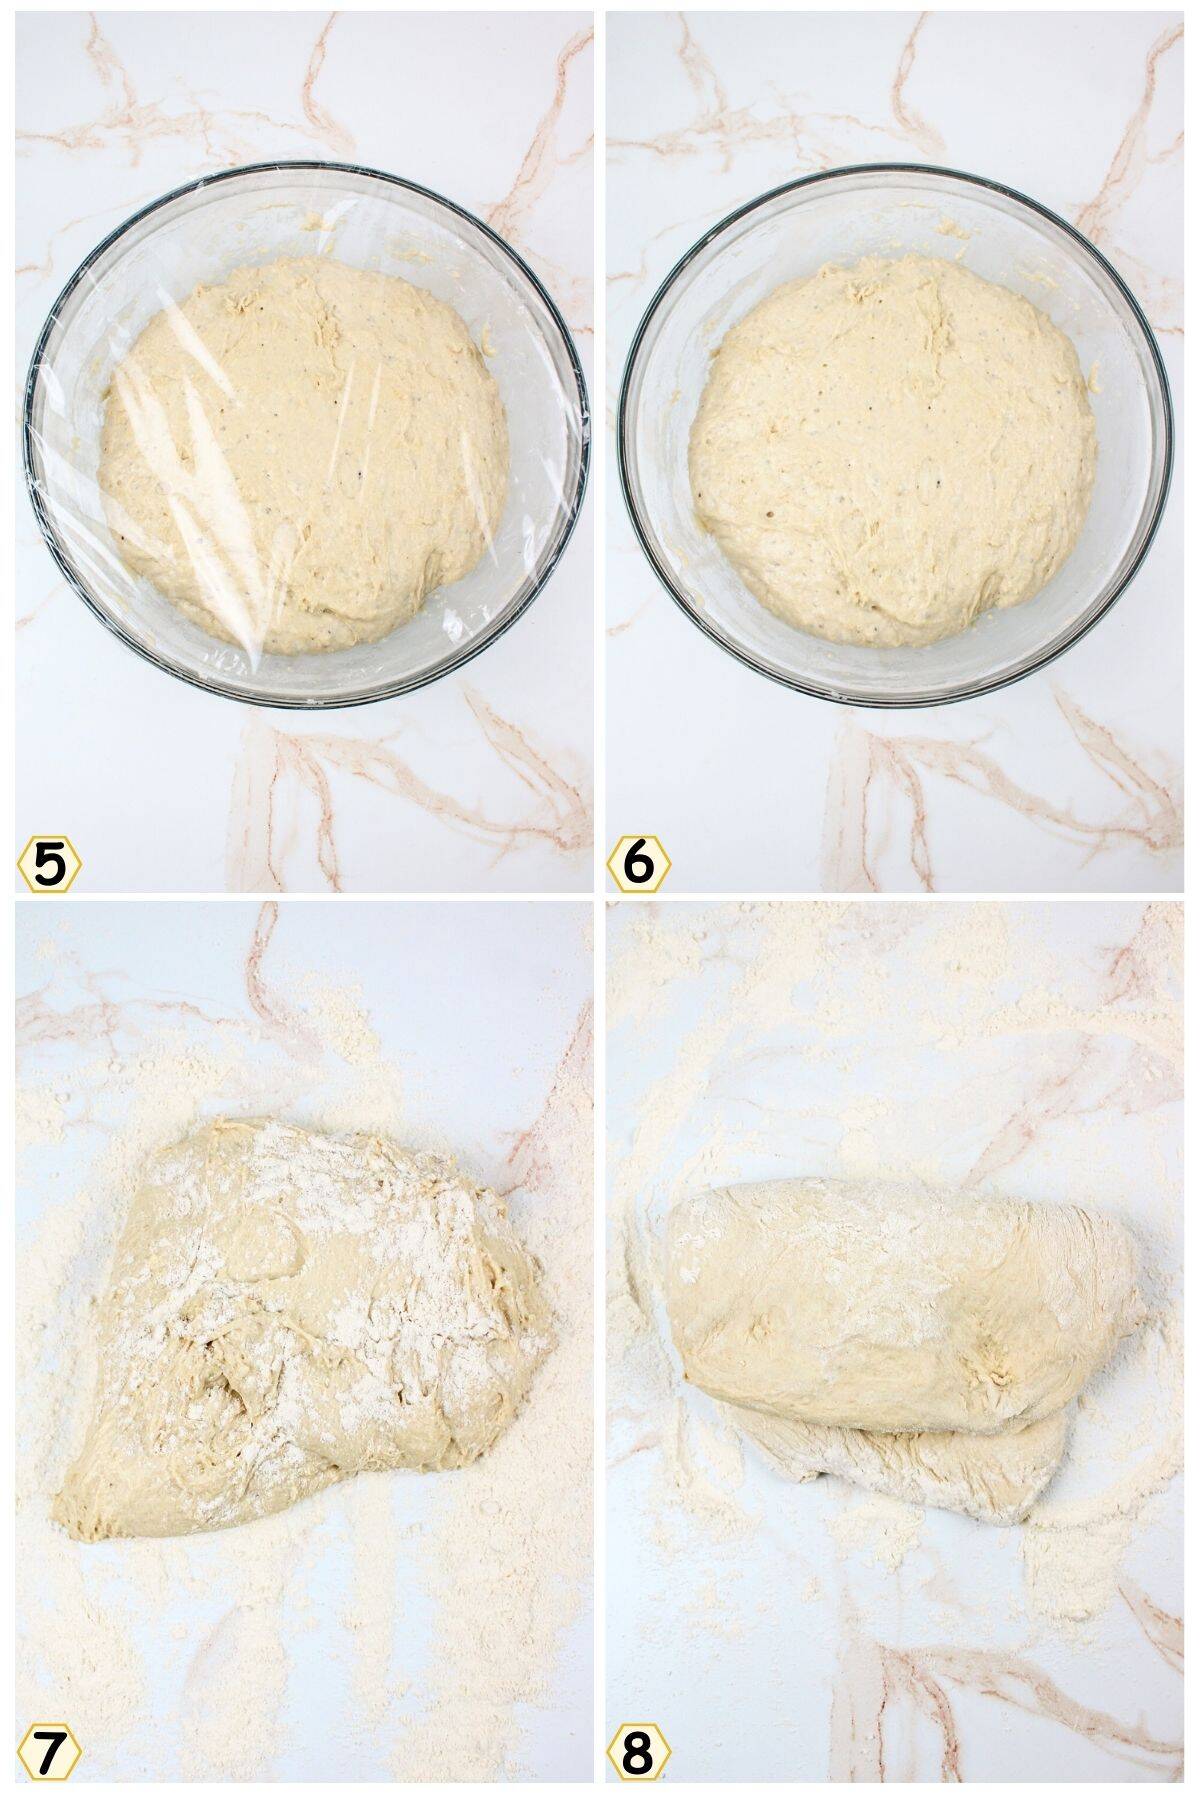
Step 5: Cover the bowl with plastic wrap and let it rest at room temperature for 1 hour. (Images 5& 6)
After the dough has been resting for 40 minutes, place a 3-6 quart Dutch oven with the lid on into a cold oven.
Preheat the oven to 450°F. (This gives the pot enough time to get hot.)
Step 6: When the full hour has passed, generously flour a clean surface. Dump the dough onto the floured surface. Sprinkle a little more flour on top. (Image 7)
Step 7: Fold the dough over itself 10-12 times, pressing gently between folds. (Image 8)
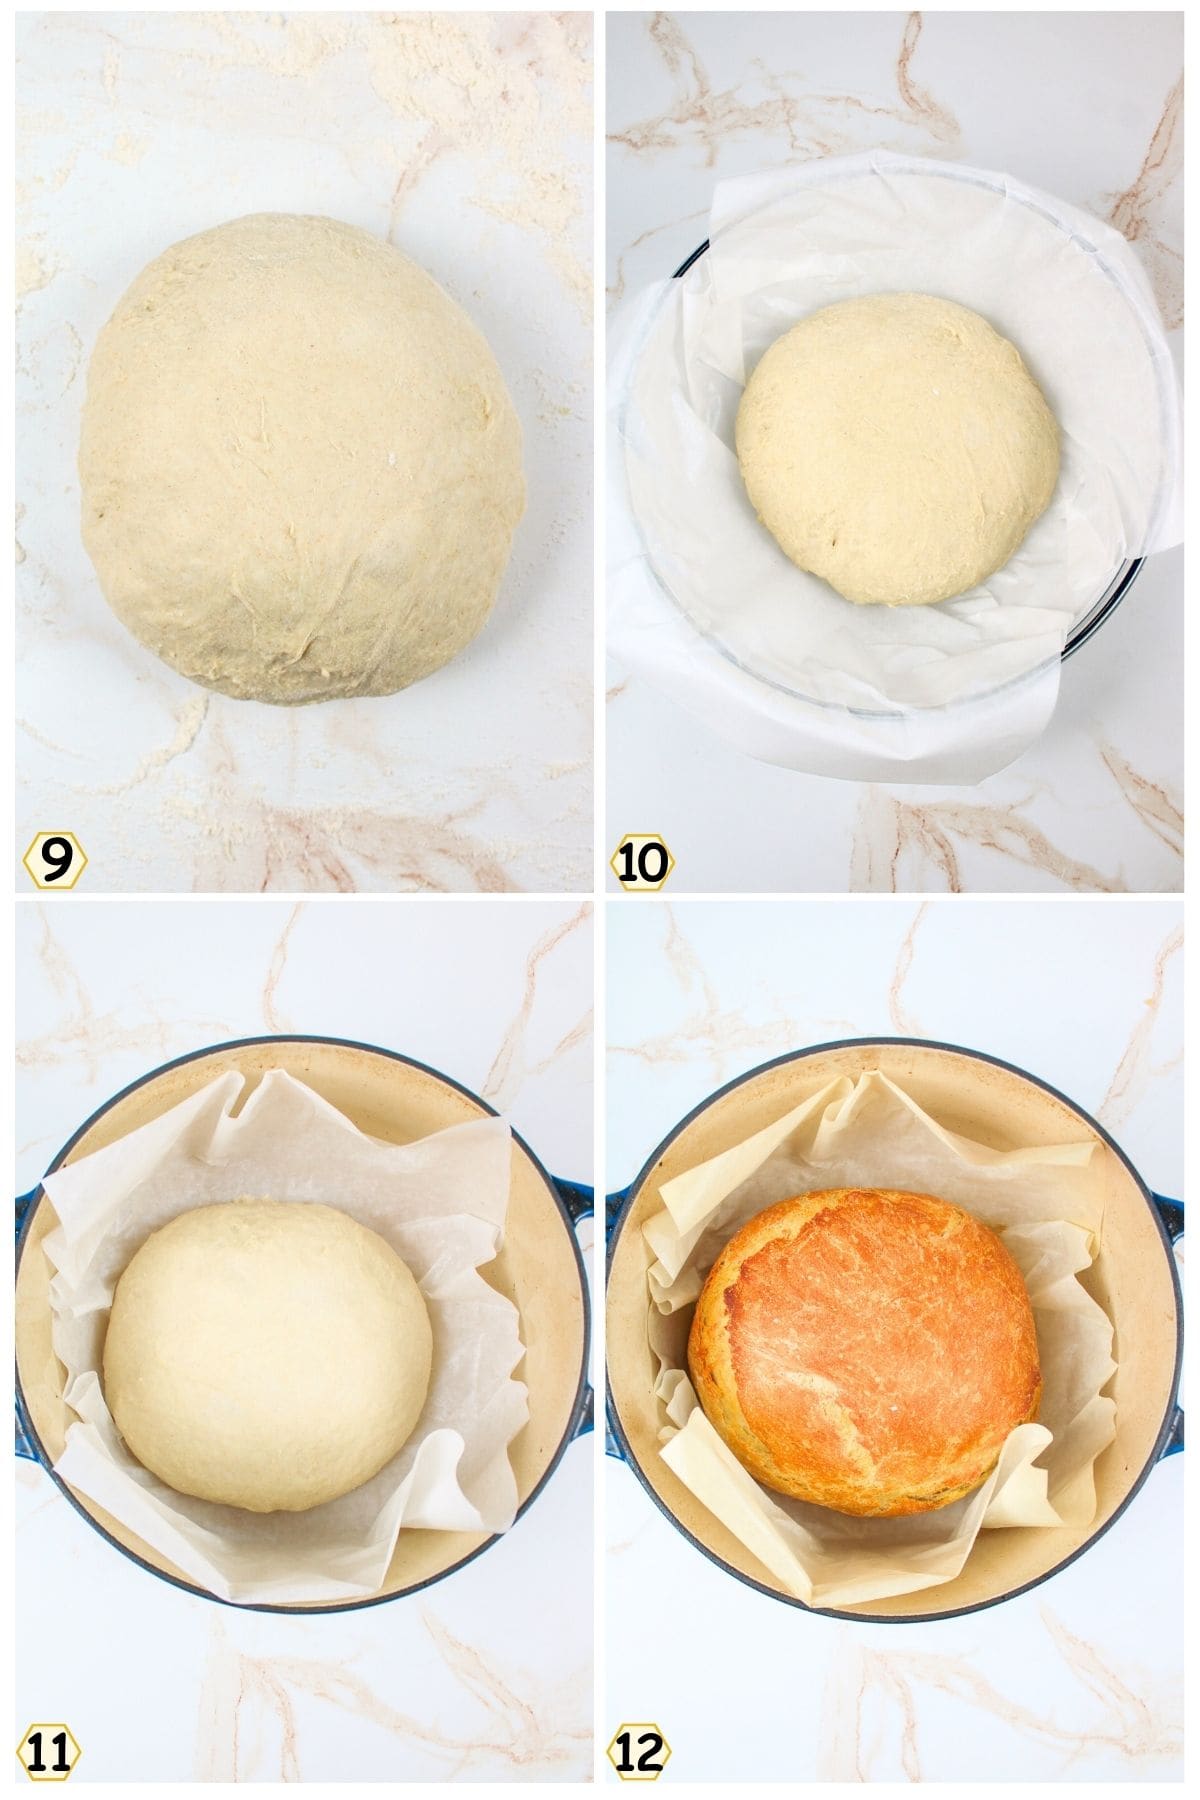
Step 8: Shape into a round ball. (Image 9).
Step 9: Line a medium mixing bowl with parchment paper (not wax paper). Place the dough ball inside the parchment-lined bowl. (Image 10)
Step 10: Cover with a towel and let it rest on the counter for 15 minutes while the oven finishes preheating. Carefully remove the hot Dutch oven using oven mitts.
Step 11: Lift the parchment paper by the edges and lower the dough (parchment and all) into the hot pot. (Image 11) Cover with the lid and bake for 30 minutes.
Step 12: Remove the lid and bake uncovered for 10-15 minutes more, until the top is golden brown and the bread sounds hollow when tapped. (Image 12)
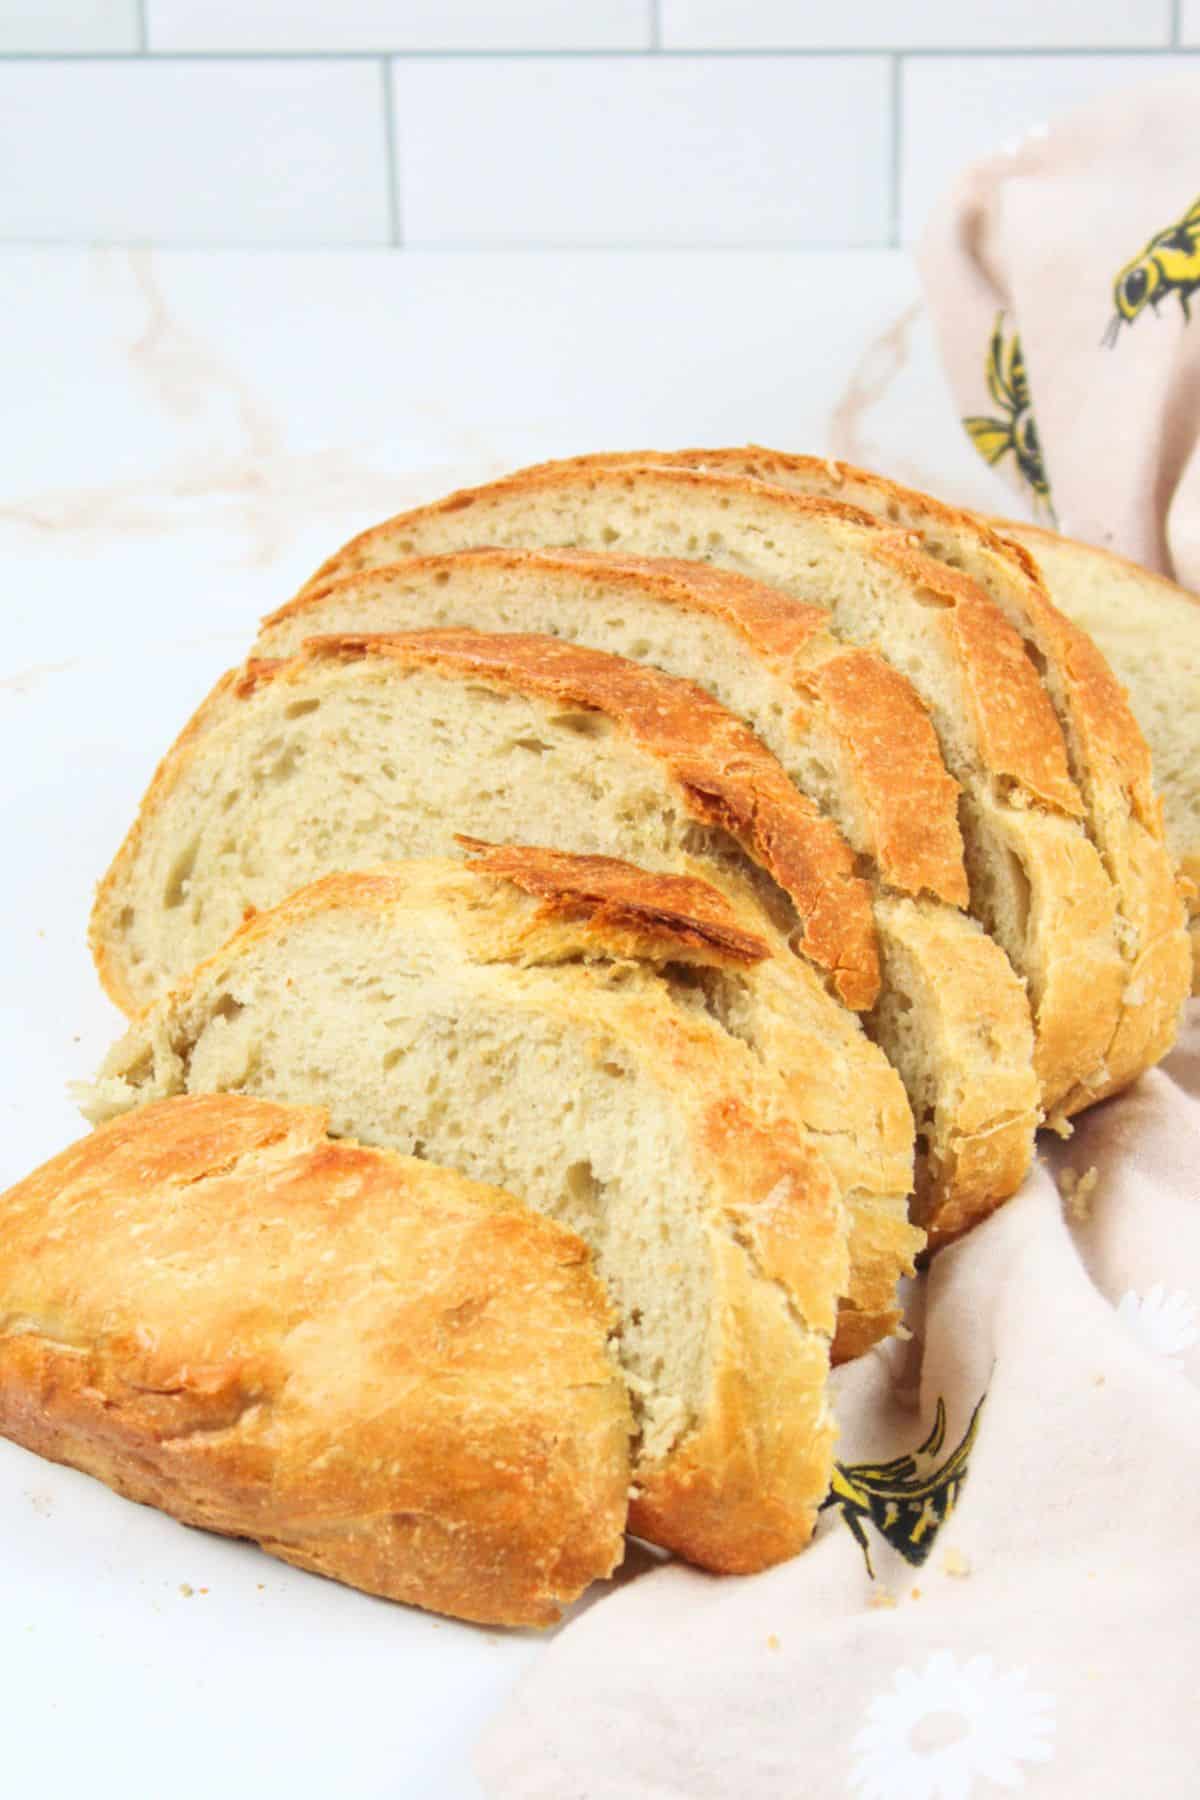
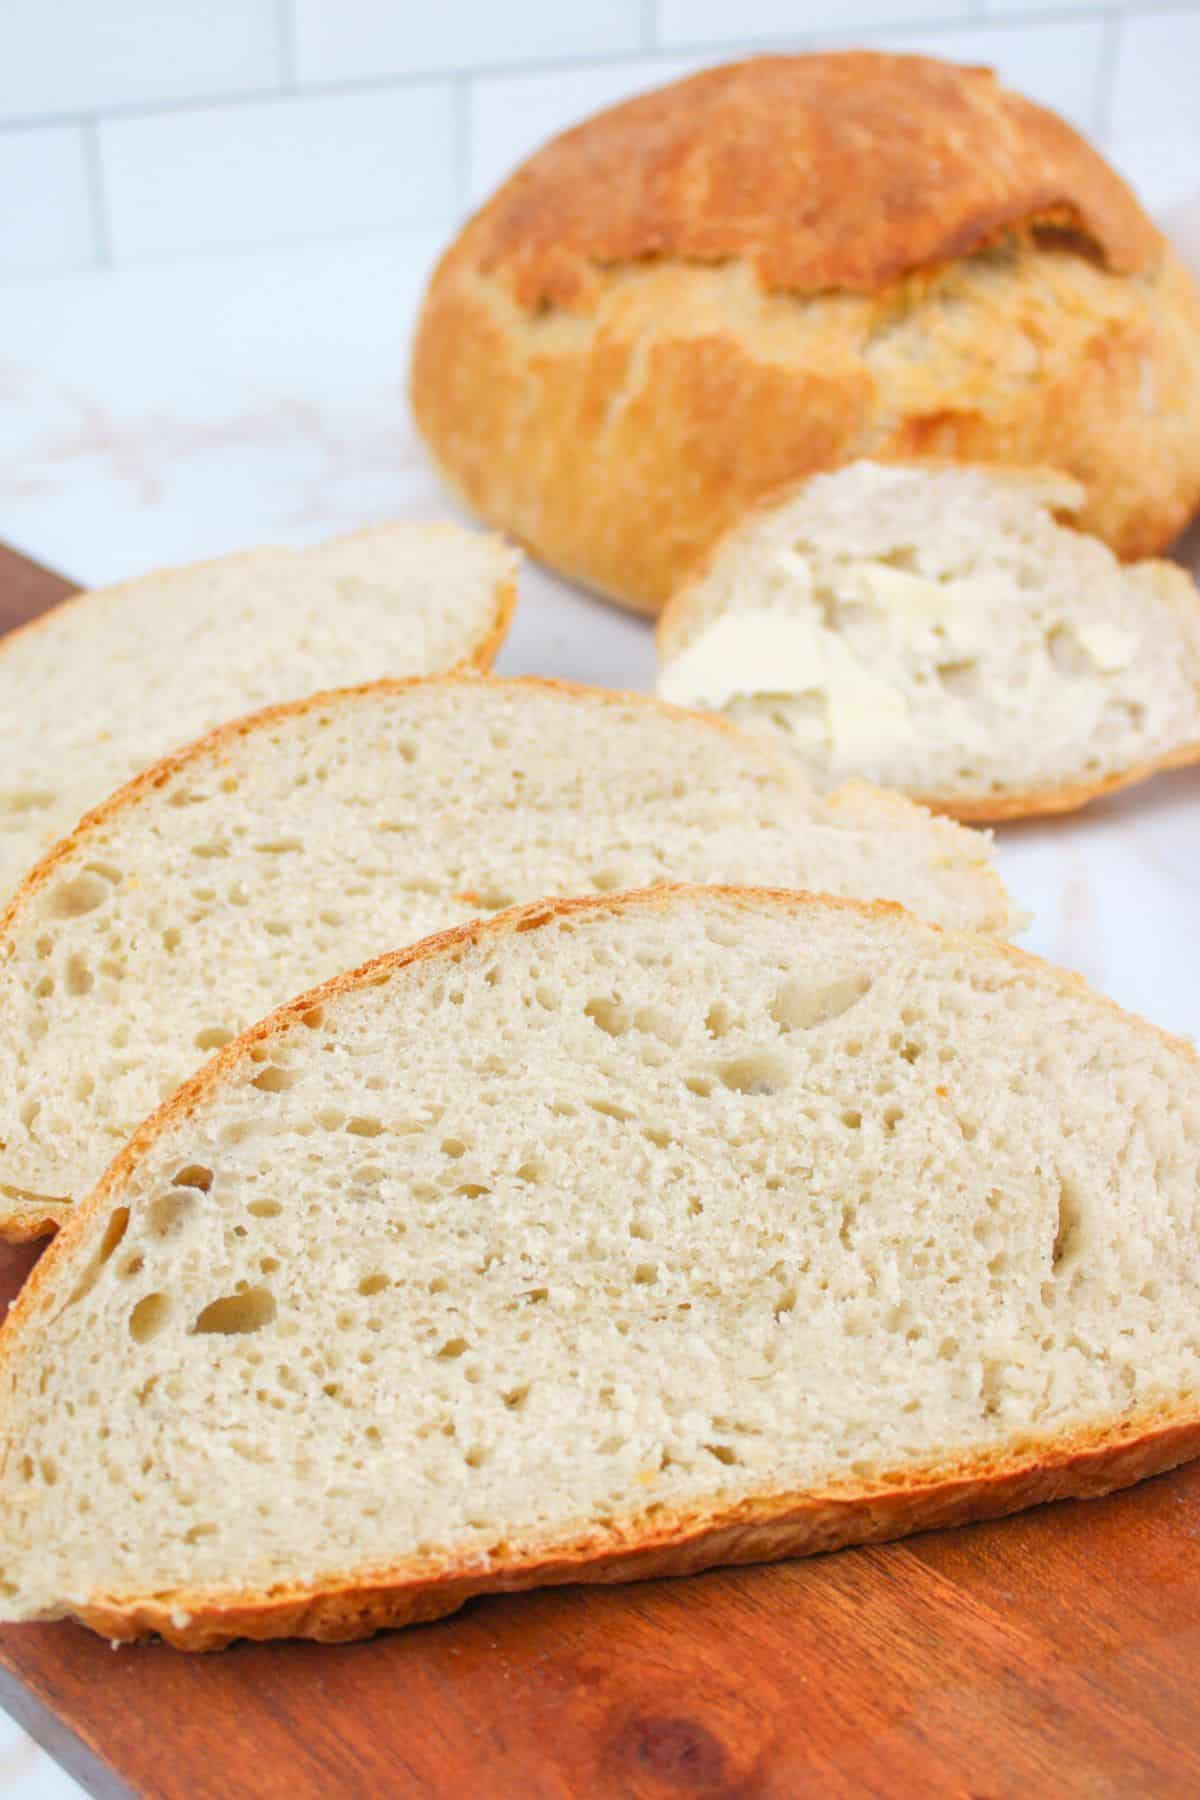
Step 13: Transfer the loaf to a cooling rack and let it cool at least 30 minutes (1 hour is best to avoid gummy slices).
Slice, serve, and enjoy!
👩🏻🍳 Expert Tips
Bread Shapes: Bake this 2 Hour No Knead Bread as a round artisan loaf on a sheet pan or shape it into a log and use an 8x4 loaf pan for sandwich-style slices. Rise and bake times stay the same.
Check the Temperature: Bake until the internal temp reaches 195-200°F. Undercooked bread will be gummy; overcooked bread will be dry.
Avoid Dense Bread: Slicing too early, underbaking, or not folding the dough enough can make the loaf dense. Let it cool fully before cutting so the crumb sets.
Proofing Time Varies: Dough rises differently depending on room temp, humidity, and yeast freshness. Don't focus on the clock, look for the dough to double in size.
Creating a Warm Proofing Spot: Cover the bowl with greased plastic wrap and place it somewhere warm, like an oven with the light on or a microwave with the door closed.
❄️ Storage
Room Temperature: Store your bread in an airtight container or bread bag for 3-5 days. Homemade bread dries out faster because it contains no preservatives.
Freezing: Wrap tightly in plastic wrap and freeze up to 3 months. Thaw at room temperature. Avoid refrigerating, as it speeds up drying.
🥗 Side Dishes or Pairing Ideas
This 2 Hour No Knead Bread pairs perfectly with soups and comfort meals like Cheesy Potato Soup, chowders, and Tomato Soup Chili. It's also great with Copycat Texas Roadhouse Butter, jams, lunch meat, and simple sandwiches.
- Roasted Tomato and Garlic SoupRecipe $3.36 / Serving $0.84
- Egg Drop SoupRecipe: $1.54 | Per Serving: $0.77
- Apple Jelly (for Canning)Recipe $7.13/ Half-Pint $1.46
- Small Batch Orange MarmaladeRecipe $1.38 / Serving $0.69


❓ Recipe FAQs
When you price it out, making your own bread can be cheaper than buying storebought. It's also tastier because there are fewer additives and fillers. Unfortunately, it doesn't last as long, so you have to eat it quickly or freeze it or later.
The main ingredients in bread are flour, salt, yeast and water. You need flour (of some kind) as the base, salt for flavor enhancement, yeast for the dough to rise (unless making sourdough) and then some liquid to hydrate the dough and activate the yeast. Sometimes sugar is added to feed the yeast, but it's not always necessary.
I recommend using active dry yeast for homemade bread recipes but my favorite yeast to use is the kind you find in jars and keep stored in the fridge as it stays freshest longest and gives the best fluff to my loaves.
Begin by baking your bread at the specified temperature in the recipe. After baking, ensure the bread cools completely before slicing to avoid a gummy texture. Cutting too soon can make the bread gummy.
🍽️ More Recipes You'll Love
- Blueberry Cream Cheese BabkaRecipe $2.32 / Serving $0.23
- Vegan Slider BunsRecipe $1.19 / Serving $0.10
- Banana Nut BagelsRecipe $2.94 / Serving $0.49
- Clone of a Cinnabon Cinnamon Roll RecipeRecipe $6.89 / Serving $0.57


🐝 If you tried this 2 Hour No Knead Bread, please leave a ⭐️ star rating and share your buzz in the 💬 comments below. I'd truly appreciate it!
📖 Recipe

2 Hour No Knead Bread
Ingredients
- 3 cups all-purpose flour or bread flour - ($0.75)
- 2 teaspoons instant yeast or RapidRise yeast, 1 packet - ($0.38)
- 1 teaspoon salt - ($0.01)
- 1 ½ cups warm water, about 110°F - ($0.00)
- 2 tablespoons all-purpose flour, for shaping - ($0.01)
Instructions
- Mix dough. Whisk together the flour, yeast, and salt in a large mixing bowl, then pour in the warm water and stir until fully combined. The dough will be sticky and shaggy.
- Rest. Cover the bowl with plastic wrap and let rest at room temperature for 1 hour.
- Preheat Dutch oven. After 40 minutes, place a 3 to 6 quart Dutch oven with the lid on into a cold oven and preheat to 450°F.
- Shape dough. Generously flour a clean surface, turn the dough out, lightly flour the top, fold over itself 10 to 12 times, and shape into a round ball.
- Final rest. Line a bowl with parchment paper, place the dough inside, cover with a towel, and rest for 15 minutes while the oven finishes heating.
- Bake. Carefully remove the hot Dutch oven, lower the dough in using the parchment paper, cover, and bake for 30 minutes. Remove the lid and bake uncovered for 10 to 15 minutes until golden brown and hollow sounding.
- Cool. Transfer to a cooling rack and cool at least 30 minutes, preferably 1 hour, before slicing.
Notes
- Substitutions. All-purpose or bread flour both work. Bread flour may need a small splash of extra water if the dough feels dry.
- Variations. Shape as a round loaf on a baking sheet or bake in a loaf pan.
- Storage. Store at room temperature in an airtight container for 3 to 5 days or freeze for up to 3 months. Avoid refrigerating.
Nutritional Information
Save This Recipe to Your Inbox
By signing up, you'll join our email list and can unsubscribe anytime.


Comments
No Comments