
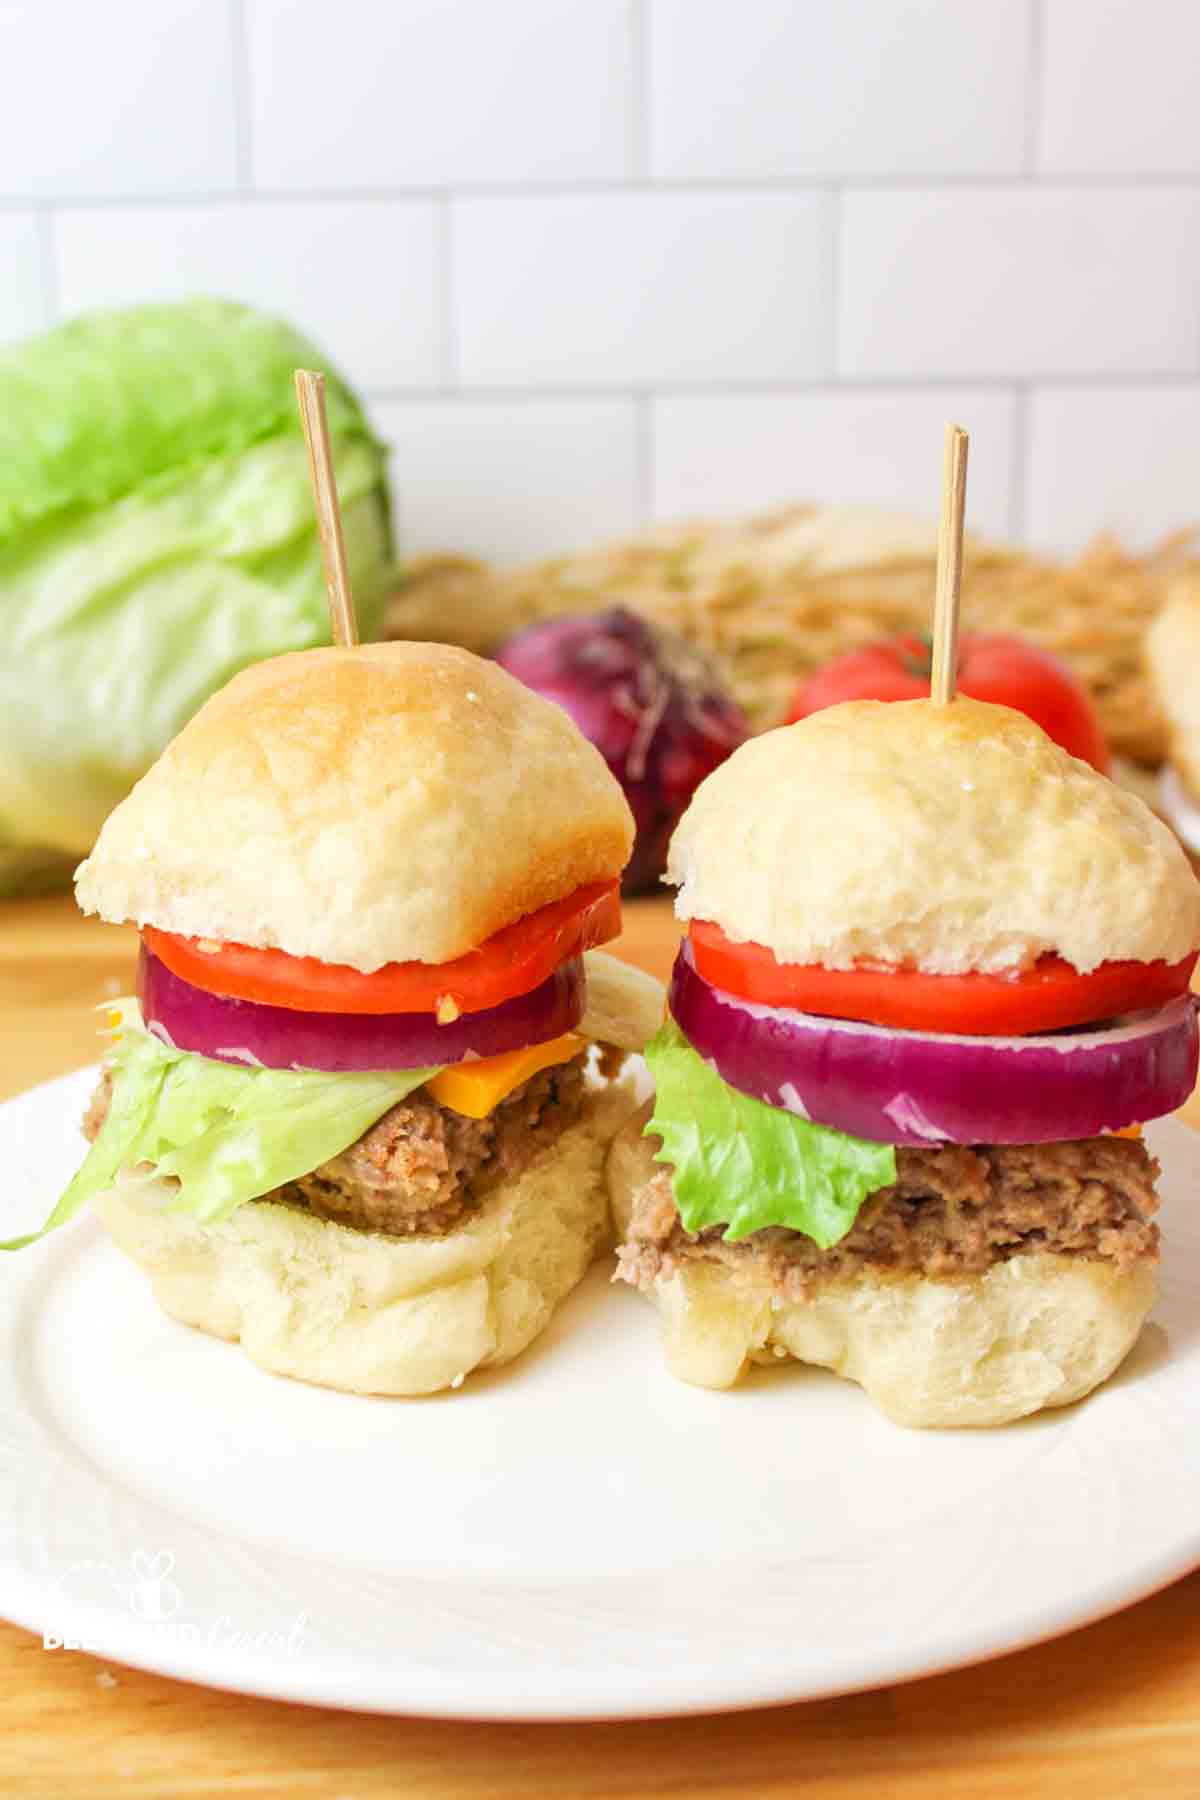
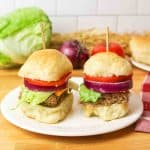
These vegan slider buns contain no dairy or eggs but still give us a fluffy, chewy bread perfect for your next BBQ. Use these vegan slider rolls for appetizers or a main course, but make enough for everyone because they're going to go fast.
Save This Recipe to Your Inbox
By signing up, you’ll join our email list and can unsubscribe anytime.
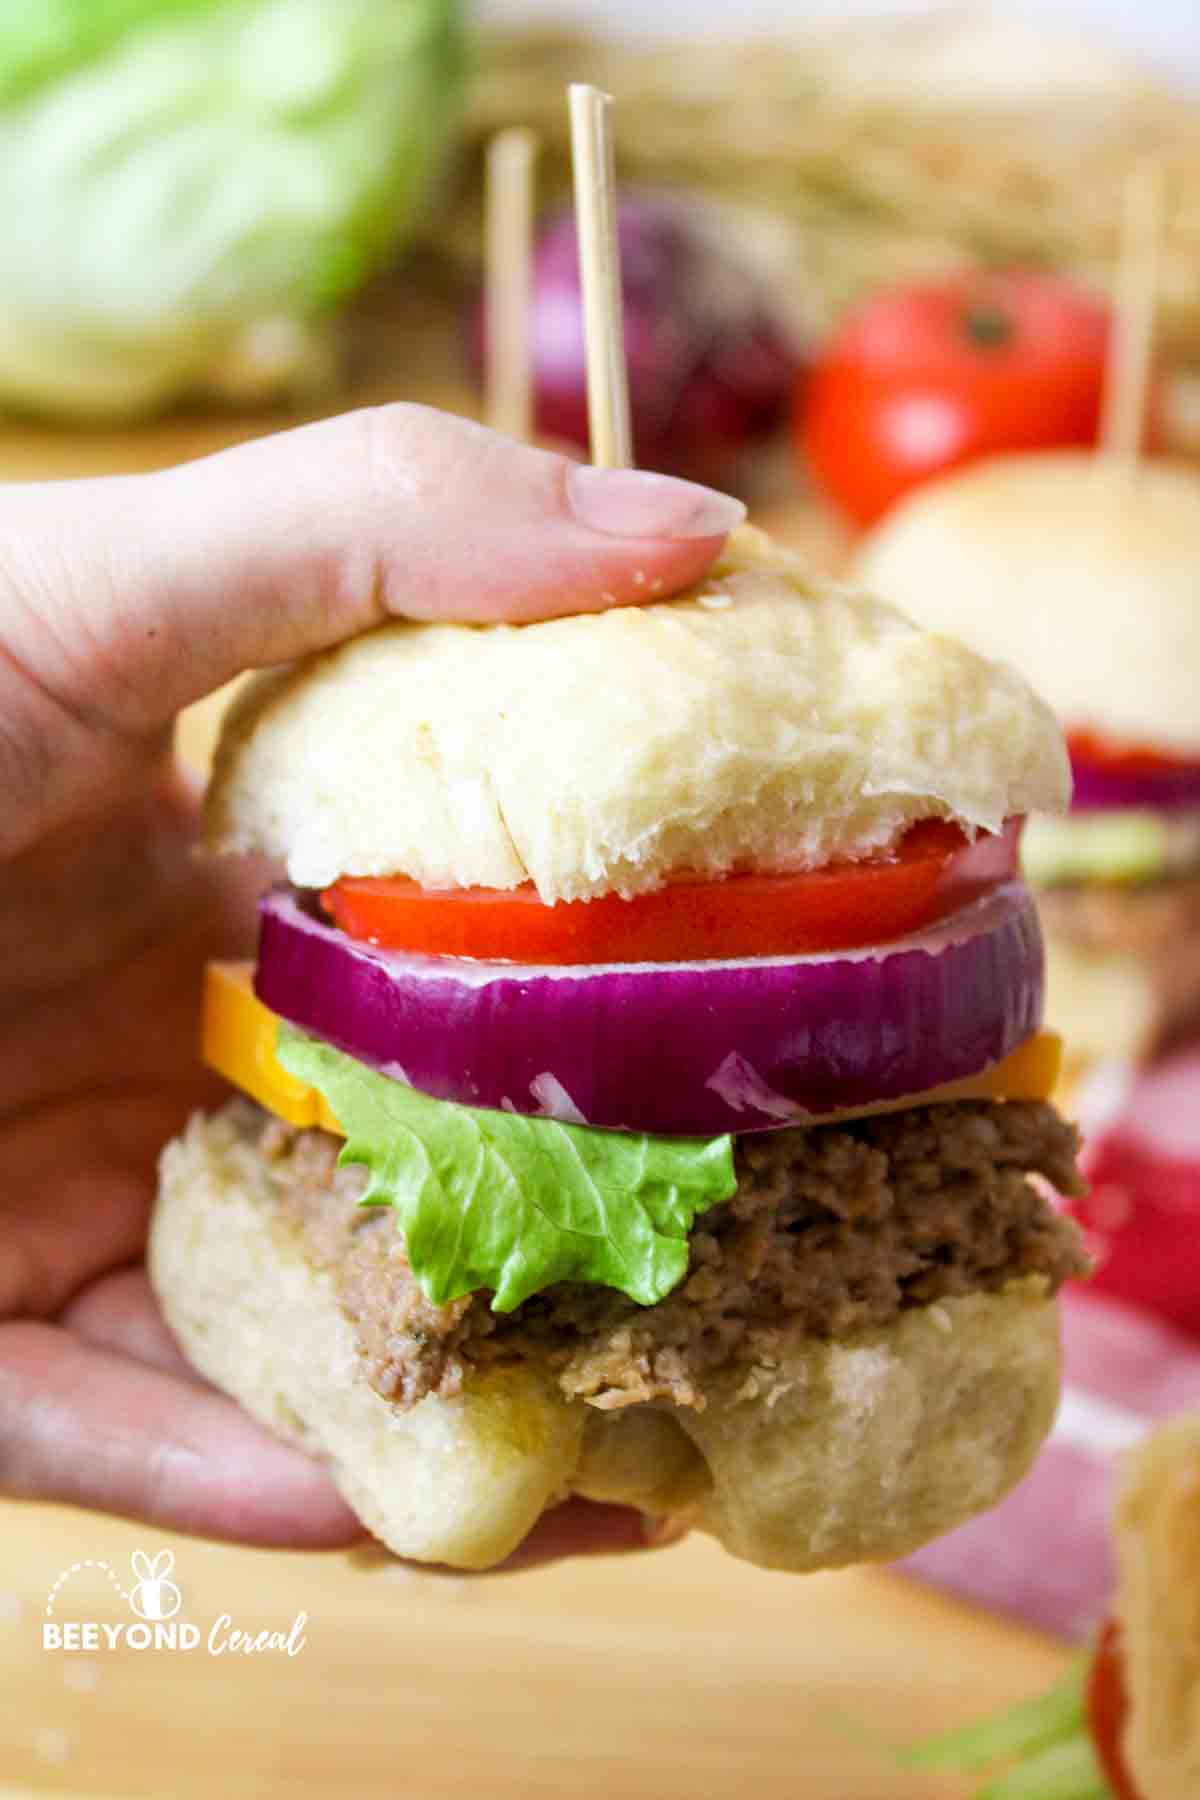
Use your mini slider buns for burgers or sandwiches when you want something small but easily handheld. Adapted from my 5 Ingredient White Bread Recipe, these sliders can be great for parties and tailgates because one batch makes plenty to share, and every sandwich is a perfect size.
Homemade slider buns are a delightful addition to any event. They offer all the flavor and texture you expect from traditional slider buns. Creating these Vegan Slider Buns at home allows you to control the ingredients and tailor them to your tastes too.
These are the BEST slider buns and are perfect for finger foods, tailgates, and more. Serve them up as regular-sized buns by making Vegan Hamburger Buns if you want.
Jump to:
💛 Why You'll Love This Recipe
- Perfect for any occasion. These easy slider buns are great for lunches, appetizers, tailgates, and parties, especially paired with Air Fryer Tortilla Chips and Tomato Jalapeño Salsa.
- Simple and sturdy. With just a few ingredients and about 10-15 minutes of hands-on time, you get soft buns that hold fillings well. Think Easy Yeast Rolls for Beginners, but built for sliders.
- Versatile crowd-pleasers. Use them for burgers, meatball subs, ham and cheese, or any favorite slider combo.
🛒 Ingredients
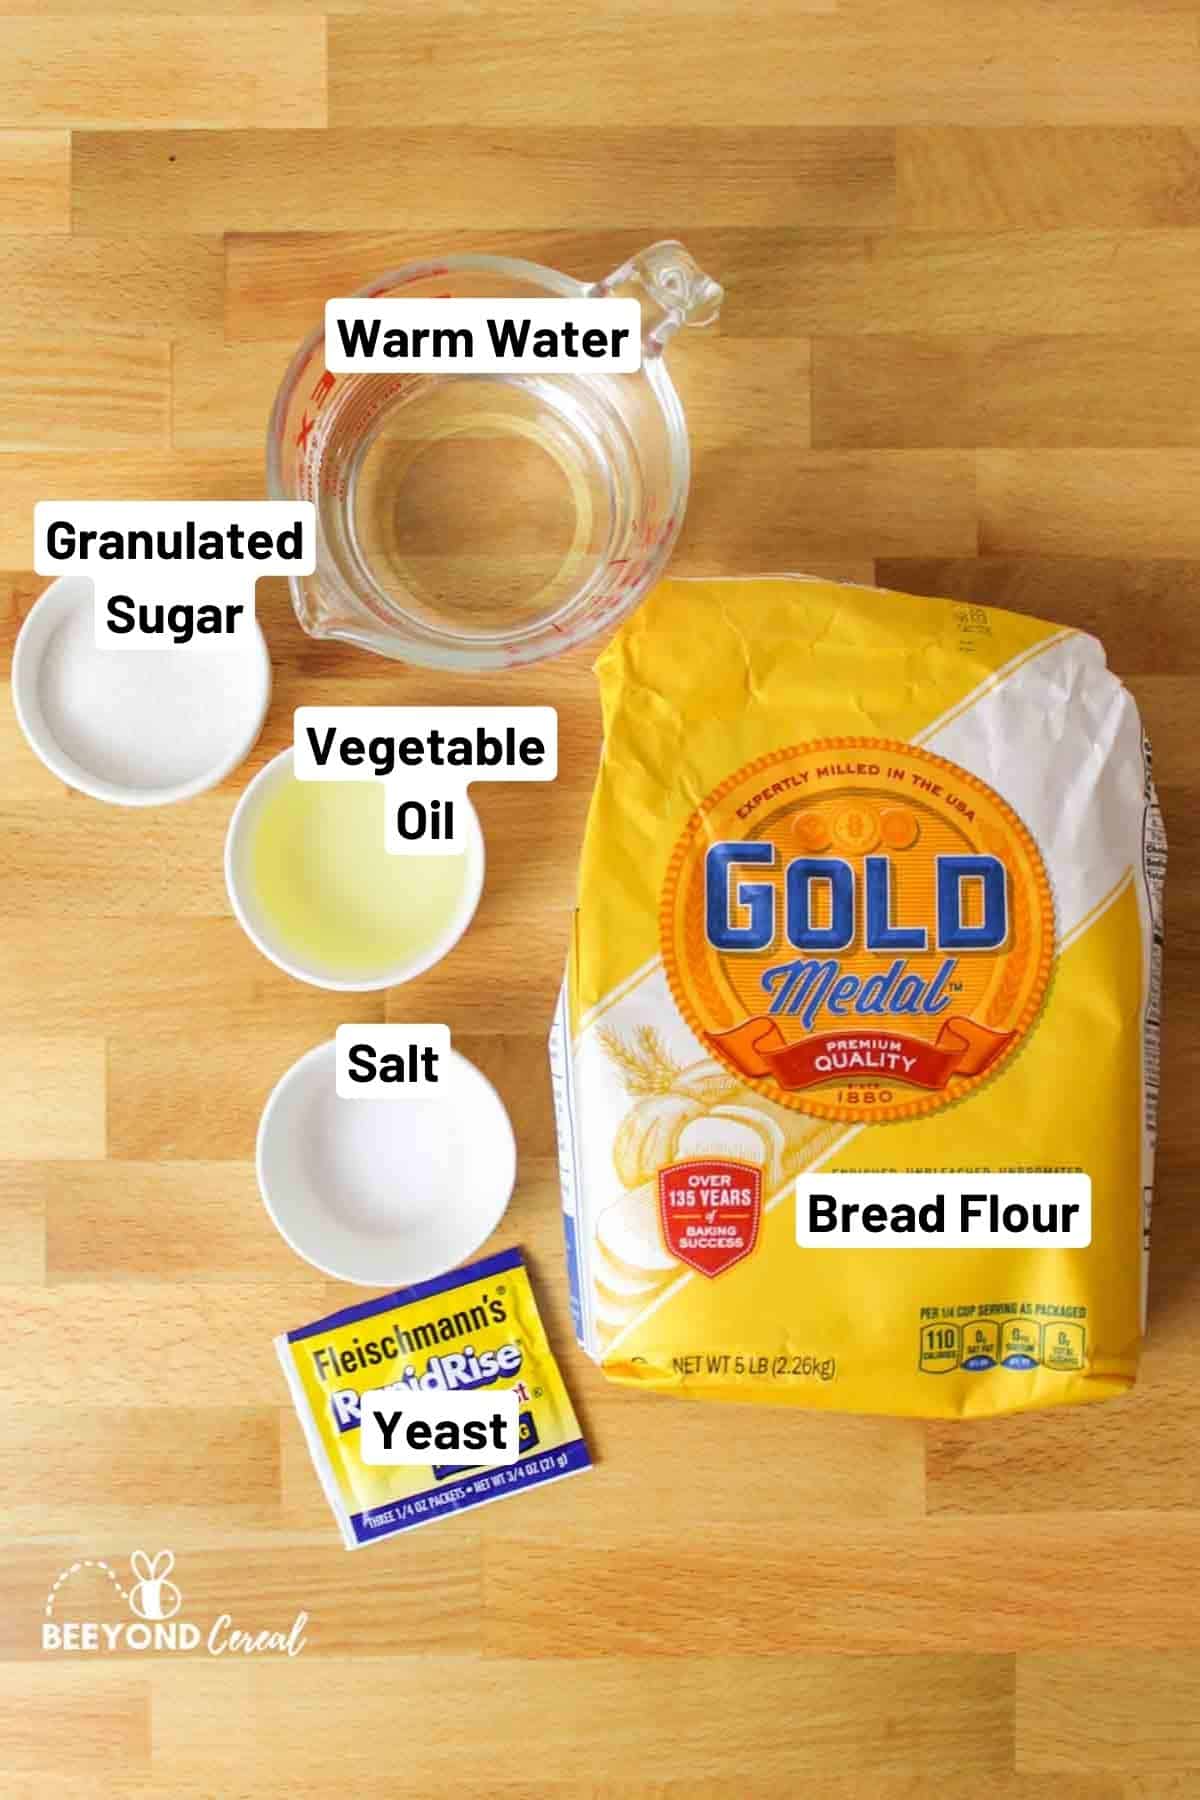
Flour - All-purpose or bread flour both work, but bread flour gives a slightly better texture and sturdier crumb thanks to its higher protein.
Water - Use lukewarm water (about 110°F). Too hot can kill the yeast, and too cool will slow rising.
Sugar - This doesn't make the bread sweet; it simply feeds the yeast so the dough rises properly.
See the recipe card below for full ingredients and instructions.
💰 Budget-Friendly Tips
Use pantry staples. Flour, yeast, oil, and sugar keep this recipe inexpensive and easy to make anytime.
Freeze for later. Extra slider buns freeze beautifully, so you can make one batch and stretch it across multiple meals.
Perfect portion size. Smaller buns mean less meat and fewer toppings per sandwich, which helps keep meals budget-friendly.
🥄 Instructions for Vegan Slider Buns
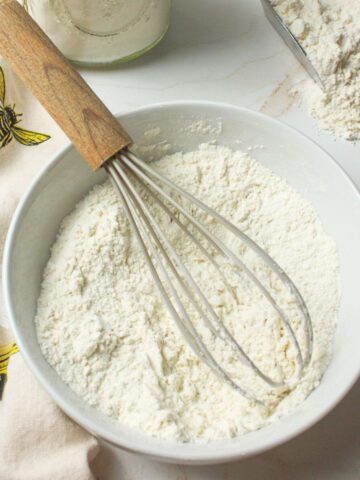
Step 1: In a bowl, whisk together the flour, yeast, and salt.
Step 2: Make a well in the center and add to it the sugar, oil, and water.
Step 3: Stir to combine.
Step 4: Knead the dough on a floured surface for about 10 minutes until smooth and elastic. Feed it more flour as needed to get it no longer sticky. You may need to add up to another cup of flour.
Step 5: Place in a greased bowl and cover. Let rise until doubled, about 1 hour in a warm place.
Step 6: Punch down and divide into 12 equal sized pieces. I like to roll them into balls, flatten them and then tuck the edges up and underneath, so I create a rounded top (like a bell shaped mushroom) so that they bake with a smoother appearance on top.
Step 7: Place into a greased 9x13 baking dish. There will be space between each roll.
Step 8: Cover again and rise until doubled (about another hour). The rolls should be touching their neighbors now.
Step 9: Bake in the oven at 400 degrees F for 15 minutes or until golden brown on top.
Step 10: Brush the top with a vegan butter spread or olive oil immediately after removing them from the oven.

👩🏻🍳 Expert Tips
- Use fresh yeast. Old or expired yeast can lead to flat slider buns. When in doubt, start with a new packet.
- Knead until elastic. Knead on a floured surface for about 10 minutes until the dough is smooth, stretches without tearing, and springs back when poked.
- Proof by size, not time. Rising can take 30 minutes to 3 hours depending on warmth and yeast strength. The dough is ready when it doubles in size.
- Sesame seed buns. Brush tops with aquafaba before baking to help seeds stick. Olive oil works, but aquafaba holds better.
- Check doneness. Buns should feel firm and sound hollow when tapped. Wrinkling as they cool is normal and means the inside is soft and moist.
❄️ Storage, Reheating & Make Ahead
Storage: Store cooled Vegan Slider Buns in an airtight container or zip-top bag at room temperature for up to 3 days. For longer storage, freeze for up to 3 months.
Reheating: Warm buns in a 300°F oven for 5-7 minutes or microwave briefly until soft. Cover with a damp paper towel when microwaving to prevent drying.
Make Ahead: Prepare the dough through shaping, then cover and refrigerate overnight before the second rise. Let buns sit at room temperature for about 30 minutes before baking.
🥗 Side Dishes or Pairing Ideas
These slider buns are perfect with classic mini burgers, pulled pork, or shredded chicken sliders. They also work great for meatball subs, ham and cheese sliders, or breakfast sliders with eggs and sausage. Serve alongside fries, potato salad, coleslaw, or a simple side salad for an easy, well-rounded meal.
- Red Potato SaladRecipe $5.78 / Serving $0.58
- Deviled Egg Pasta SaladRecipe $6.14 / Serving $0.51
- Classic Macaroni Pasta SaladRecipe $4.37 / Serving $0.55
- Strawberry Cottage Cheese SaladRecipe $7.61 / Serving $0.63


❓ Vegan Slider Buns FAQs
Slider buns are like dinner rolls that have been split in half and filled like a sandwich. You can make them into just about any type of sandwich from loose meat to ham and cheese to a cheeseburger or parmesan chicken sandwich. The options are truly limitless and what makes sliders great is that they're small and compact so you can eat multiple or save room for other appetizer-type foods.
We love using the bread machine for recipes like Bread Machine Bagels, but it's great for bread dough too! You can make these homemade slider buns in a bread machine by adding in all of the ingredients in the order of your bread machine manual. Then close the lid and set it to dough cycle. Once proofed, punch it down and divide it out into rolls, place it into a greased baking dish to proof again, and then bake as directed on the recipe card.
When dividing the dough into 12 little balls, if you have a kitchen scale handy, measure the lumps out into about 2 ounce-sized balls. I think mine all came up to about 2.10 ounces, and that's what gave me 12 rolls of the exact same size. Your actual measurement may vary though as you could use more or less flour than I did, so just measure the dough as a whole and divide by 12.
🍽️ More Recipes You'll Love
- Vegan Banana Bread with ApplesauceRecipe $1.52 / Serving $0.15
- Vegan Apple Upside Down CakeRecipe $2.22 / Serving $0.28
- Spiced Vegan Apple Bundt CakeRecipe $4.76 / Serving $0.40
- Eggless Banana BreadRecipe $1.73 / Serving $0.17

🐝 If you tried these vegan slider buns, please leave a ⭐️ star rating and share your buzz in the 💬 comments below. I'd truly appreciate it!
📖 Recipe
Vegan Slider Buns
Ingredients
- 1 cup warm water, about 110°F - ($0.00)
- 2 ¼ teaspoons active dry yeast, one packet - ($0.38)
- 2 tablespoons granulated sugar - ($0.05)
- 3 tablespoons vegetable oil or olive oil - ($0.42)
- 2 ½ cups all-purpose flour or bread flour - ($0.33)
- 1 ½ teaspoons salt - ($0.01)
Instructions
- Make dough. In a large bowl, whisk together the all-purpose flour, active dry yeast, and salt. Make a well in the center and add the granulated sugar, oil, and warm water. Stir until a dough forms.
- Knead. Turn the dough out onto a floured surface and knead for about 10 minutes, until smooth and elastic. Add additional flour as needed until the dough is no longer sticky.
- First rise. Place the dough in a lightly greased bowl, cover, and let rise in a warm place for about 1 hour, until doubled in size.
- Shape rolls. Punch down the dough and divide into 12 equal portions, about 2 ounces each. Shape into smooth balls by flattening slightly and tucking the edges underneath to create rounded tops.
- Second rise. Arrange the rolls in a greased 9x13-inch baking dish, spacing evenly. Cover and let rise again for about 1 hour, until doubled and touching.
- Bake. Preheat the oven to 400°F. Bake for about 15 minutes, until golden brown on top.
- Finish. Brush the tops with vegan butter or olive oil immediately after baking.
- Bread machine option. Add ingredients to the bread machine in the order recommended by the manufacturer and run the dough cycle. When complete, continue with shaping and baking steps above.
Notes
- Dough test. Properly kneaded dough should feel springy and slowly fill in when poked.
- Portioning. Divide dough into 12 equal pieces for evenly sized rolls.
- Topping option. For sesame rolls, brush with a vegan egg wash and sprinkle with sesame seeds before baking.
- Cooling. Rolls will feel firm when hot and soften as they cool. Light wrinkling on top indicates good moisture retention.
Nutritional Information
Save This Recipe to Your Inbox
By signing up, you'll join our email list and can unsubscribe anytime.


Comments
No Comments