

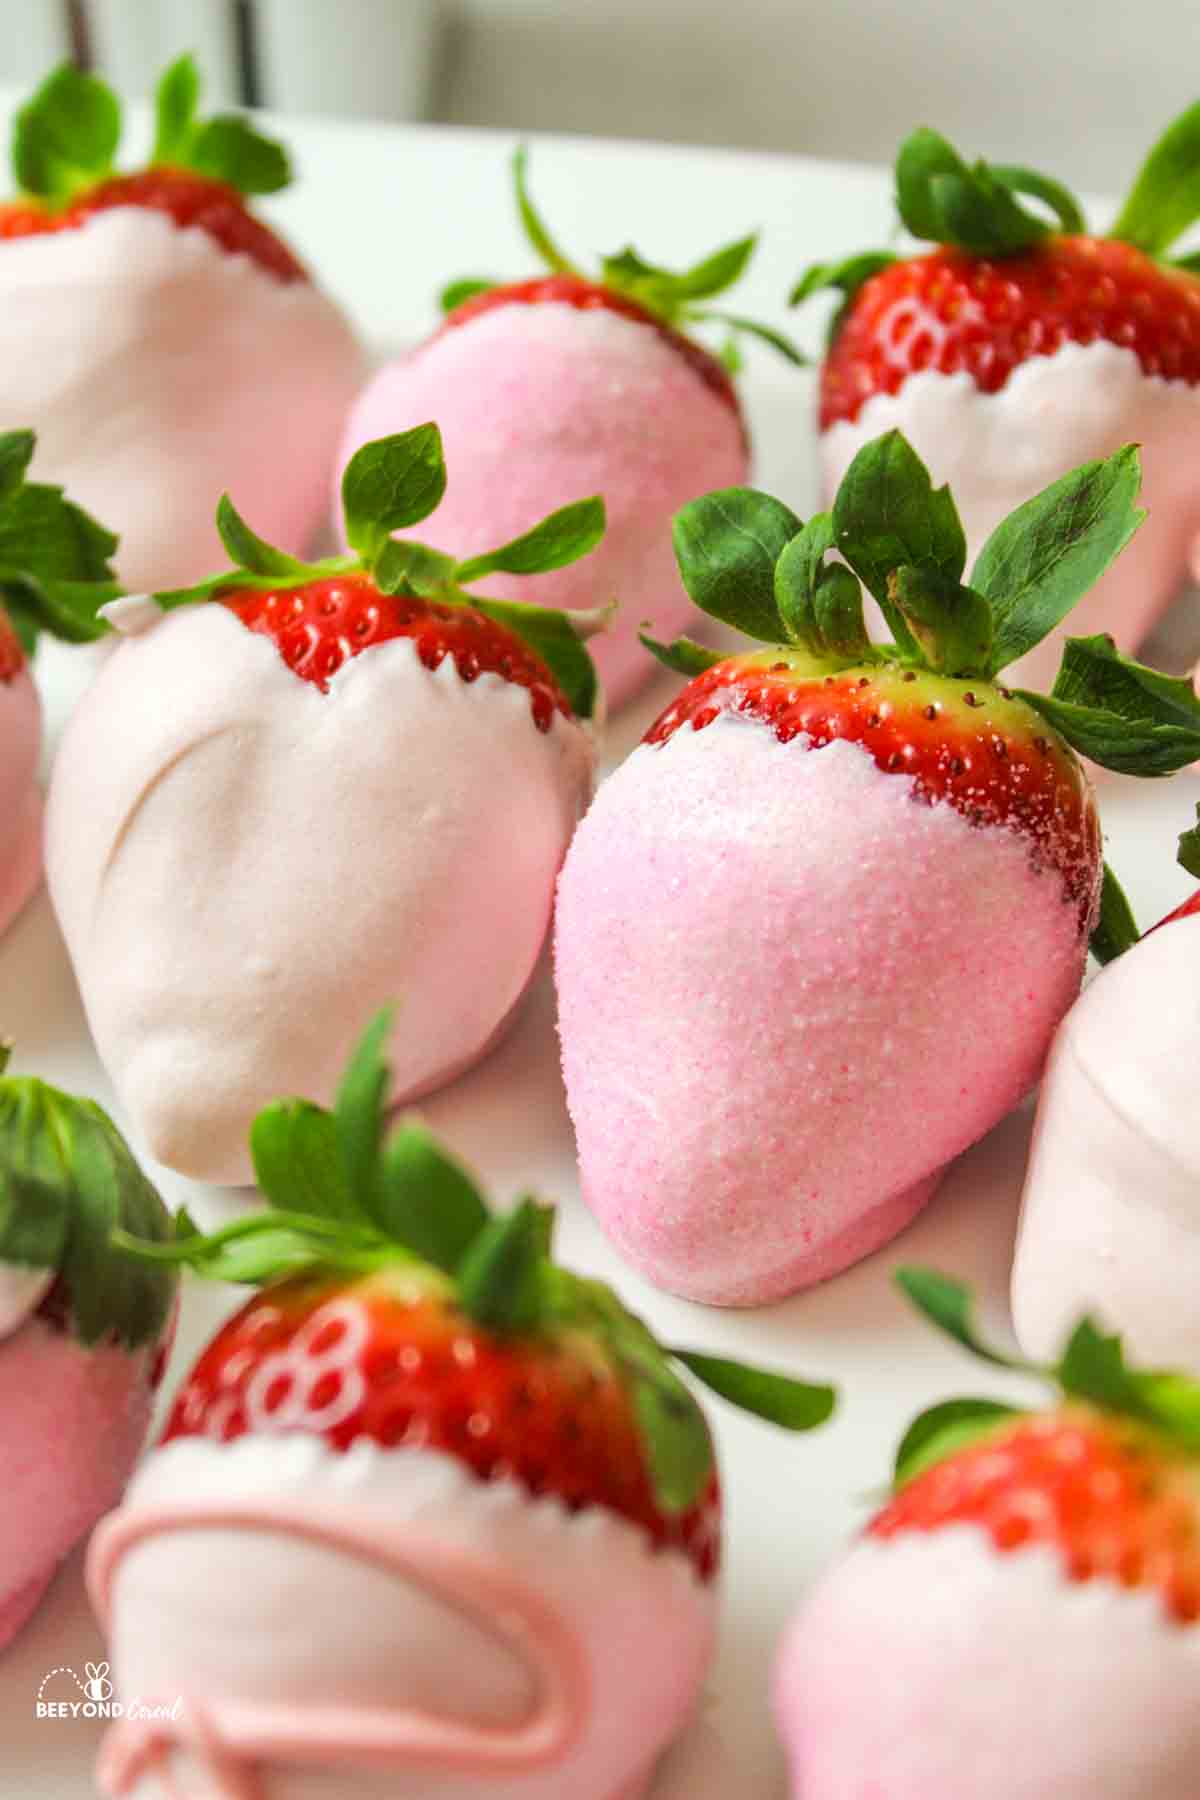
These pink chocolate covered strawberries are a super simple and easy to make dessert that's perfect for any occasion from baby showers to Valentine's Day and more!
Save This Recipe to Your Inbox
By signing up, you’ll join our email list and can unsubscribe anytime.
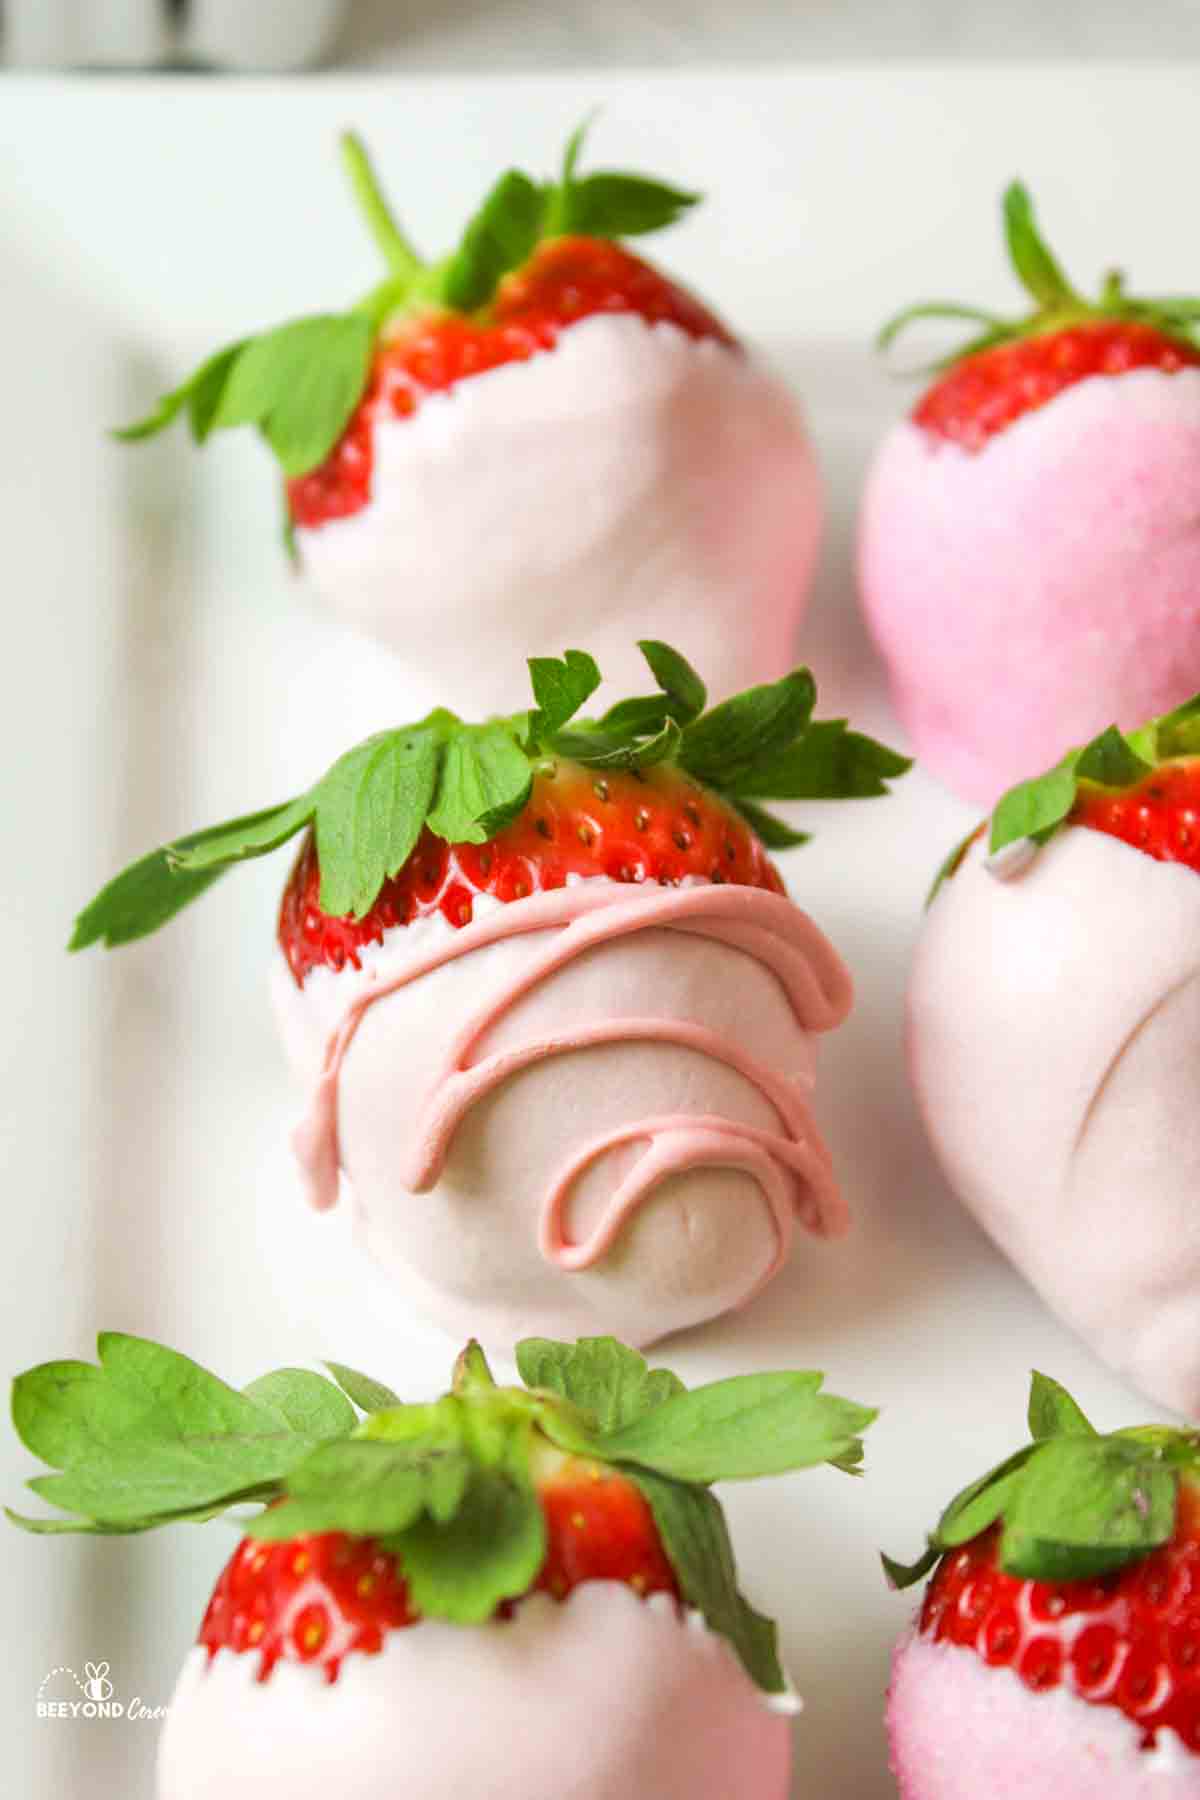
Fresh, succulent strawberries are dipped in smooth and creamy pink chocolate, creating a harmonious blend of fruity sweetness and silky richness.
These pink chocolate strawberries are not only a feast for the taste buds but also a sight to behold, making them perfect for special occasions, romantic gestures, or any moment when you want to add a touch of sophistication to your dessert table.
Whether you're looking to impress guests at a special occasion or simply treating yourself to an elegant indulgence, these pink chocolate dipped strawberries are a delightful choice.
Strawberries and white chocolate are a great pairing. See for yourself in my Strawberry White Chocolate Chip Cookies.
For more strawberry recipes check out my Strawberry Banana Orange Smoothie, Homemade Strawberry Pop Tarts, Strawberry Peach Cobbler, and Fresh Strawberry Pie.
Jump to:
💛 Why You'll Love This Recipe
- Great for any occasion. Pink covered strawberries are so festive and fun that they're almost as much fun to make as they are to eat.
- Adjust the shades. The pink color can be made light or intense depending on the food coloring used which means you can give every berry a unique personality to fit any party theme or romantic setting.
- They're easy to make. Melt some chocolate, add some coloring, and dip. You won't need fancy equipment or hours of time, just a few moments, a bowl, and a microwave.
🛒 Ingredients
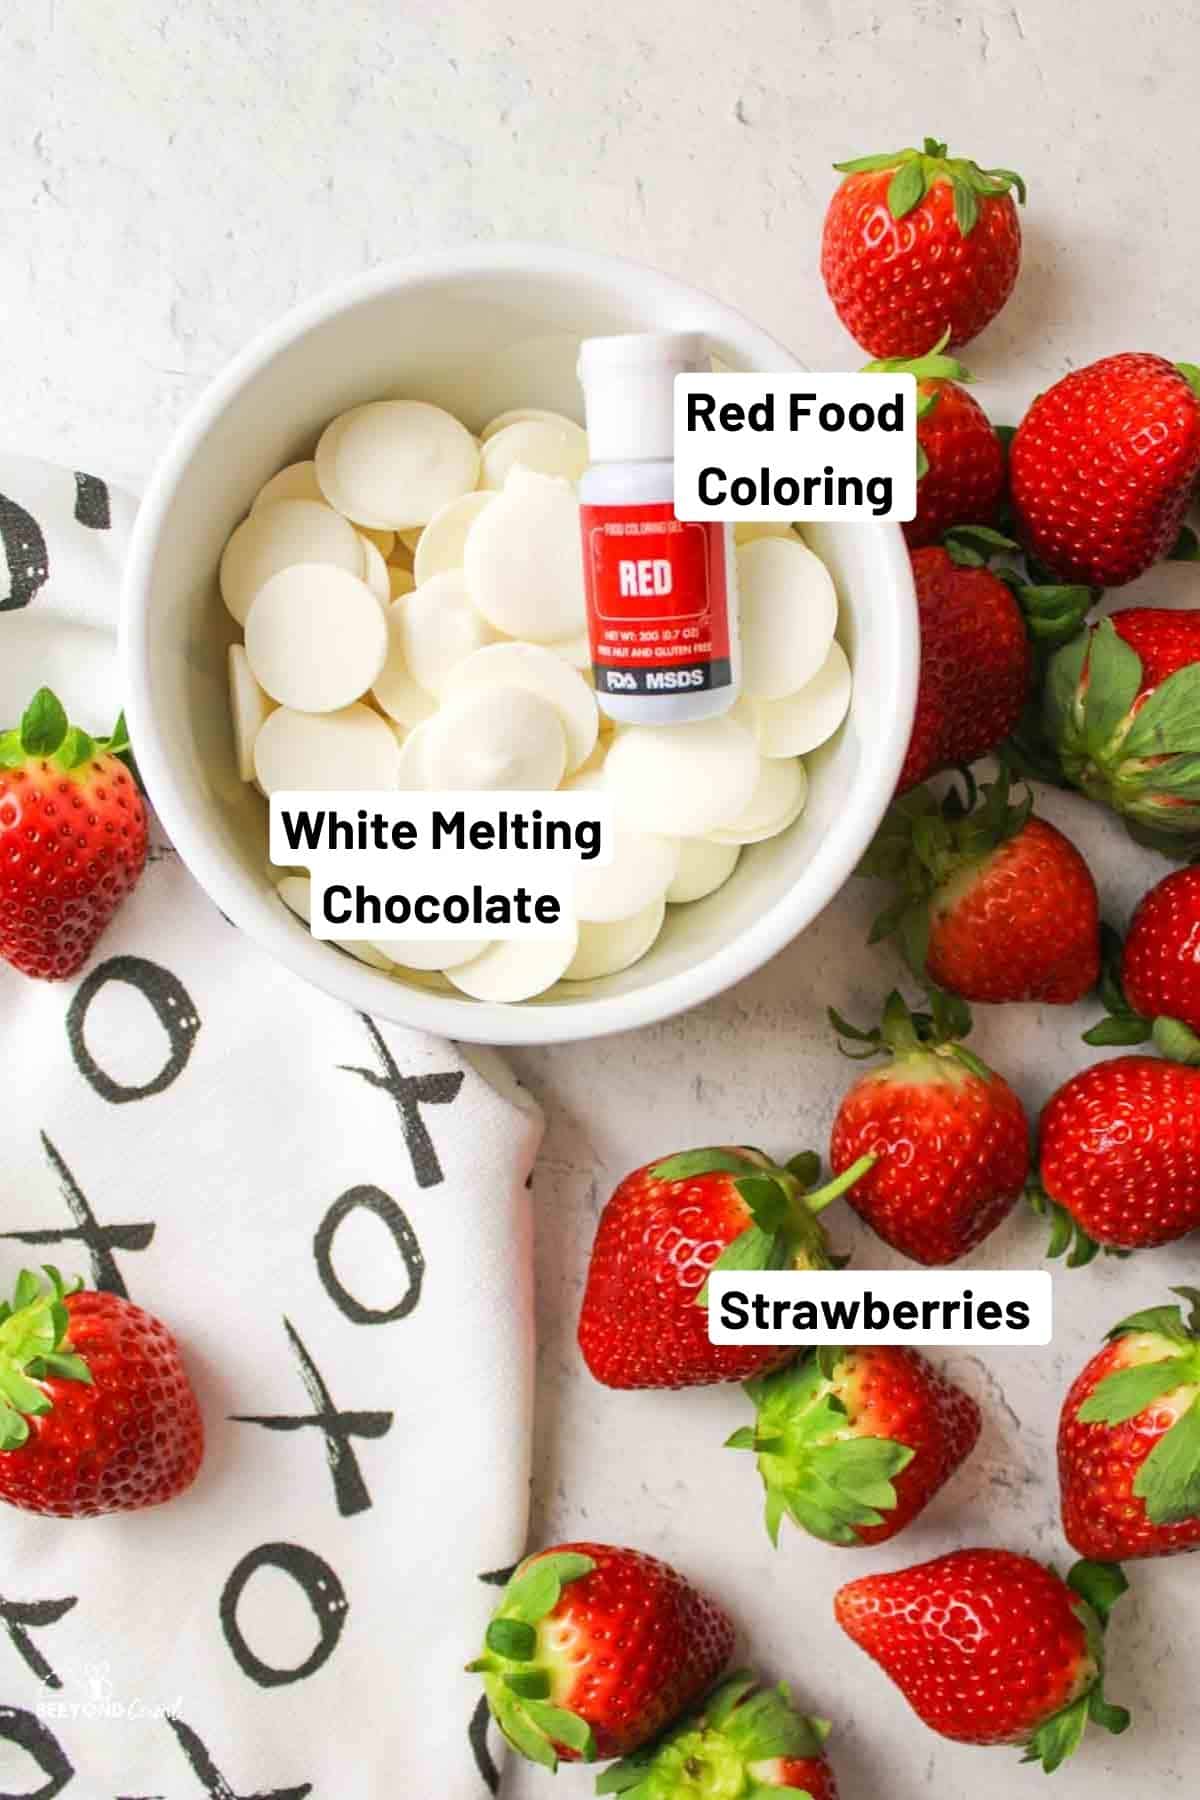
Fresh strawberries - Use fresh (not frozen) berries so the chocolate sticks properly.
White chocolate melting wafers - Melt smoothly and evenly, but white chocolate chips also work.
Red or pink gel food coloring - Gel coloring prevents chocolate from seizing and gives the best pink color.
See the recipe card below for full ingredients and instructions.
🔀 Substitutions & Variations
Food coloring: Pink gel coloring gives pastel pink; red creates a deeper rose shade, use sparingly.
Almond bark: A budget-friendly swap for melting wafers; melts quickly and coats smoothly. Almond bark is also used in recipes like Almond Bark Popcorn.
White chocolate chips: Use high-quality chips (like Ghirardelli) and add 1 teaspoon coconut oil per cup for smoother dipping.
Pink melting wafers: Pre-colored wafers make the process effortless, great for parties or themed events.
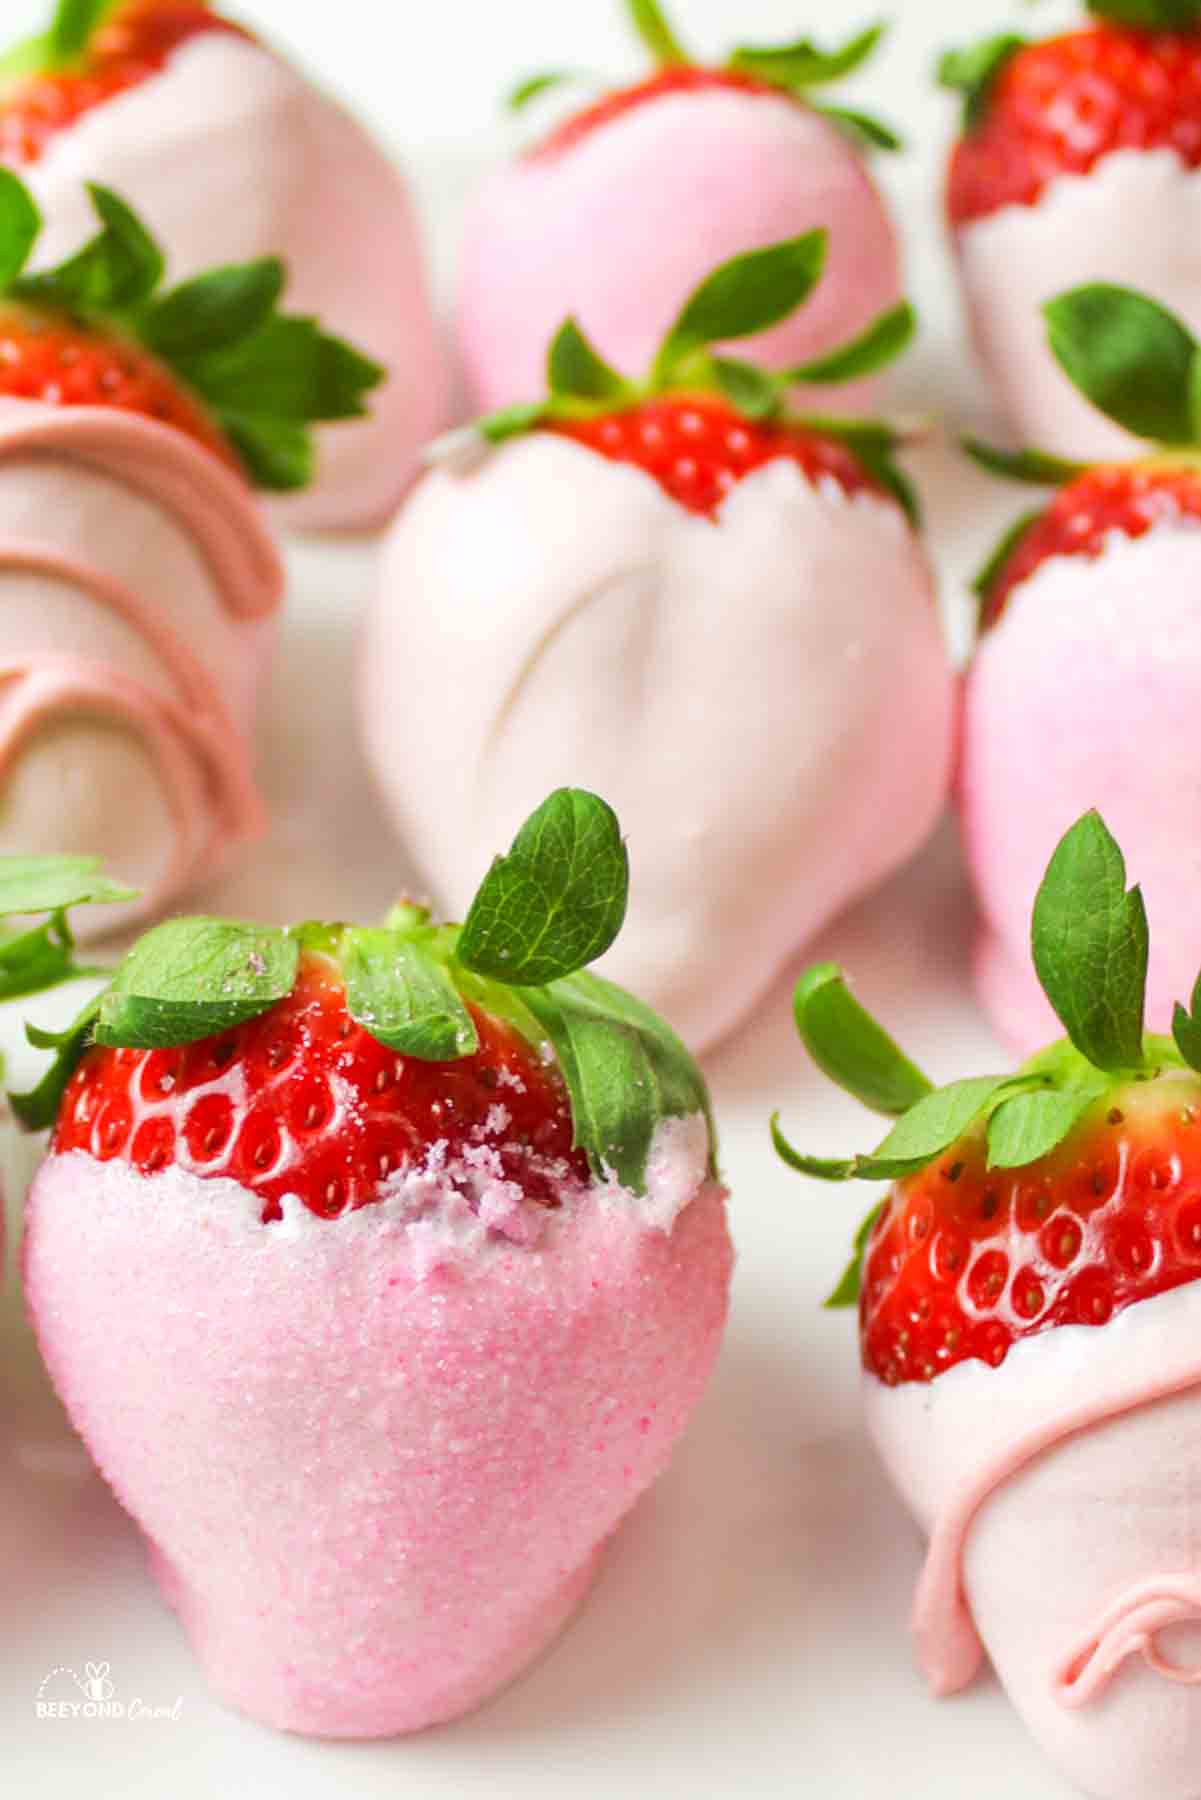
Pink glitter strawberries: Dip berries, then sprinkle with pink sanding sugar. Make DIY sanding sugar with sugar + a tiny dab of pink/red gel coloring.
Marble effect: Partially mix food coloring into the chocolate and dip at an angle for swirled, marbled pink berries.
💰 Budget-Friendly Tips
Buy in season: Strawberries are cheapest (and sweetest) during spring and summer.
Use almond bark: A more affordable alternative to white chocolate wafers and melts beautifully.
Make DIY décor: Create your own pink sanding sugar with granulated sugar + a dab of gel coloring instead of buying specialty sprinkles.
🥄 Instructions for Pink Chocolate Covered Strawberries
Step 1: Place your chocolate into a microwave-safe bowl and microwave in 30 second intervals, stirring well between each until smooth.
Step 2: Stir in the food coloring, one drop at a time until the color has been fully incorporated.
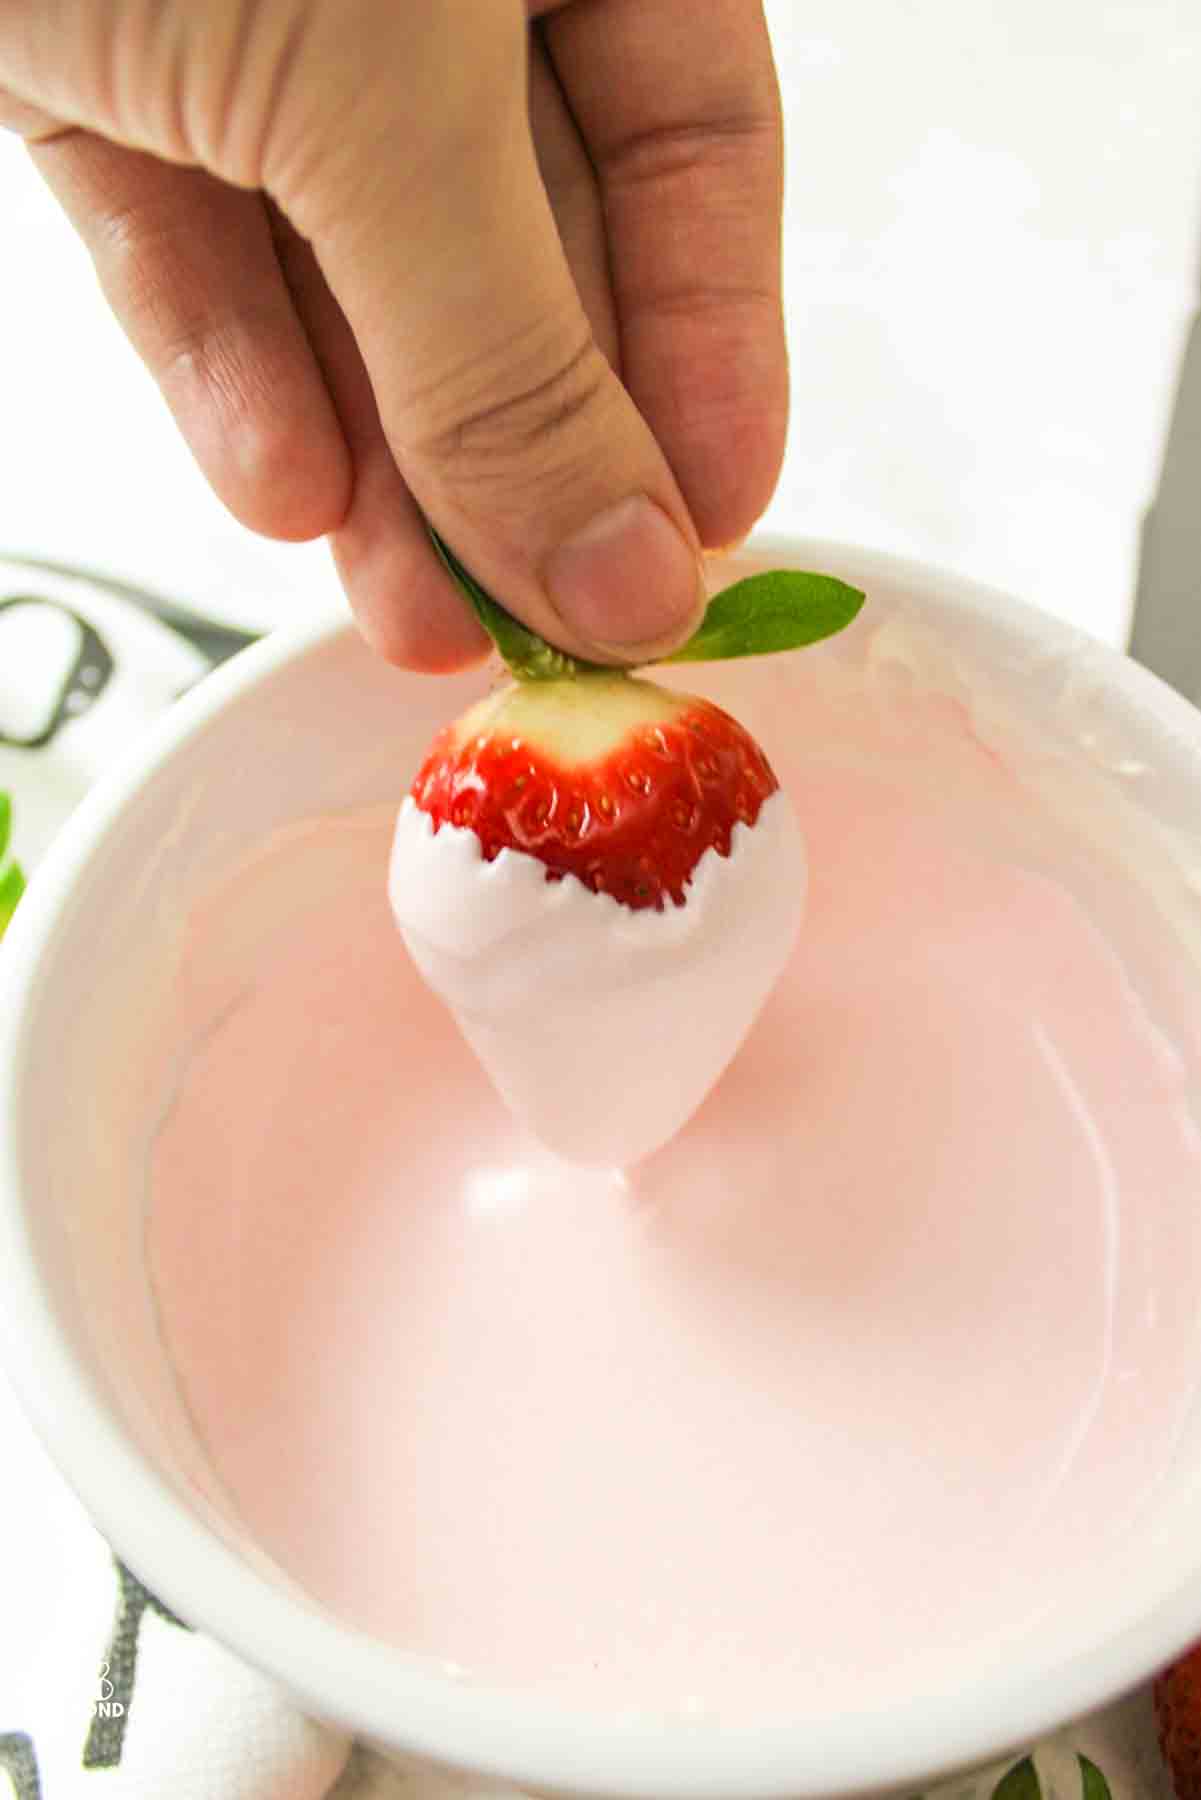
Step 3: Dip your washed and dried strawberries into the chocolate.
Step 4: Hold the berries above the chocolate to drizzle excess chocolate back into the bowl before placing the berries onto a parchment paper lined baking sheet to set.
Step 5: Repeat until all berries have been covered and enjoy.
👩🏻🍳 Expert Tips
- Dry the berries well: Even a drop of water can make the chocolate seize or slide off, so pat berries completely dry before dipping.
- Use gel food coloring: Water-based coloring ruins melted chocolate; gel ensures smooth pink color every time.
- Add coconut oil for shine: Stir in ½-1 teaspoon coconut oil for smoother dipping and a glossy finish.
- Handle with care: Hold berries by the stem/leaves, or insert a toothpick for clean dipping and less mess.
- Let excess drip off: After dipping, let extra chocolate fall back into the bowl to prevent pooling under the berries.
❄️ Storage and Make Ahead
Storage: Keep Pink Chocolate Covered Strawberries uncovered on a plate or lined tray in the fridge for up to 2 days. Covering them traps moisture and speeds up leaking.
Make Ahead: Best served the same day, but you can dip them up to 24 hours ahead and refrigerate.
🥗 Side Dishes or Pairing Ideas
Serve these Pink Chocolate Covered Strawberries alongside other sweet bites like Cheesecake Stuffed Strawberries, Easy Crepes with Pancake Mix, or as part of an elegant brunch spread. They also pair wonderfully with coffee, tea, or a simple dessert board.
- Strawberry Cheesecake PancakesRecipe $7.26 / Serving $1.22
- Valentine's M&M CookiesRecipe $11.28 / Serving $0.47
- Chocolate Covered Cheesecake StrawberriesRecipe $5.53 / Serving $1.38
- Easy Crepes With Pancake MixRecipe $2.84 / Serving $0.28


❓ Recipe FAQs
Yes, you can make this recipe vegan by using vegan white chocolate chips. Just melt them down the same way and stir in the red or pink food coloring. Use as desired. Also, make sure that the food coloring is vegan-friendly.
After dipping, these berries can last in a well-covered container for up to 2 days. After that, the berries will start to leak their juices and make a mess over the chocolate so that they won't look as incredible. Do not freeze.
No, unfortunately, this recipe cannot be frozen. This is because the berries will not hold up well after thawing and will become soft and thus ruin the appeal in both appearance and texture.
🍽️ More Recipes You'll Love
- How to Make Strawberry Jam (for Canning)Recipe $9.62 / Half-Pint $1.60
- Strawberry Blueberry ShortcakeRecipe $5.47 / Serving $0.91
- Strawberry Blueberry ParfaitRecipe $2.97 / Serving $1.49
- Strawberry Blueberry Overnight OatsRecipe $1.64


🐝 If you tried these Pink Chocolate Covered Strawberries, please leave a ⭐️ star rating and share your buzz in the 💬 comments below. I'd truly appreciate it!
📖 Recipe

Pink Chocolate Covered Strawberries
Ingredients
- ½ cup white chocolate melting wafers - ($1.00)
- 1-3 drops gel-based red food coloring - ($0.06)
- 10 whole fresh strawberries, washed and completely dried - ($1.27)
Instructions
- Melt chocolate. Add the white chocolate melting wafers to a microwave-safe bowl. Microwave in 30-second intervals, stirring well between each, until fully melted and smooth.
- Color chocolate. Stir in the red food coloring, one drop at a time, until the desired color is reached and evenly incorporated.
- Dip strawberries. Dip each strawberry into the melted chocolate, coating evenly. Lift and allow excess chocolate to drip back into the bowl.
- Set. Place the coated strawberries onto a parchment paper-lined baking sheet. Repeat until all strawberries are dipped. Let set until firm before serving.
Notes
- Food coloring. Gel-based coloring is recommended to prevent chocolate from seizing and to achieve vibrant color.
- Chocolate options. Almond bark or high-quality white chocolate chips may be used if melting wafers are unavailable.
- Berry prep. Strawberries must be completely dry before dipping to prevent chocolate from seizing.
- Storage. Store chocolate-covered strawberries in an airtight container in the refrigerator for up to 2 days. Avoid freezing.
Nutritional Information
Save This Recipe to Your Inbox
By signing up, you'll join our email list and can unsubscribe anytime.


Comments
No Comments