

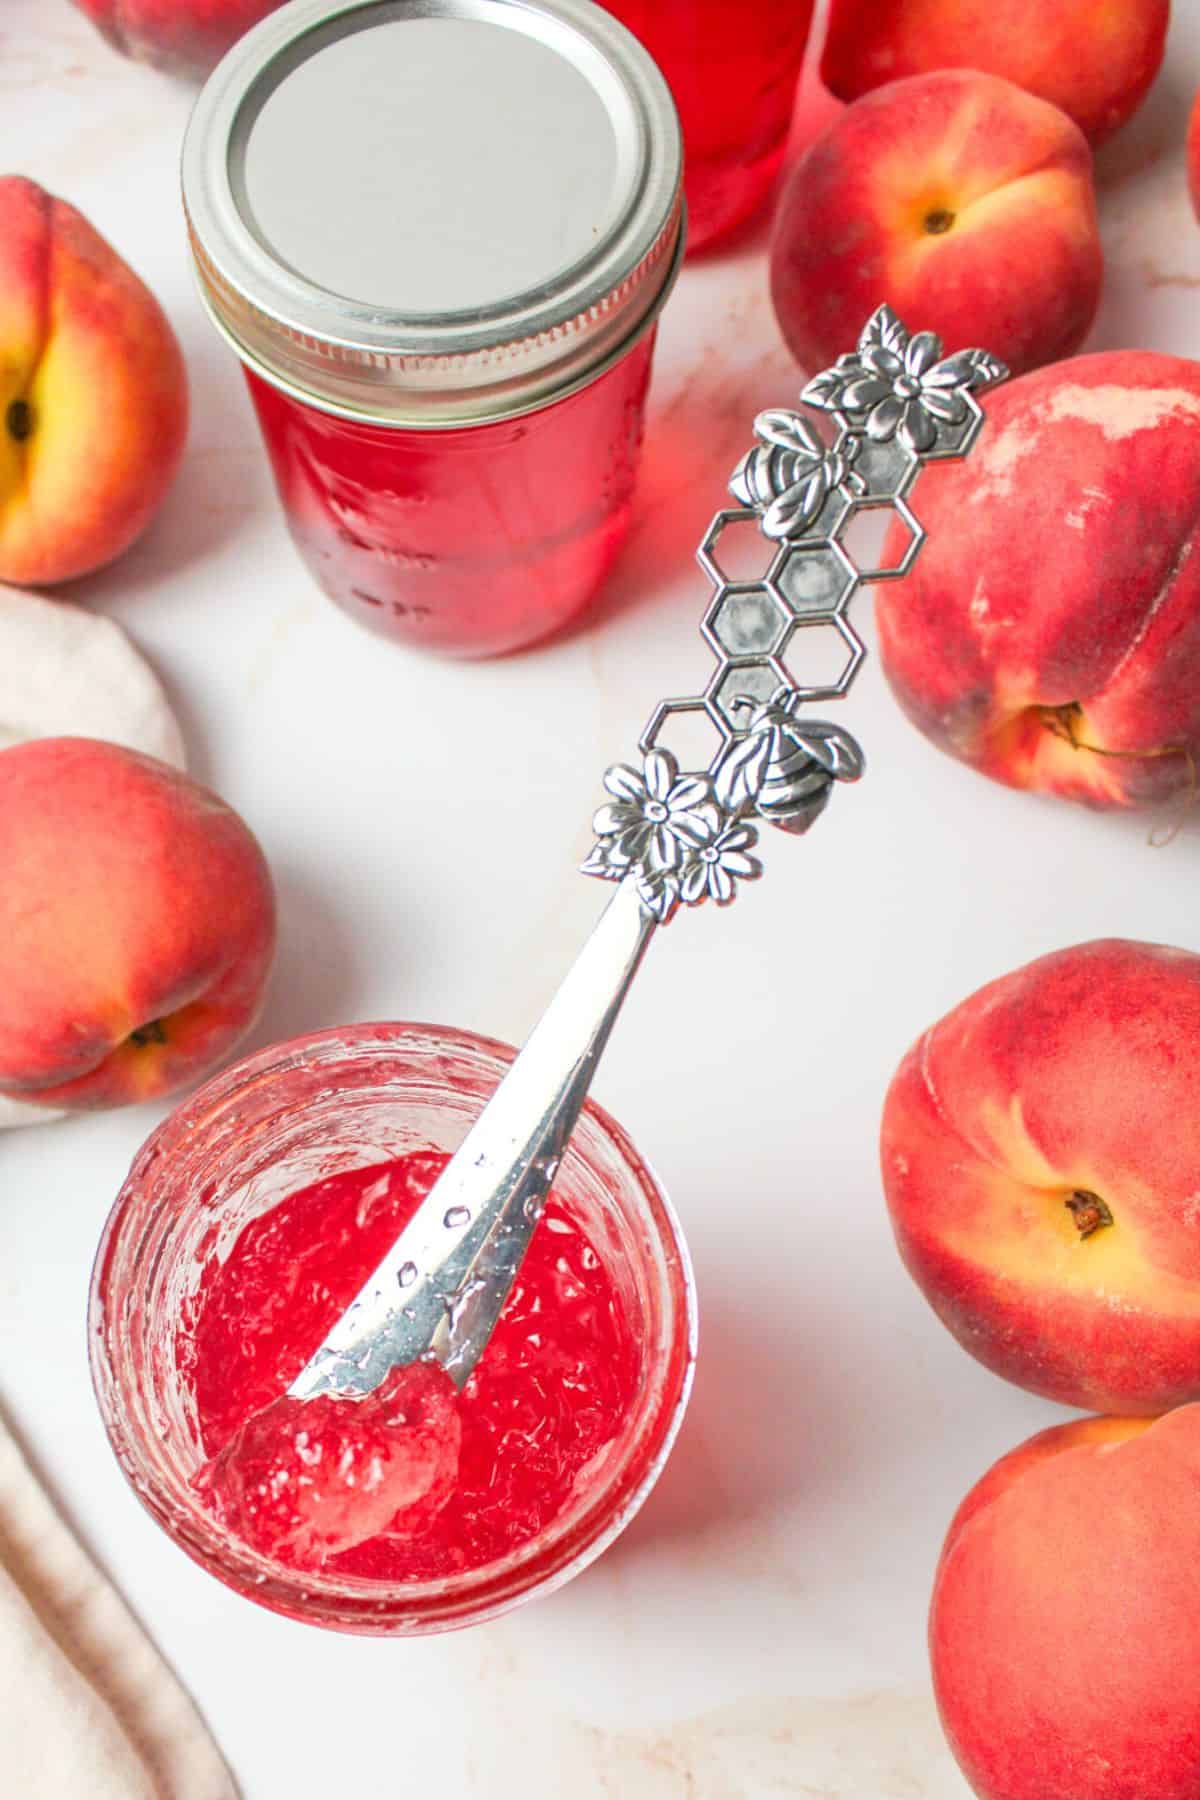
Homemade Peach Peel Jelly is a delicious way to get the most out of your peaches. Turning those fuzzy skins and hard pits into a clear juice for jelly is a frugal idea that is both easy and tasty.
Save This Recipe to Your Inbox
By signing up, you’ll join our email list and can unsubscribe anytime.
Whether you know it as peach peel jelly, peach scrap jelly, or peach pit jelly, the results are the same. It's a peach jelly made from the peach peelings and seeds.
The difference between jams and jellies is that jellies are made from juice, while jams are made from the fruit. This peach skin jelly recipe is made from the juice we make from the peach skins, pits, and some additional water. This is different from peach jam.
We love buying bulk peaches annually from The Peach Truck to make canned sliced peaches (see: How to Can Peaches). And after spending a small fortune on peaches, we want to make sure we get the most out of them.
Since we don't need the skins and pits for canning, we turn them into Peach Peel Jelly instead by using this safe water bath canning recipe.
Use this Peach Peel Jelly in recipes like Peanut Butter and Jelly Bread Pudding or Frozen Peanut Butter and Jelly Sandwiches, or keep several pints (or half pints) in the pantry for long-term storage.
Jump to:
- 💛 Why You'll Love This Recipe
- 🛒 Ingredients
- 🔀 Substitutions & Variations
- 💰 Budget-Friendly Tips
- 📍 Water Bath Canning: Elevation Adjustments
- 🥄 Instructions for Peach Peel Jelly
- 👩🏻🍳 Expert Tips
- 🫙 Reprocessing
- ❄️ Storage and Make Ahead
- 🥗 Pairing Ideas
- ❓ Peach Peel Jelly FAQs
- 🍽️ More Recipes You'll Love
- 📖 Recipe
- 💬 Comments
💛 Why You'll Love This Recipe
- It's cheaper than store-bought. When you calculate the costs of homemade jelly vs store-bought, homemade is cheaper by a few cents per ounce. While that may not be a huge savings, it does add up.
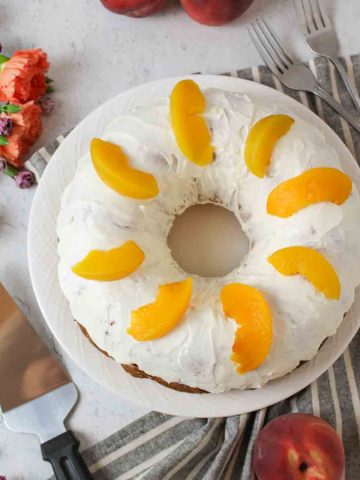
- The Peach Peel Jelly is good for a long time. Because we are canning this recipe, the long-term storage is great! You can gift the jars out for the holidays or keep them in the pantry for later. Give them out alongside our Watermelon Jelly for fun and flavorful gifts!
- It reduces food waste. Instead of tossing out peach skins after peeling, this recipe puts them to delicious use. It's a smart way to use every part of the fruit, no waste, all flavor.
👉 Looking for more ways to stretch your scraps? Check out How to Reuse Leftover Food for creative, waste-cutting inspiration!
🛒 Ingredients
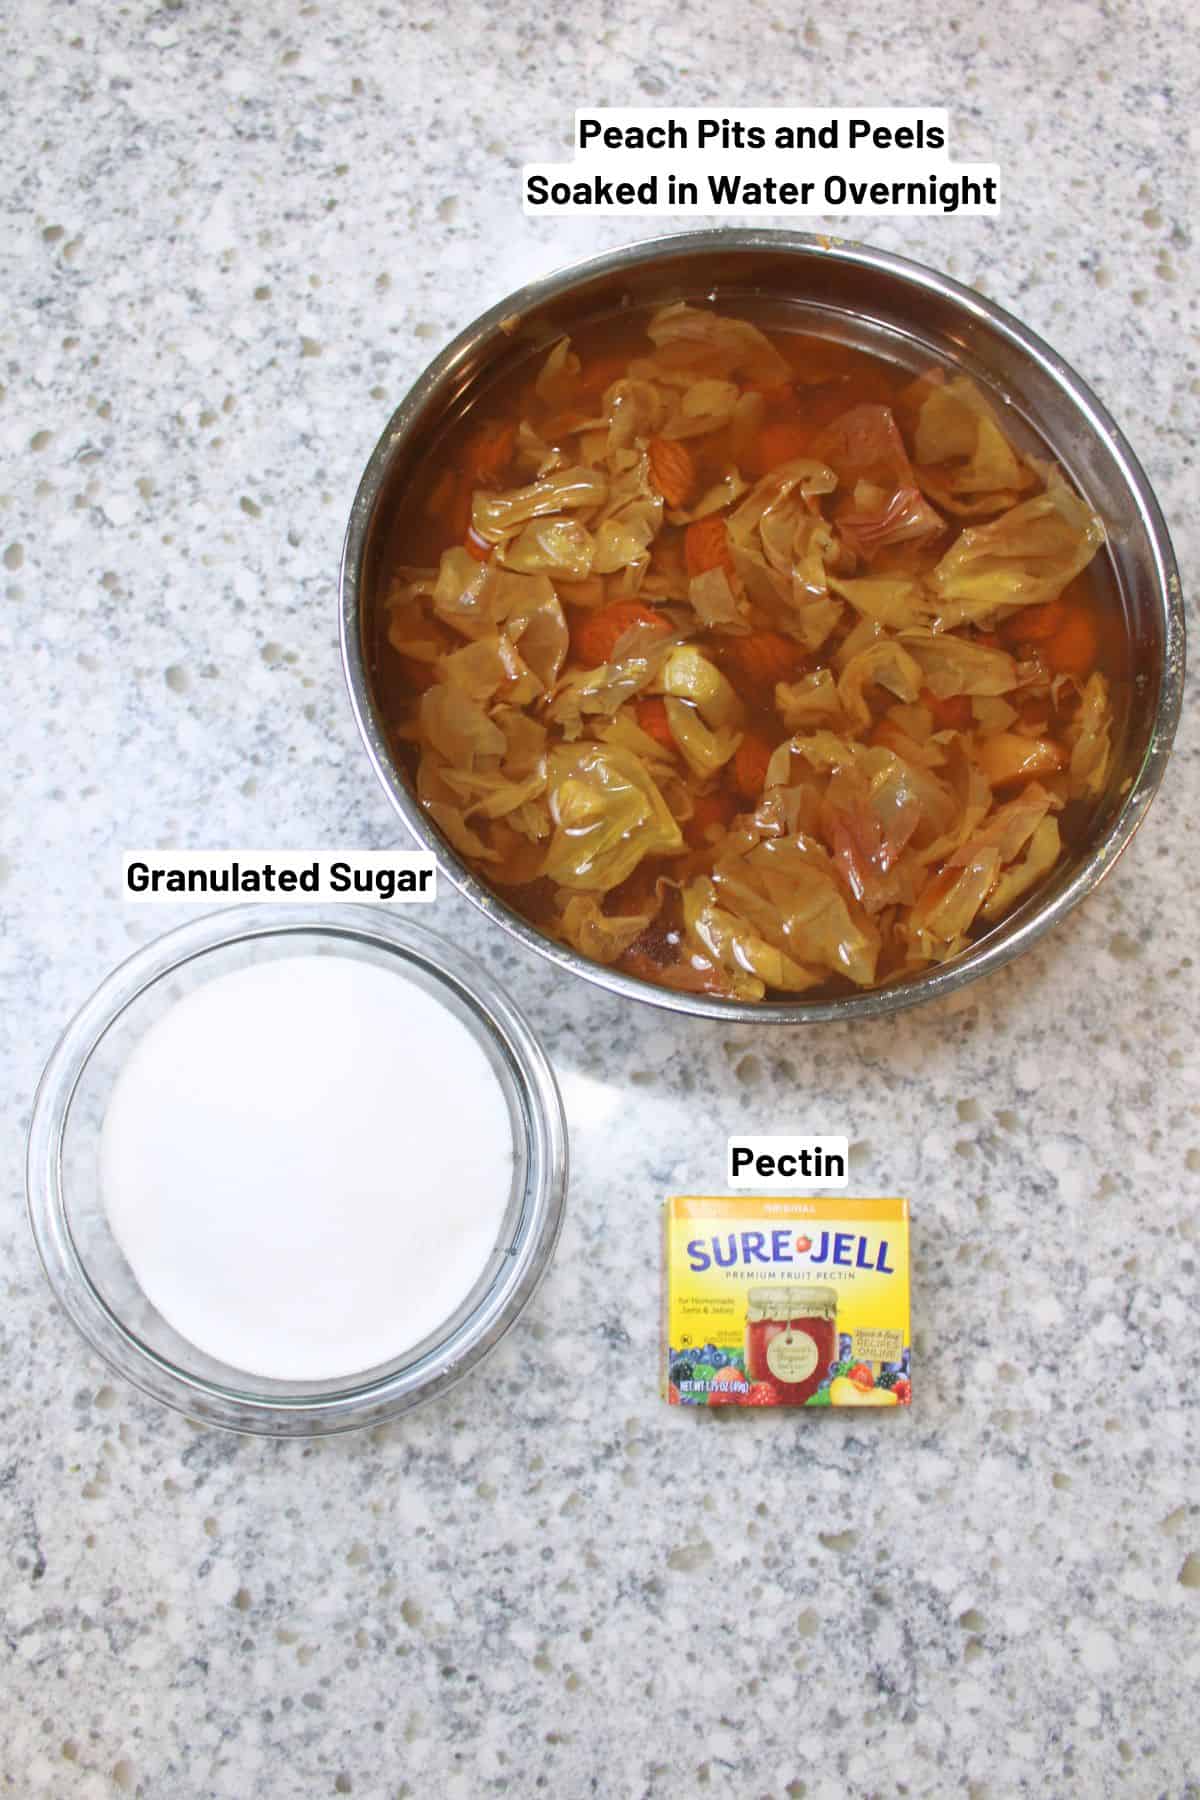
- Pectin- Use the yellow box of Sure-Jell Pectin, not the pink. This is what will solidify the juice into a jelly. We use this same pectin in other jelly recipes like our Homemade Grape Jelly Recipe and Apple Jelly (for Canning).
- Peach Juice- You will make your own homemade peach juice using the pits, skins, and scraps from peaches. (Instructions included below.) Note: We also use this peach juice in our Peach Sourdough Bread, so if you have some left over, make sure to give that recipe a shot!
See the recipe card below for full ingredients and instructions.
🔀 Substitutions & Variations
🌶Peach Jalapeno Jelly
You can make jalapeño peach jelly by simmering 2-4 sliced jalapeños with the peach skins while extracting the juice. Strain out the solids and measure 4 cups juice, then add 1 box (1.75 oz) powdered pectin, 5 cups sugar, and ¼ cup bottled lemon juice.
Optionally, place a few jalapeño seeds or a slice into each jar before filling. Leave ¼ inch headspace and process in a boiling water bath for 10 minutes (adjust for altitude).
💰 Budget-Friendly Tips
Use Peach Scraps - Save the peels and pits from other recipes (like Sourdough Peach Cobbler, Peach Crumble Pie, or canned peaches) instead of tossing them. You're turning what would be food waste into something delicious.
Buy Discounted Fruit - Grab "seconds" or overripe peaches at farmers' markets or grocery clearance bins. Since you only need the peels, bruises don't matter. If you're local on the eastern half of the US, you could do what I do and order peaches in bulk from The Peach Truck. Use my referral code to save an additional 10% on an order of $30.
Stretch with Juice or Water - If you don't have enough peels, add a little apple juice or just water to stretch the base without buying extra fruit.
Stock Up on Sugar Sales - Peach Peel Jelly requires a good amount of sugar. Buy store-brand sugar or stock up during seasonal sales (summer canning season and holiday baking season).
Reuse Jars - Save glass jars from store-bought items (like pasta sauce or pickles) for fridge/freezer jelly, or buy canning jars secondhand at thrift shops/yard sales. Do not reuse lids. You can buy them brand new and cheap.
📍 Water Bath Canning: Elevation Adjustments
Use this chart to adjust boiling water bath processing times based on your elevation. Don't know your elevation? A quick Google search can help.
| Elevation | Increase Processing Time By |
|---|---|
| 0-1,000 ft | Used in this recipe's listed time |
| 1,001-3,000 ft | Add 5 minutes |
| 3,001-6,000 ft | Add 10 minutes |
| 6,001-8,000 ft | Add 15 minutes |
| 8,001-10,000 ft | Add 20 minutes |
🥄 Instructions for Peach Peel Jelly
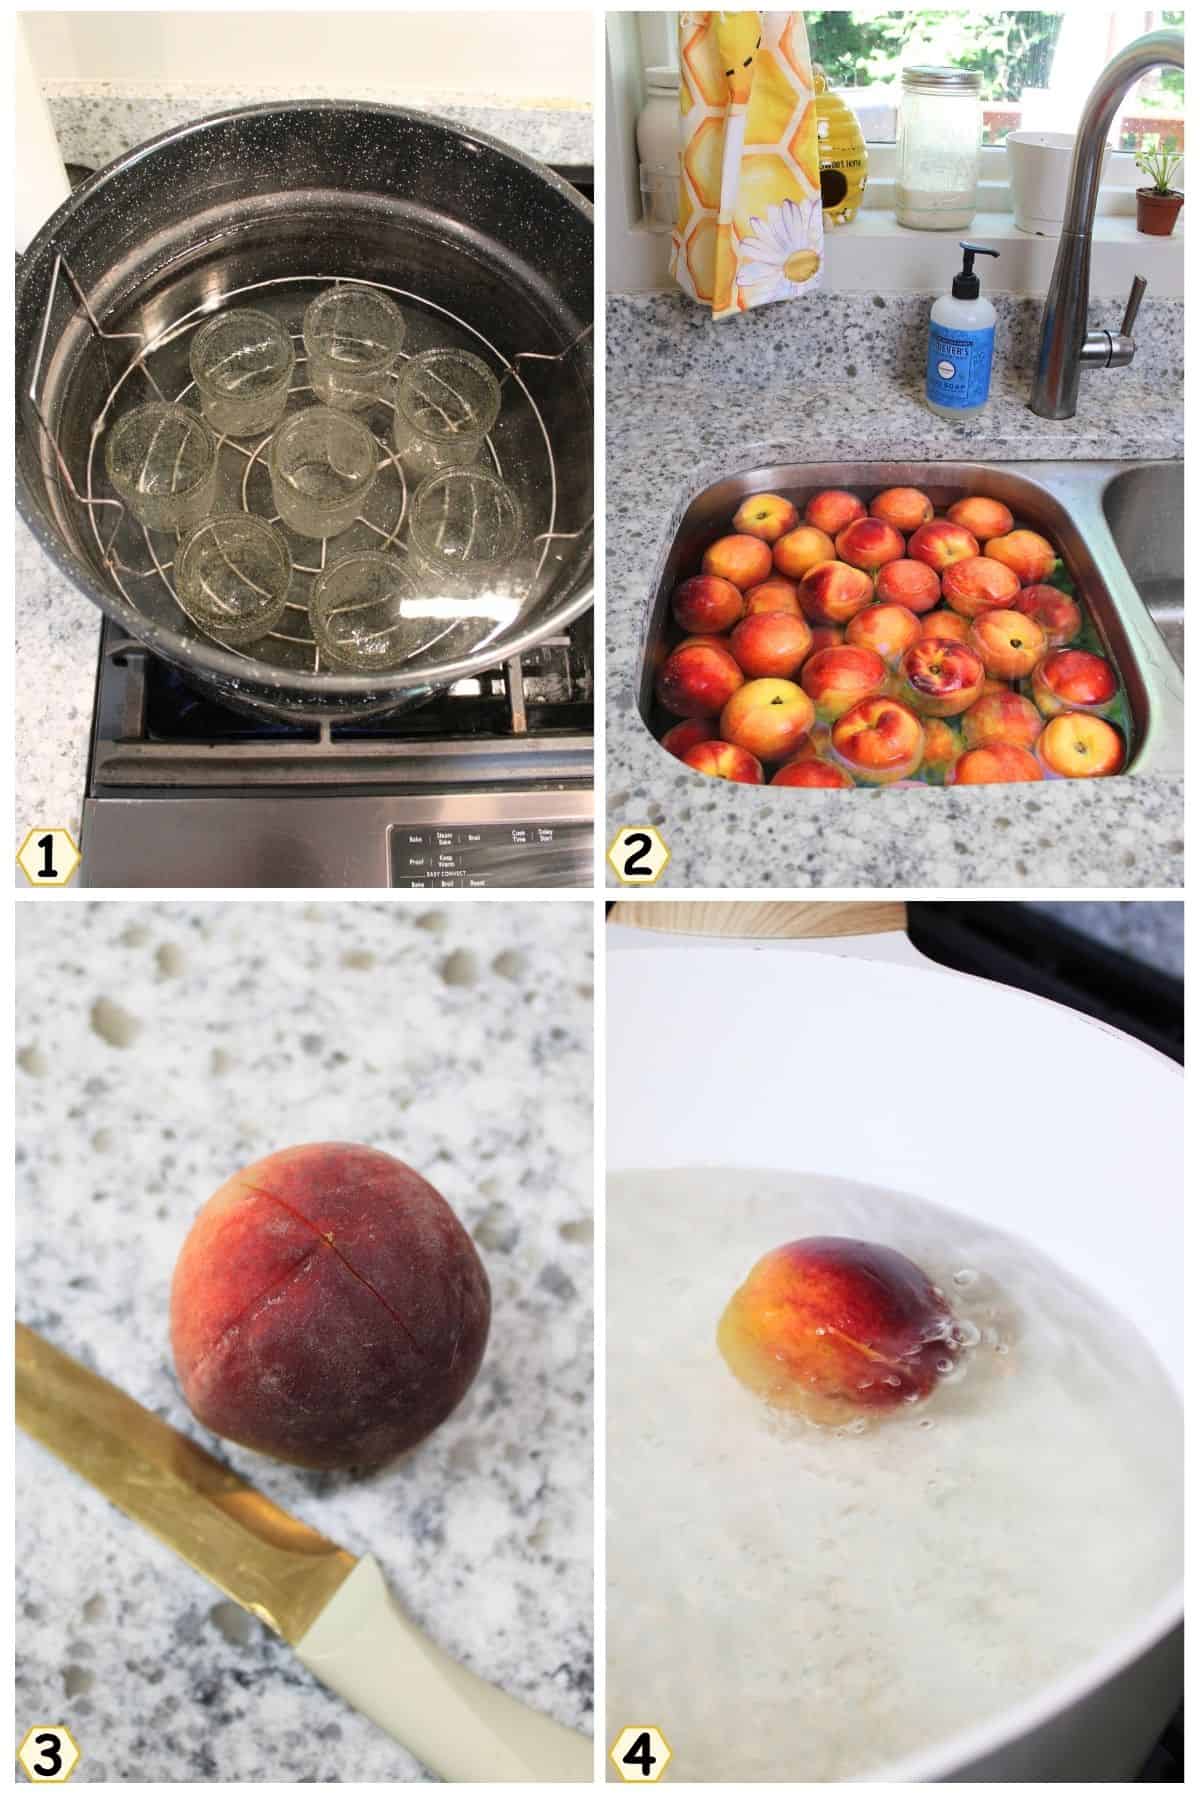
Step 1: Wash your jars, lids, and metal rings in hot, soapy water and rinse well. Set aside the lids and rings, but put your jars in a large pot of water and bring them to a boil. (Image 1) Boil for 10 minutes (add 1 minute for every 1,000 feet above sea level). Your pot must be large enough to cover the tops of the jars by 1-2 inches of water.
Step 2: Bring a large pot of water to a boil. Prep the peaches. Wash them all well under cool running water to remove any dirt, then soak in a vinegar/water solution to remove additional dirt and whatnot. A common ratio is 3 parts water to 1 part white vinegar. (Image 2)
Step 3: Then slice an X mark with a sharp knife on the bottom of each peach. This mark shouldn't be too deep. (Image 4).
Step 4: Dip the peaches in boiling water for 30-60 seconds in the boiling pot of water from step 2 (Image 4), and then scoop them up with a slotted spoon.
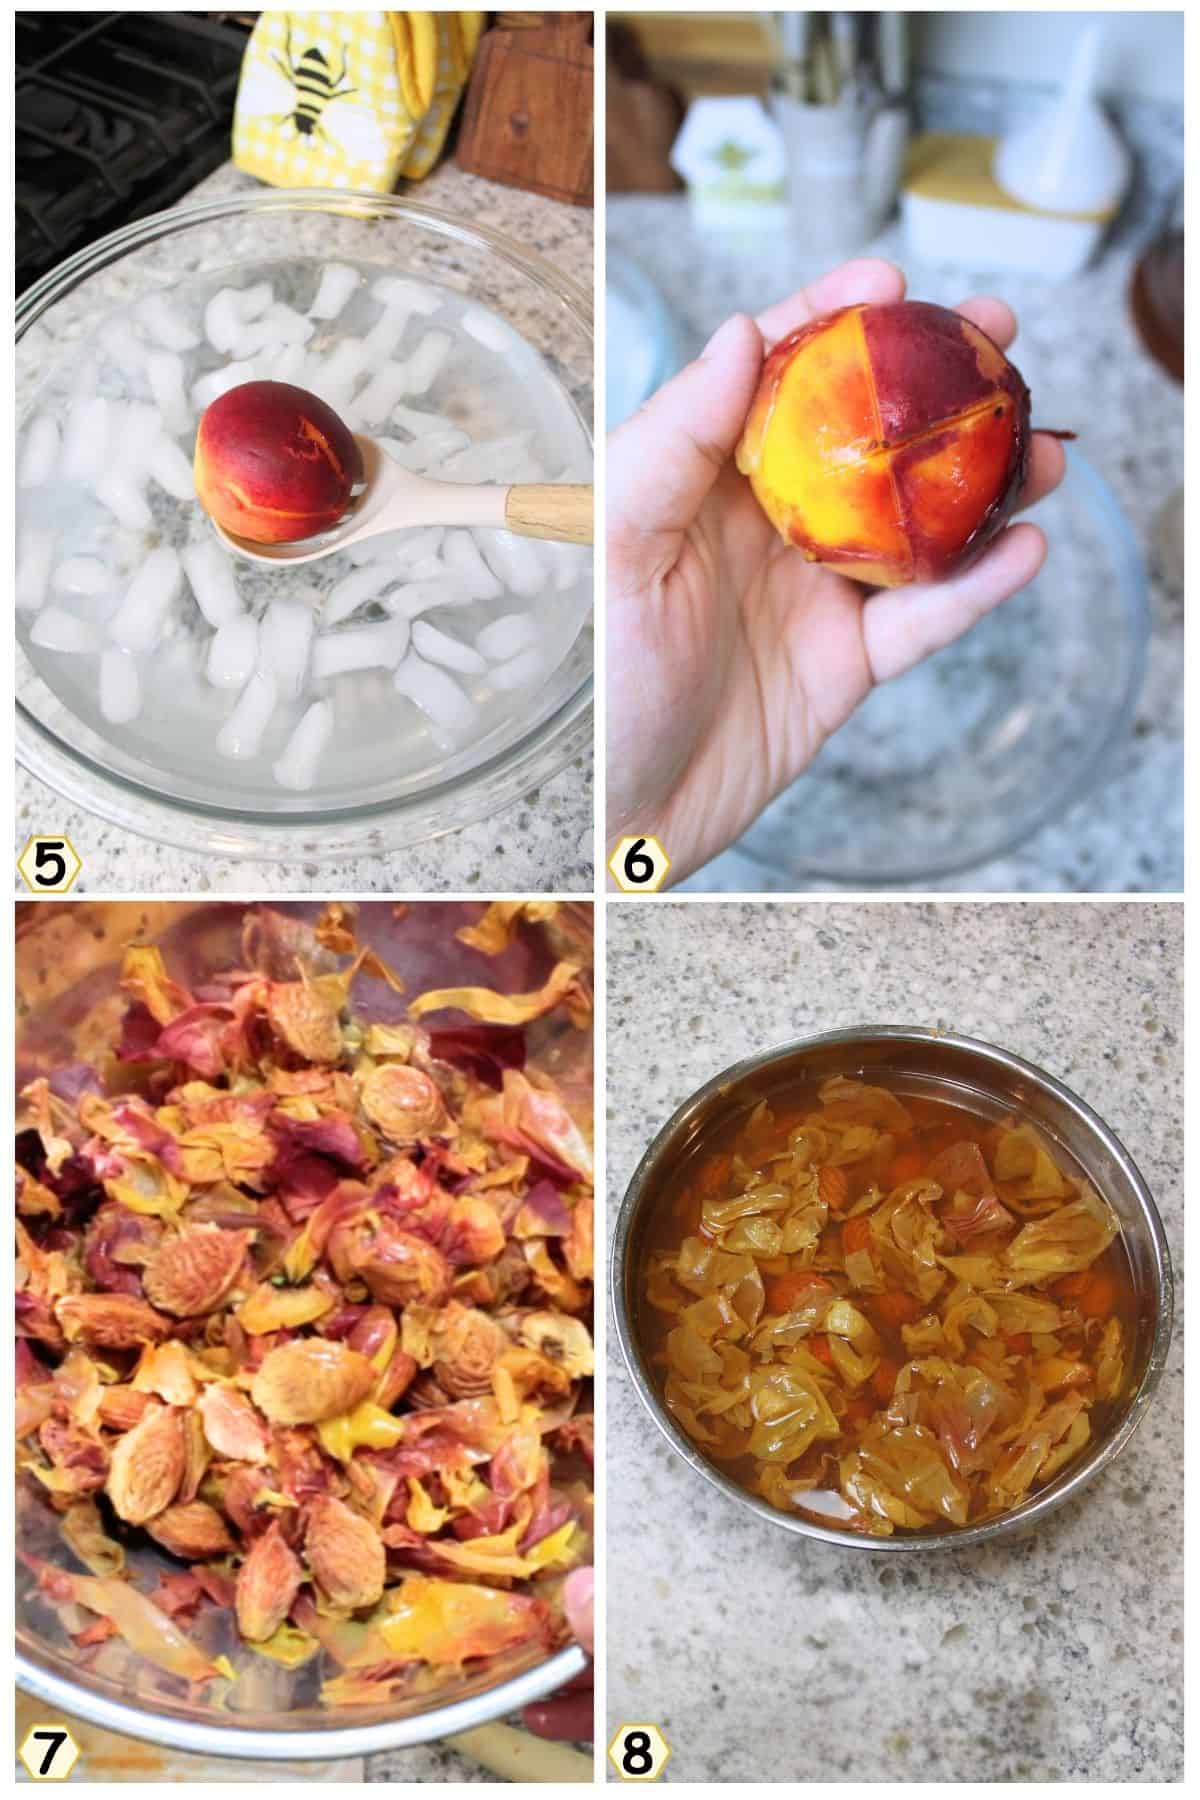
Step 5: Immediately place the boiled peach into a large bowl filled with ice water. (Image 5).
Step 6: Peel the skin off the peaches using your fingers, gently rubbing the now loose skin off the boiled peach. (Image 6). It should peel off pretty easily. Repeat the boiling, chilling, and peeling until several peaches (or all of them) are done. Use peaches as desired, but place all scraps in a bowl for later. (Image 7)
Step 7: Prepare the peach scraps.
- Fast Method: Place all of your peach peels and pits into a large pot and fill with enough water to cover the top of them. Bring to a low simmer and let cook for about 30 minutes.
- Overnight Method: Place all of the peach peels and pits into a large pitcher and fill with water. Let it sit overnight in the fridge. (Image 8)
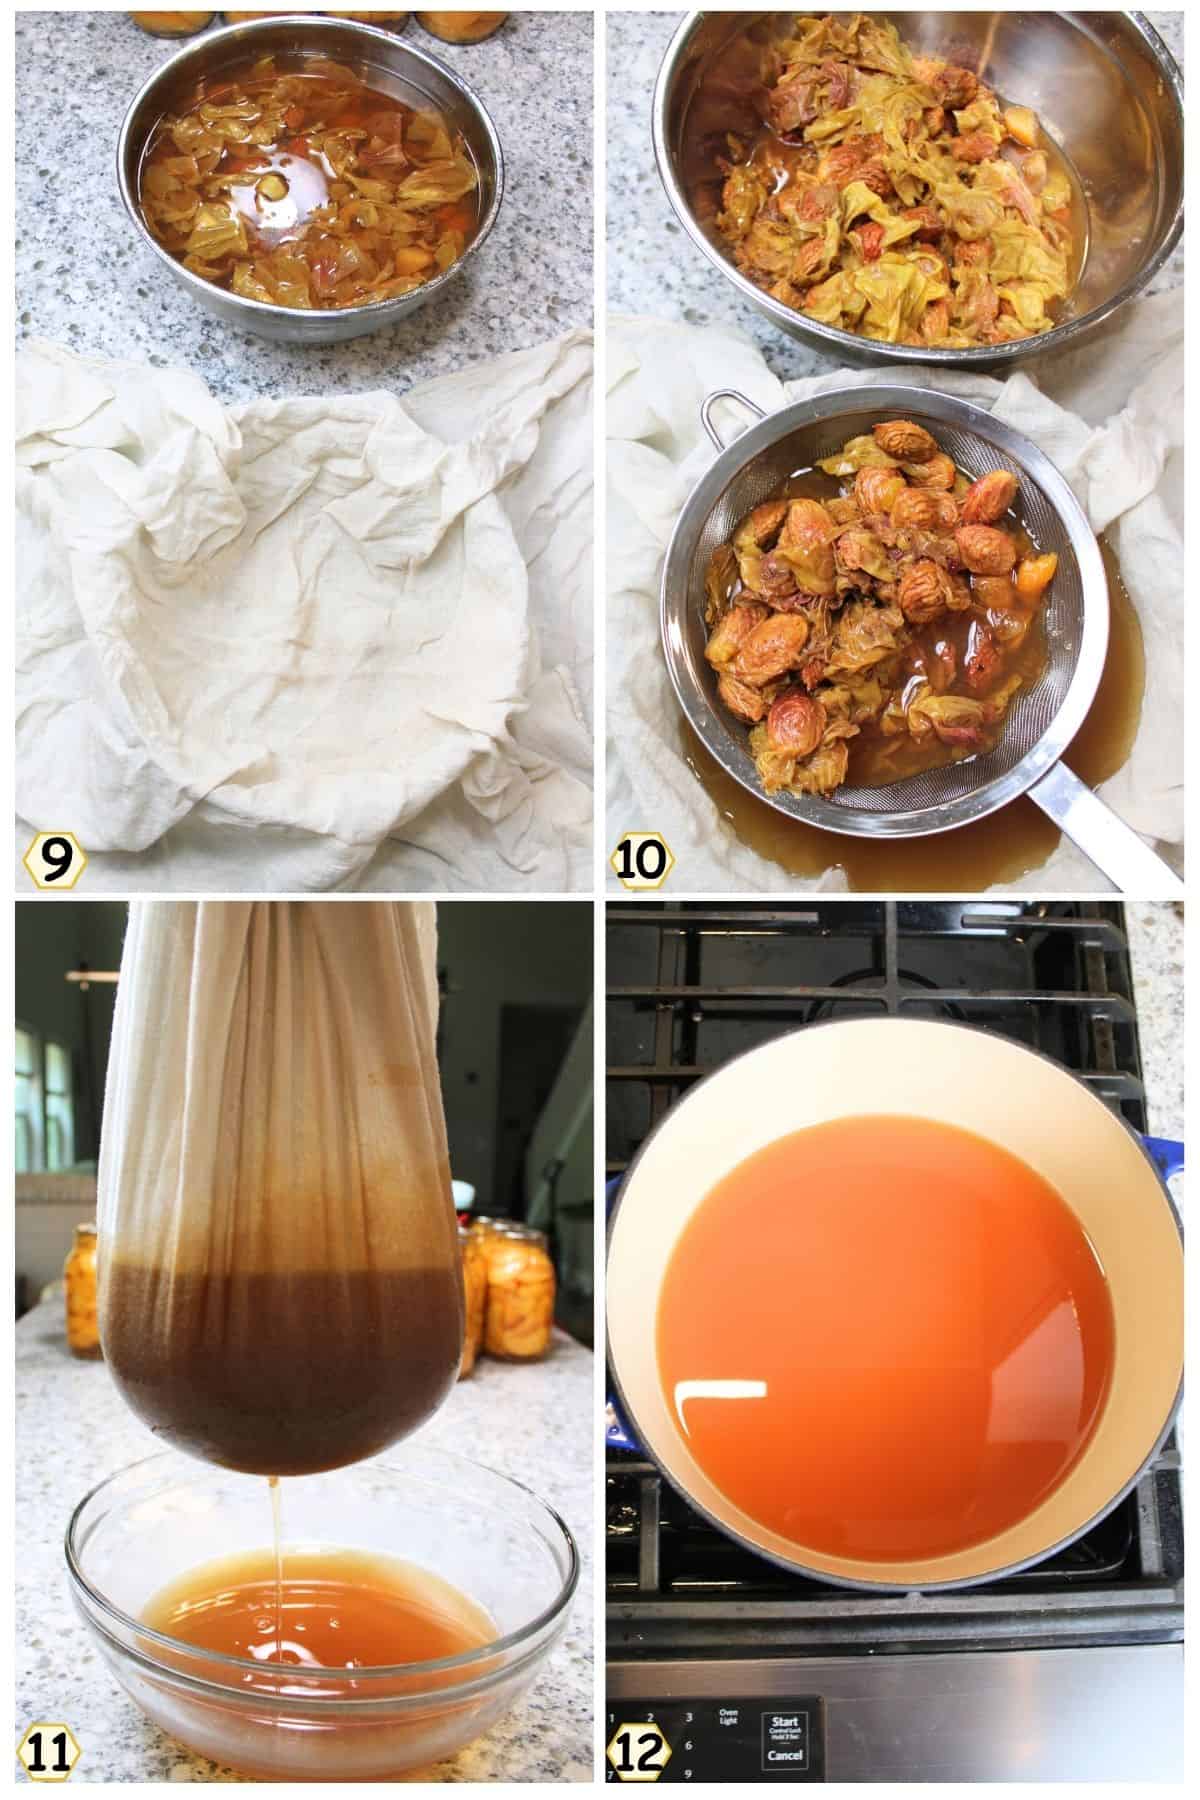
Step 8: Lay a cheesecloth over a large bowl (Image 9) and place a metal strainer on top. Pour in the scraps and juice, and allow the seeds and skin to filter out of the liquid. (Image 10)
Step 9: Once the larger pieces have been removed, carefully lift the cheesecloth and allow the juice to drain naturally through it (Image 11). For the clearest, most beautiful jelly, avoid squeezing or pressing the cheesecloth. Letting the juice filter through on its own will produce a clearer liquid, while squeezing can force pulp and fine particles through, resulting in a cloudier jelly.
Note: For every 3 cups of peach juice, you will need 1 package of pectin and 3 cups of granulated sugar. If you are short of juice, top it off with water or 100% apple juice (no added ingredients besides apples and water- Motts is a good choice).
Step 10: Place the peach juice into a large pot and bring to a boil. (Image 12)
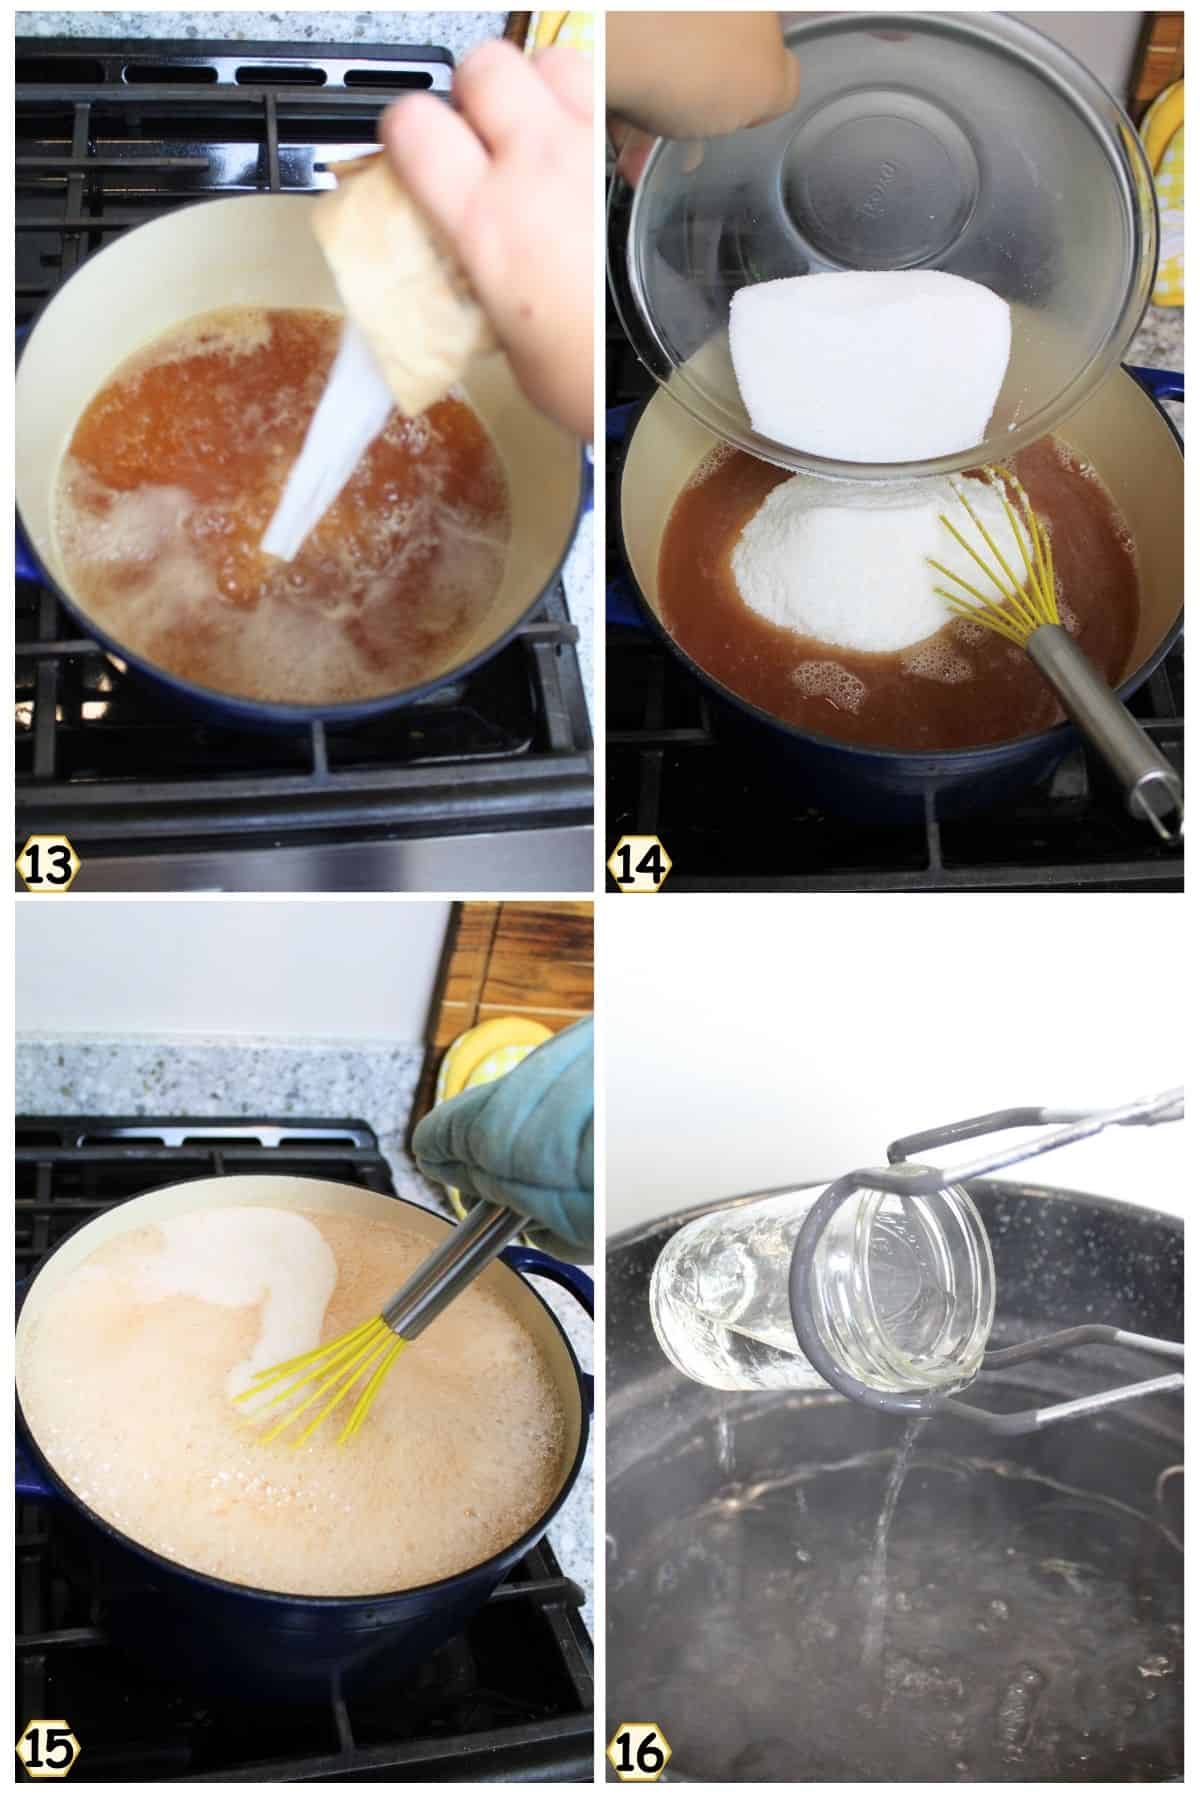
Step 11: Once the peach juice is boiling, whisk in the pectin. (Image 13) Return to a boil.
Step 12: Once at a vigorous boil, whisk in the sugar. (Image 14).
Step 13: Let it come to a boil again, and then set the timer for 5 minutes, stirring occasionally. (Image 15) Remove from the heat and let cool down enough to stop boiling and instead bring a foam to the top.
Step 14: While the jelly is cooling, remove your glass jars from the boiling pot. (Image 16)
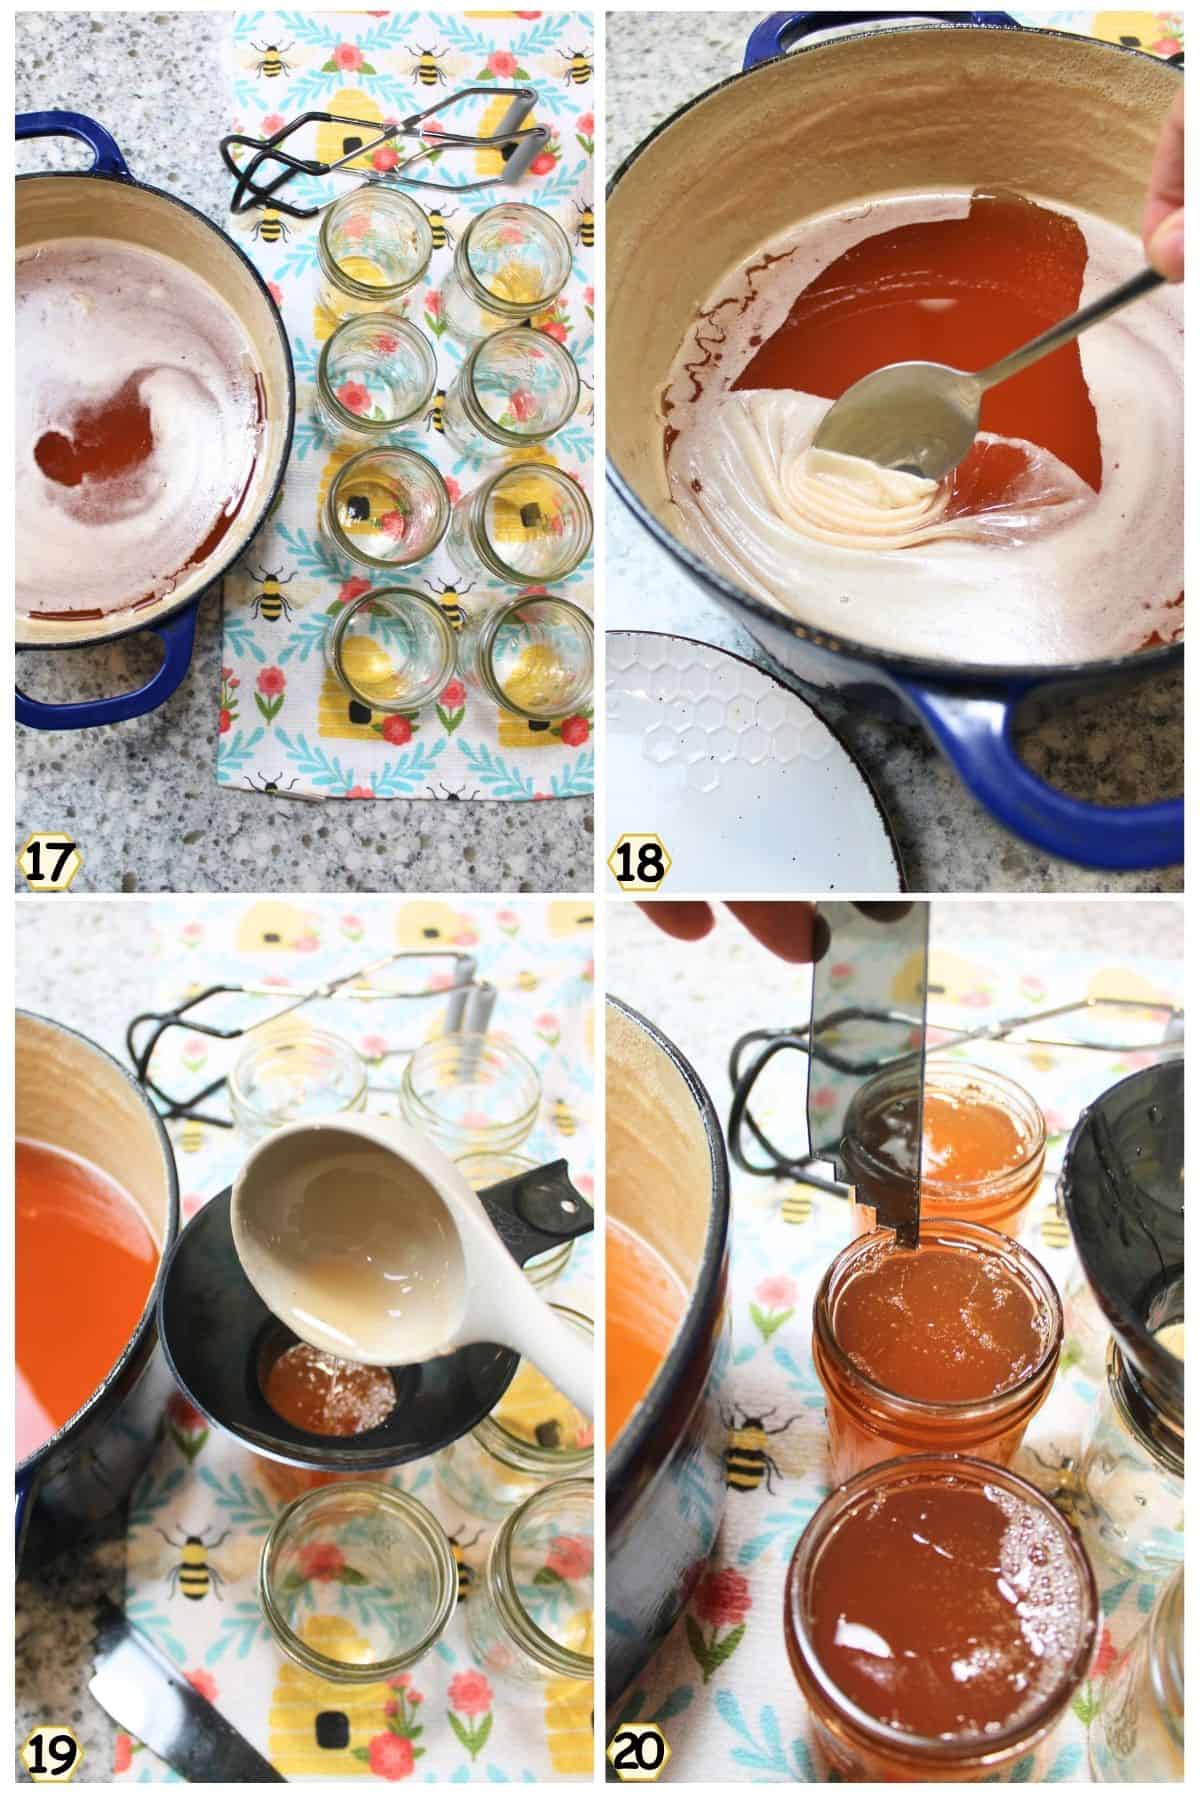
Step 15: Place your clean hot jars onto a towel-lined counter. (Image 17)
Step 16: Scrape the foam off with a clean spoon. (Image 18). You don't want this in your jelly (it makes it cloudy), but it is tasty on toast as a mid-activity snack. Scoop it out and place it onto a plate to get it out of the way for now.
Step 17: Pour the jelly into sterilized warm jars (Image 19) and give them a ¼ inch headspace from the top. (Image 20). Measure from all 4 sides using the headspace tool.

Step 18: Wipe down the tops and rims of the jars with a clean cloth (Image 21).
Tip: I've found that a wet paper towel works better than a wet dishrag because it can fit better into the nooks and crannies along the side of the rim.
Step 19: Place the metal lids on the top of the jars, and then place the metal rings around the lids. You need to be careful with tightening them; too loose and they won't work right, and too tight, and they won't seal. (Image 22). A good rule of thumb is finger-tight. Turn the lids just enough to feel secured, but do not do any additional turning.
Tip: Using your non-dominant hand can help to keep you from overtightening the rings.
Step 20: Carefully place your jars into the pot and make sure that 1-2 inches of water sits above the lids. (Image 23).
Step 21: Set the timer for 5 minutes. Once those 5 minutes are up, turn off the heat and set the timer for another 5 minutes.
Step 22: After the timer is up, carefully remove the jars from the water and place them onto a towel. (Image 24). Let sit undisturbed for 12-24 hours.
Step 23: Remove the rings and check the centers of the jars. The centers of the lids should be concave and not click when pressed. This means there was a good seal.
Step 24: Wipe the jars clean and then label and date the top metal lid with the contents. You won't be able to reuse the metal lids (it's unsafe to do so), so use a permanent marker. Keep stored in a cool, dark place (50-70°F).
👩🏻🍳 Expert Tips
- Why We DON'T Boil Lids Anymore. Since 2014, canning guidelines changed. Lids no longer need boiling. Just wash in soapy water and use at room temp. The sealing compound was reformulated, and preheating can actually weaken the seal.
- Why You Should Lay Towels on Counters. Towels protect hot jars from breaking on cold counters and make cleanup easier, just toss them in the wash instead of scrubbing sticky messes.
🫙 Reprocessing
- If jars do not seal after the first processing, remove the contents from the jars and reheat them to a boil before repacking.
- Use fresh, sterilized jars and new lids for reprocessing.
- Process again using the full recommended processing time.
- Do not reuse old lids, and make sure jars are clean and hot before refilling.
❄️ Storage and Make Ahead
Storage: Unopened jars: Store in a cool, dry place for up to 12 months.
Opened jars: Refrigerate and use within 2-4 weeks for best quality.
Always use a clean spoon to avoid contamination and preserve freshness.
Make Ahead: You can prepare the peach juice up to 2 days in advance. After simmering the peach skins and straining out the solids, refrigerate the juice in a sealed container until you're ready to make jelly. You can also can the jelly and store sealed jars for up to 1 year in a cool, dark pantry.
🥗 Pairing Ideas
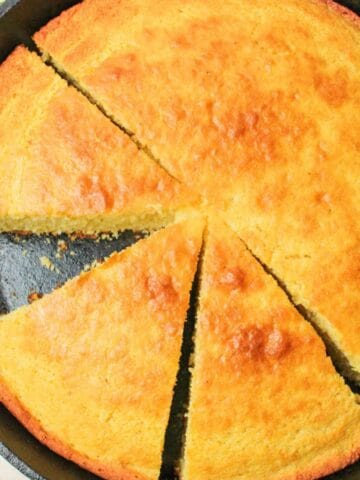
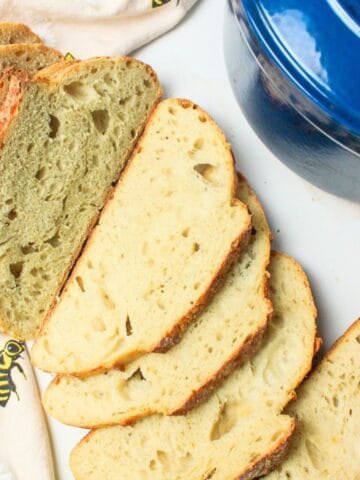
Peach Peel Jelly is delicious spread over homemade Sourdough Cornbread. You can spread it over Low Hydration Sourdough Bread or 5 Ingredient White Bread.
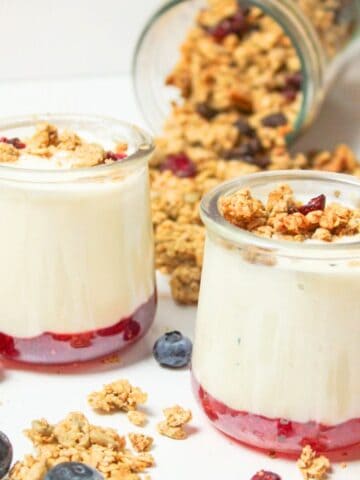
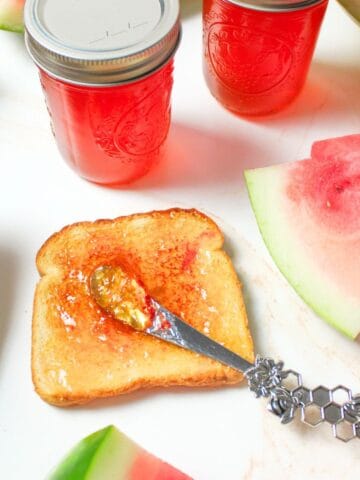
My favorite way to eat it is spread over some toast in the morning but it also tastes great swirled into some homemade Instant Pot Yogurt and spread over biscuits and scones.
- Sourdough CornbreadRecipe $2.14 / Serving $0.27
- 65% Low Hydration Sourdough BreadRecipe 0.97 / Serving $0.06
- 5 Ingredient White Bread RecipeRecipe $0.96
- Instant Pot YogurtRecipe $3.76 / Serving $0.24

❓ Peach Peel Jelly FAQs
Peach jelly is made from strained juice, usually simmered from peach peels and pits, resulting in a smooth, clear spread with no fruit bits. Peach jam, on the other hand, uses the whole fruit (often peeled and mashed), giving it a thicker, more textured consistency with chunks of peach throughout.
Don't toss those peels! Peach peels are perfect for making Peach Peel Jelly, syrup, or infused vinegar. You can also dry them for tea blends, toss them into smoothies, or use them to flavor sugar or honey. They're packed with flavor and ideal for zero-waste recipes.
Definitely! If you prefer not to water bath can, pour the finished jelly into freezer-safe containers, leaving room for expansion, and freeze for up to 6 months.
After simmering for Peach Peel Jelly, the flavor is mostly extracted, but you can compost the peels, or dehydrate them for chicken treats or garden mulch if you keep a sustainable homestead.

🍽️ More Recipes You'll Love
- How to Can PeachesRecipe $41.15 / Quart $5.87
- Strawberry Peach CobblerRecipe $7.37 / Serving $0.92
- Homemade Peach Pie FillingRecipe $3.70 / Serving $0.46
- Peaches and Cream Bundt CakeRecipe $9.09 / Serving $0.76

🐝 If you tried this Peach Peel Jelly, please leave a ⭐️ star rating and share your buzz in the 💬 comments below. I'd truly appreciate it!
📖 Recipe

Peach Peel Jelly
Ingredients
- 3 cups peach juice, made from peach peels and pits - ($0.00)
- 1 box (1.75 ounces) powdered fruit pectin, Sure-Jell yellow box - ($4.09)
- 3 cups granulated sugar - ($1.14)
Instructions
- Prep jars. Wash your jars, lids, and metal rings in hot, soapy water and rinse well. Set aside the lids and rings, but put your jars in a large pot of water and bring them to a boil. Boil for 10 minutes (add 1 minute for every 1,000 feet above sea level). Your pot must be large enough to cover the tops of the jars by 1-2 inches of water.
- Prepare the peach juice. Peel peaches by scoring an X on the bottoms, boiling for 30 to 60 seconds, then transferring to ice water and slipping off the skins. Reserve all peels and pits.
- Extract the juice. Place peels and pits in a pot, cover with water, and simmer for about 30 minutes, or place them in water and refrigerate overnight. Strain through cheesecloth without squeezing. Measure exactly 3 cups juice.
- Cook the jelly. Pour the peach juice into a large pot and bring to a boil. Whisk in the pectin and return to a full rolling boil. Add the sugar and stir to dissolve. Boil for 5 minutes, stirring occasionally.
- Skim and fill. Remove from heat and skim off foam. Ladle hot jelly into hot jars, leaving ¼-inch headspace. Wipe rims clean, apply lids, and tighten rings fingertip-tight.
- Process. Place jars in a boiling water bath with 1 to 2 inches of water covering them. Process for 5 minutes. Turn off heat and let jars rest in the canner for 5 minutes.
- Cool and store. Remove jars and cool undisturbed for 12 to 24 hours. Check seals, remove rings, label, and store.
Notes
- Fruit quality. Ripe, fresh peaches produce the best flavor.
- Juice clarity. Do not squeeze the cheesecloth or the jelly will be cloudy.
- Foam. Skimming improves clarity. Foam is safe to eat.
- Scaling. Use 1 box pectin and 3 cups sugar per 3 cups juice. Juice may be topped off with water or 100 percent apple juice if short.
- Storage. Store sealed jars in a cool, dark place for up to 1 year. Refrigerate after opening and use within 3 to 4 weeks.
- Variation. You can safely make jalapeño peach jelly by simmering 2-4 sliced jalapeños with the peach skins while extracting the juice. Strain out the solids and measure 4 cups juice, then add 1 box (1.75 oz) powdered pectin, 5 cups sugar, and ¼ cup bottled lemon juice. Optionally, place a few jalapeño seeds or a slice into each jar before filling. Leave ¼ inch headspace and process in a boiling water bath for 10 minutes (adjust for altitude).
Nutritional Information
Save This Recipe to Your Inbox
By signing up, you'll join our email list and can unsubscribe anytime.


Iris Hermann says
The amount of pectin is completely incorrect. It should be measured in teaspoon or tablespoons. Not packets. I made an absolutely grotesque monster that destroyed the gorgeous pits and peels that I’d saved. It was so thick it burned to the bottom of the pan even while I was stirring it!
Nicole Durham says
I’m so sorry to hear this happened with your batch! From what you’re describing, it sounds like the issue wasn’t the recipe but the type of pectin used. This recipe is written and tested with the Sure-Jell powdered pectin in the yellow box (1.75 oz packet), which is different from bulk or Pomona’s pectin that’s measured in teaspoons or tablespoons. Using a different type can throw the ratios way off and cause the jelly to turn out overly thick or even scorch. If you try it again with the yellow-box Sure-Jell, you should get the smooth, clear jelly shown here. I hate that your peach scraps didn’t work out this time, but I hope this clears things up!
Nicole Durham says
This is by far my most favorite jelly. I look forward to it every year!