

If you're new to sourdough bread baking or you're looking for an easier loaf to try your hand at, then this Low Hydration Sourdough Bread is the answer you need. Made with less moisture, we get a dough that's easy to handle and hard to mess up.

Save This Recipe to Your Inbox
By signing up, you’ll join our email list and can unsubscribe anytime.
Low Hydration Sourdough Bread is the perfect beginner's sourdough bread, or the perfect bread for those living in humid areas. When I first started getting into sourdough baking over a year ago, I was living in Florida and using the standard higher hydration recipes, and they kept turning out flat. Then I learned that humidity can affect the dough.
This, of course, makes sense because humidity plays a role in making yeast breads like my 5 Ingredient White Bread Recipe and Easy Yeast Rolls for Beginners, but learning that it was true about sourdough somehow blew my mind.
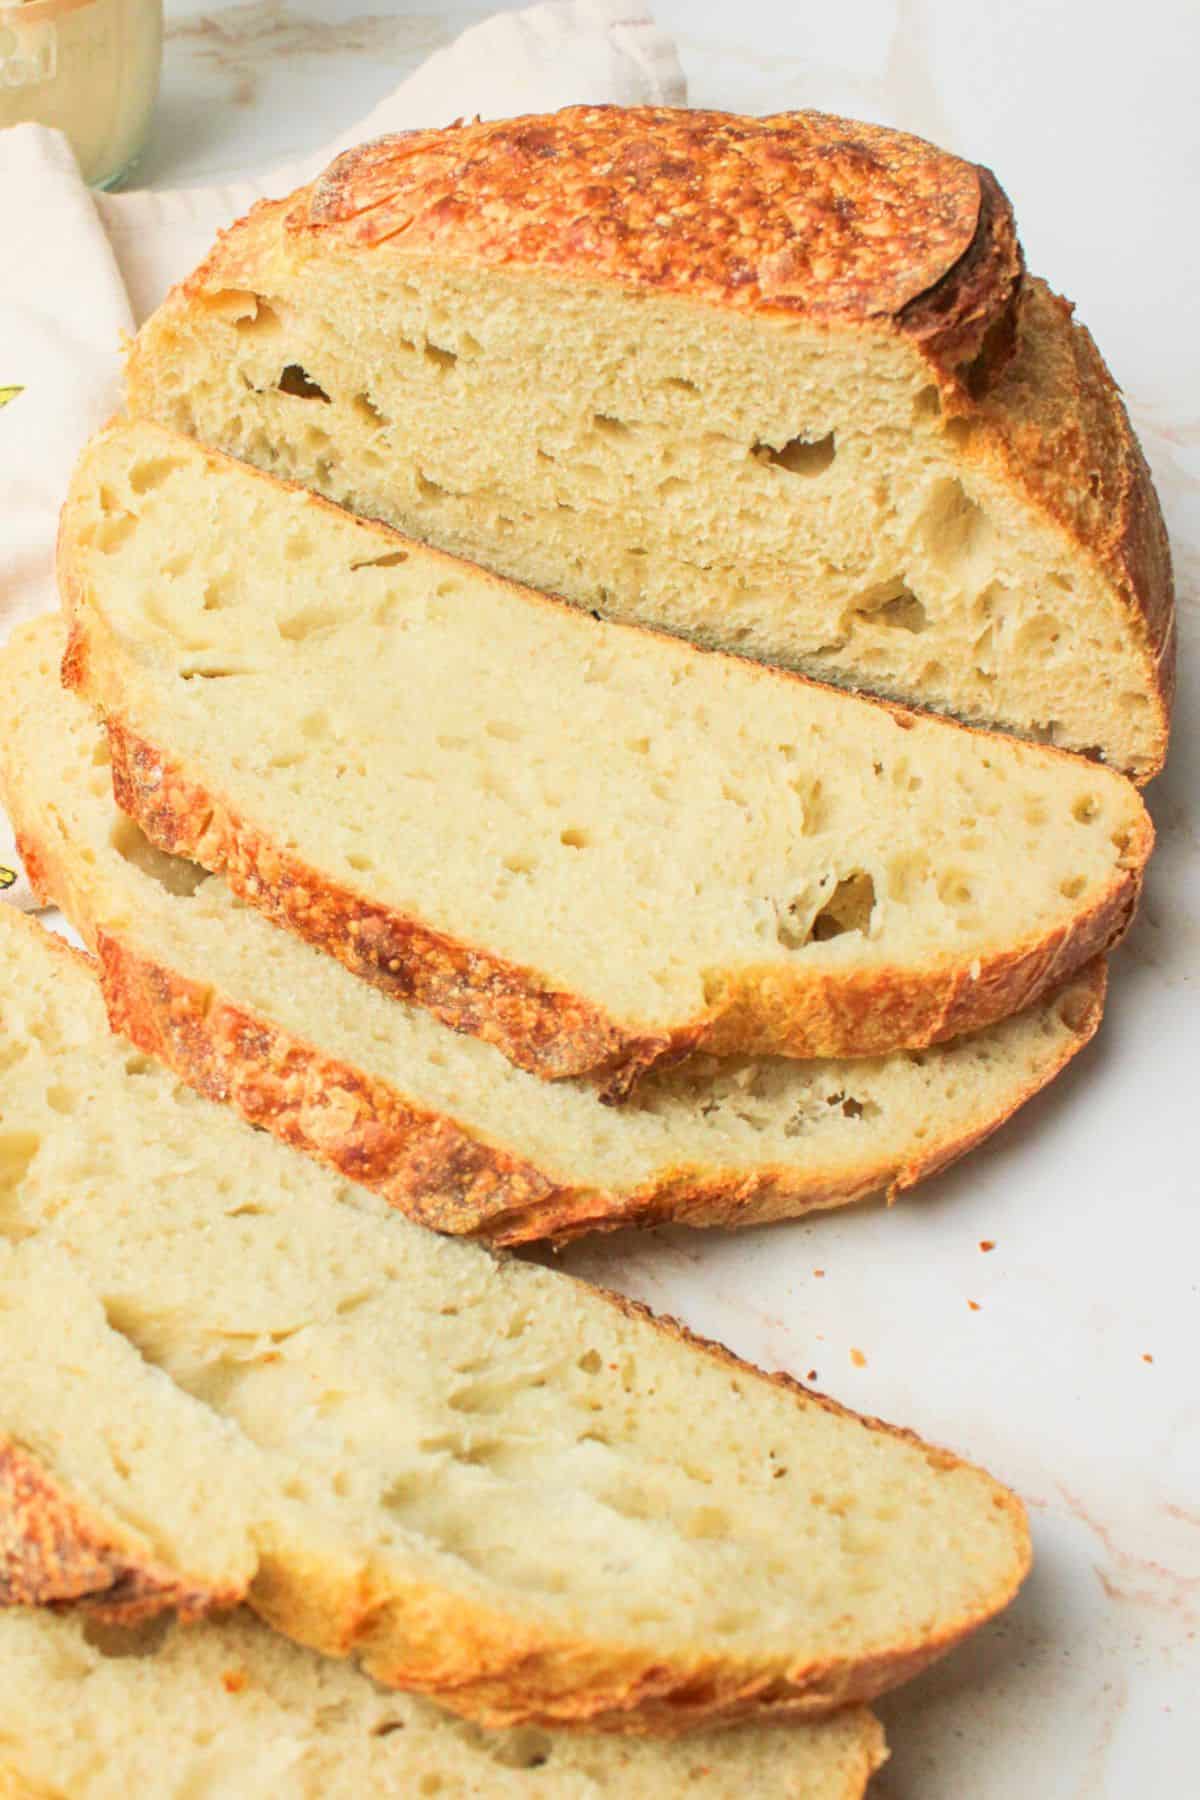
When comparing low hydration vs high hydration sourdough, there's not much difference. The ingredients are the same, but the quantities shift a little in either direction. More moisture means wetter dough, harder to shape, but once baked, you get big open holes in the crumb.
A low hydration sourdough recipe will give you an easier dough to work with (similar to yeast dough in texture) and will produce a tighter crumb with smaller holes. The higher hydration makes a great snack with butter, but a Low Hydration Sourdough Bread makes for better sandwiches because the filling doesn't fall out of the large crumb holes.
Once you've figured out how to make a good low hydration sourdough loaf you can add in inclusions to bring more moisture and fun to the loaf, like we do in our Peach Sourdough Bread, Apple Sourdough Bread, Caramel Apple Cider Sourdough Bread, and S'mores Sourdough Bread.
Jump to:
💛 Why You'll Love This Recipe
- Budget friendly. Sourdough bread costs pennies per ingredient, making it possible to bake a full loaf for under a dollar, far cheaper than store bought bread.
- Easy to customize. This lower hydration dough is great as written, but it also works well as a base for add ins and flavor variations once you feel like experimenting.
- No sticky mess. Unlike high hydration doughs that can feel like working with slime, this low hydration sourdough is more manageable, flexible, and predictable, making it easier to shape and bake with confidence.
🛒 Ingredients
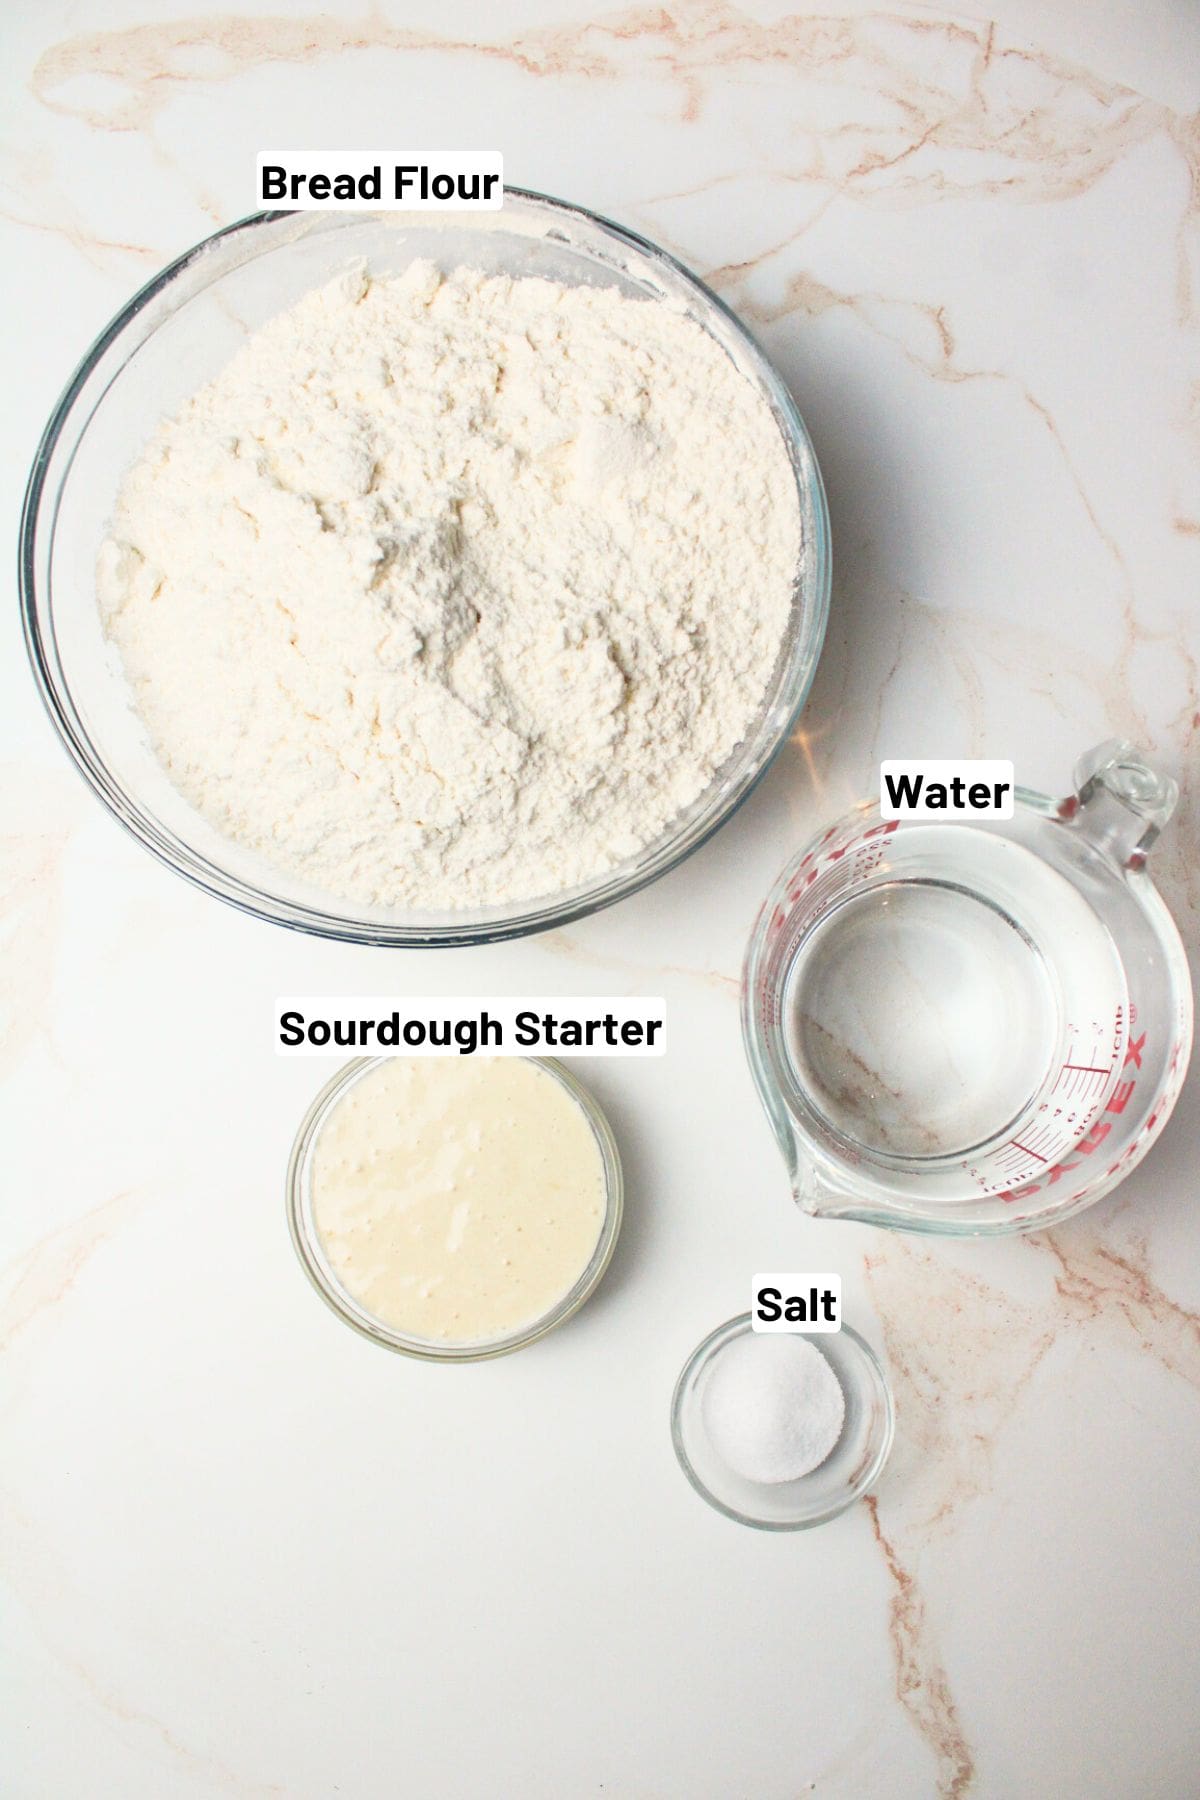
- Bread Flour- You will need bread flour for the base of this recipe. Bread flour has more protein than regular all-purpose flour, which helps create better gluten structure. This results in a stronger dough, a chewier texture, and more developed flavor in your finished bread.
- Water- The temperature of the water plays a big role in how quickly your dough proofs. Warm water will speed up fermentation, while cooler water will slow it down. Aim for room temperature water unless your recipe specifies otherwise.
- Sourdough Starter- This is the natural leavening agent that makes your bread rise. A healthy, active starter is full of wild yeast and beneficial bacteria, giving your bread its rise, tangy flavor, and unique character.
See the recipe card below for full ingredients and instructions.
🔀 Substitutions & Variations
Flour. Use all purpose flour if needed for a softer loaf, or make your own bread flour to keep costs low.
Sourdough starter. Active starter or discard both work. Discard may need a longer rise but helps reduce waste.
Salt. Table, sea, or kosher salt all work. Avoid iodized salt, which can affect fermentation.
Add ins. Fold in cheese, dried fruit, nuts, or seeds during the final stretch and fold for extra flavor and texture.
💰 Budget-Friendly Tips
DIY starter. Maintain a sourdough starter and skip buying yeast altogether. One starter can last for years and is a true frugal kitchen staple.
Buy flour in bulk. Bulk bags of flour are far cheaper per pound. Store extras in airtight containers. I buy 25lb bags of all purpose flour at Sam's Club for about $7 a bag and then add vital wheat gluten as needed, so I always have bread flour on hand.
Limit add ins. Nuts, seeds, and dried fruit increase cost quickly. Stick to the base loaf for the most budget friendly option.
Make it multi purpose. Use one loaf for sandwiches, toast, croutons, or even sourdough bread pudding to stretch it across multiple meals.
🥄 Instructions for Low Hydration Sourdough Bread
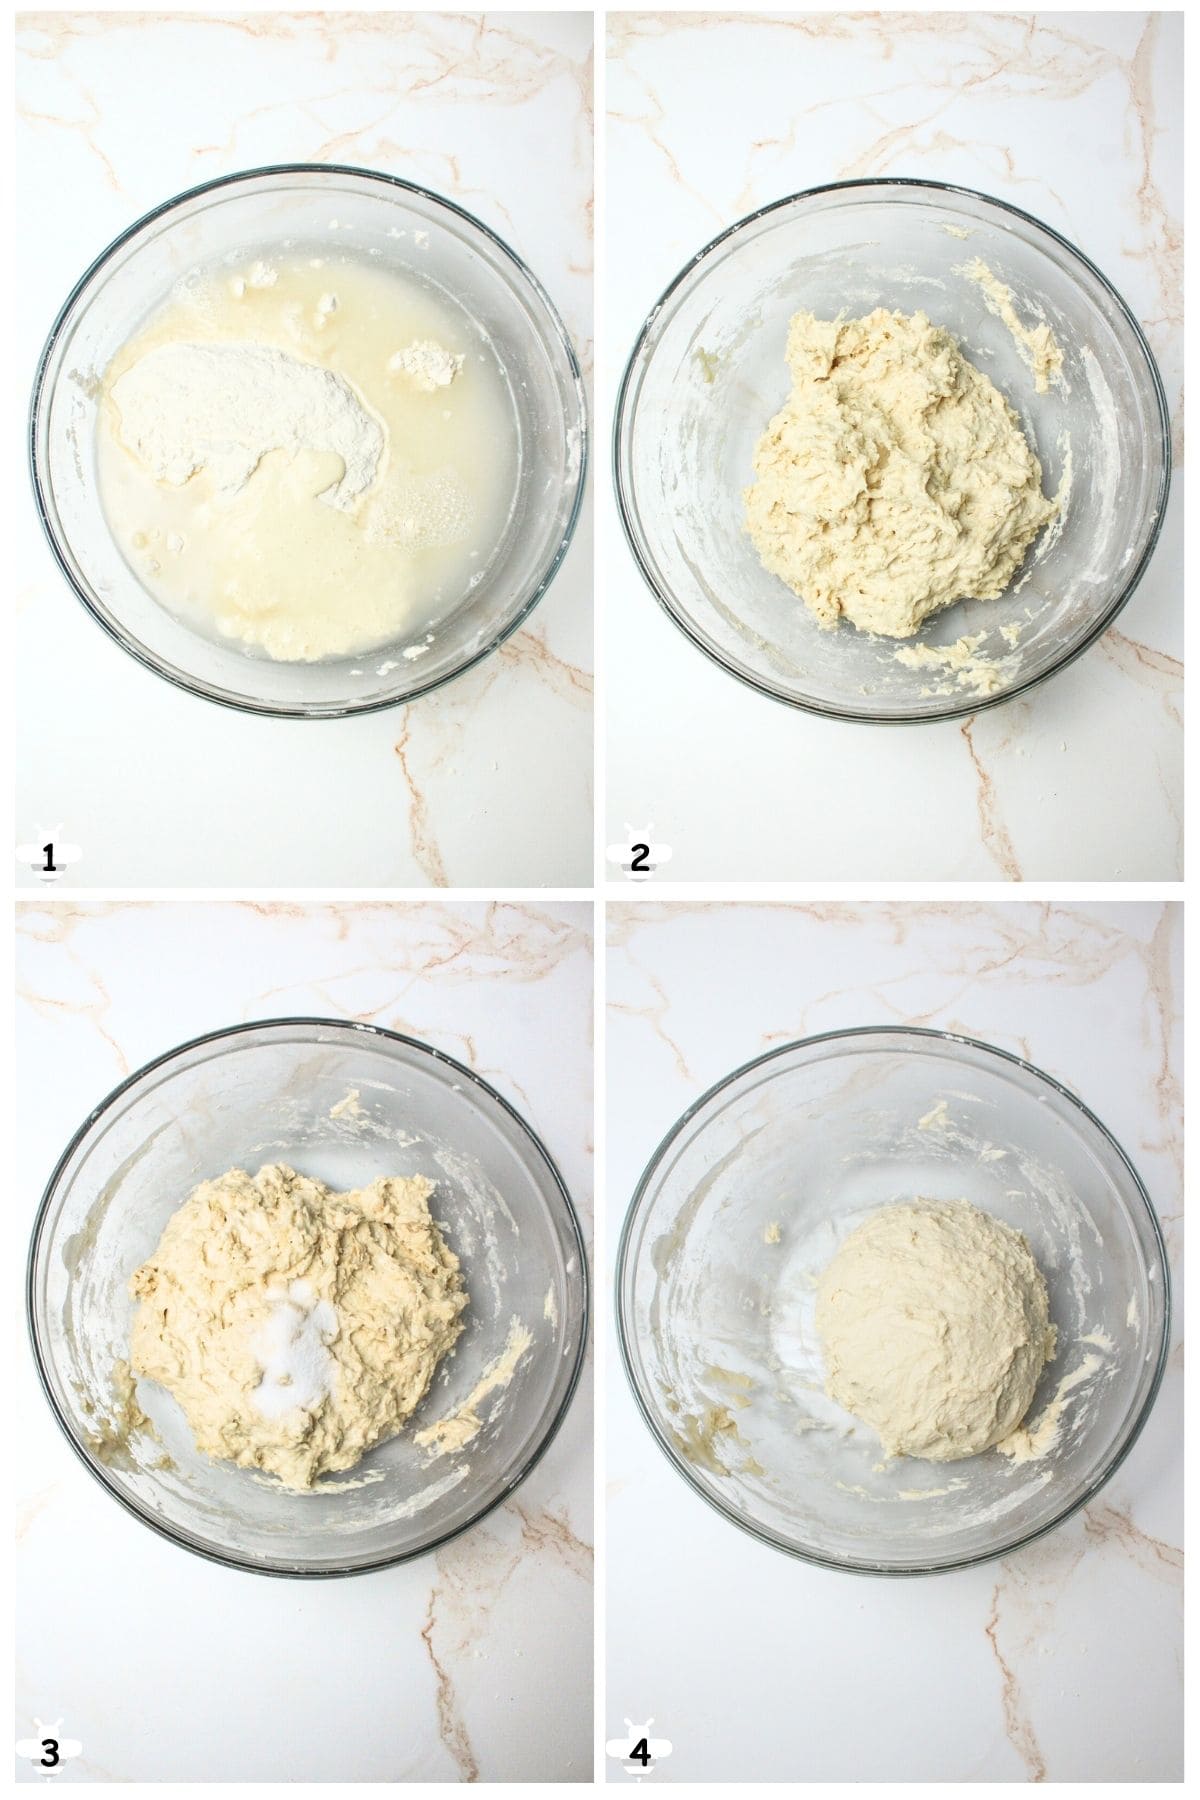
Step 1: In a large mixing bowl, combine the flour, water, and sourdough starter until a shaggy dough forms (Image 1 and Image 2). Cover and let rest 15 minutes.
Step 2: Uncover the dough and add the salt (Image 3). Do your first stretch and fold to incorporate it: grab one side of the dough, gently stretch it up, and fold it over the center. Rotate the bowl 90° and repeat until all four sides are folded (Image 4). Cover the dough.
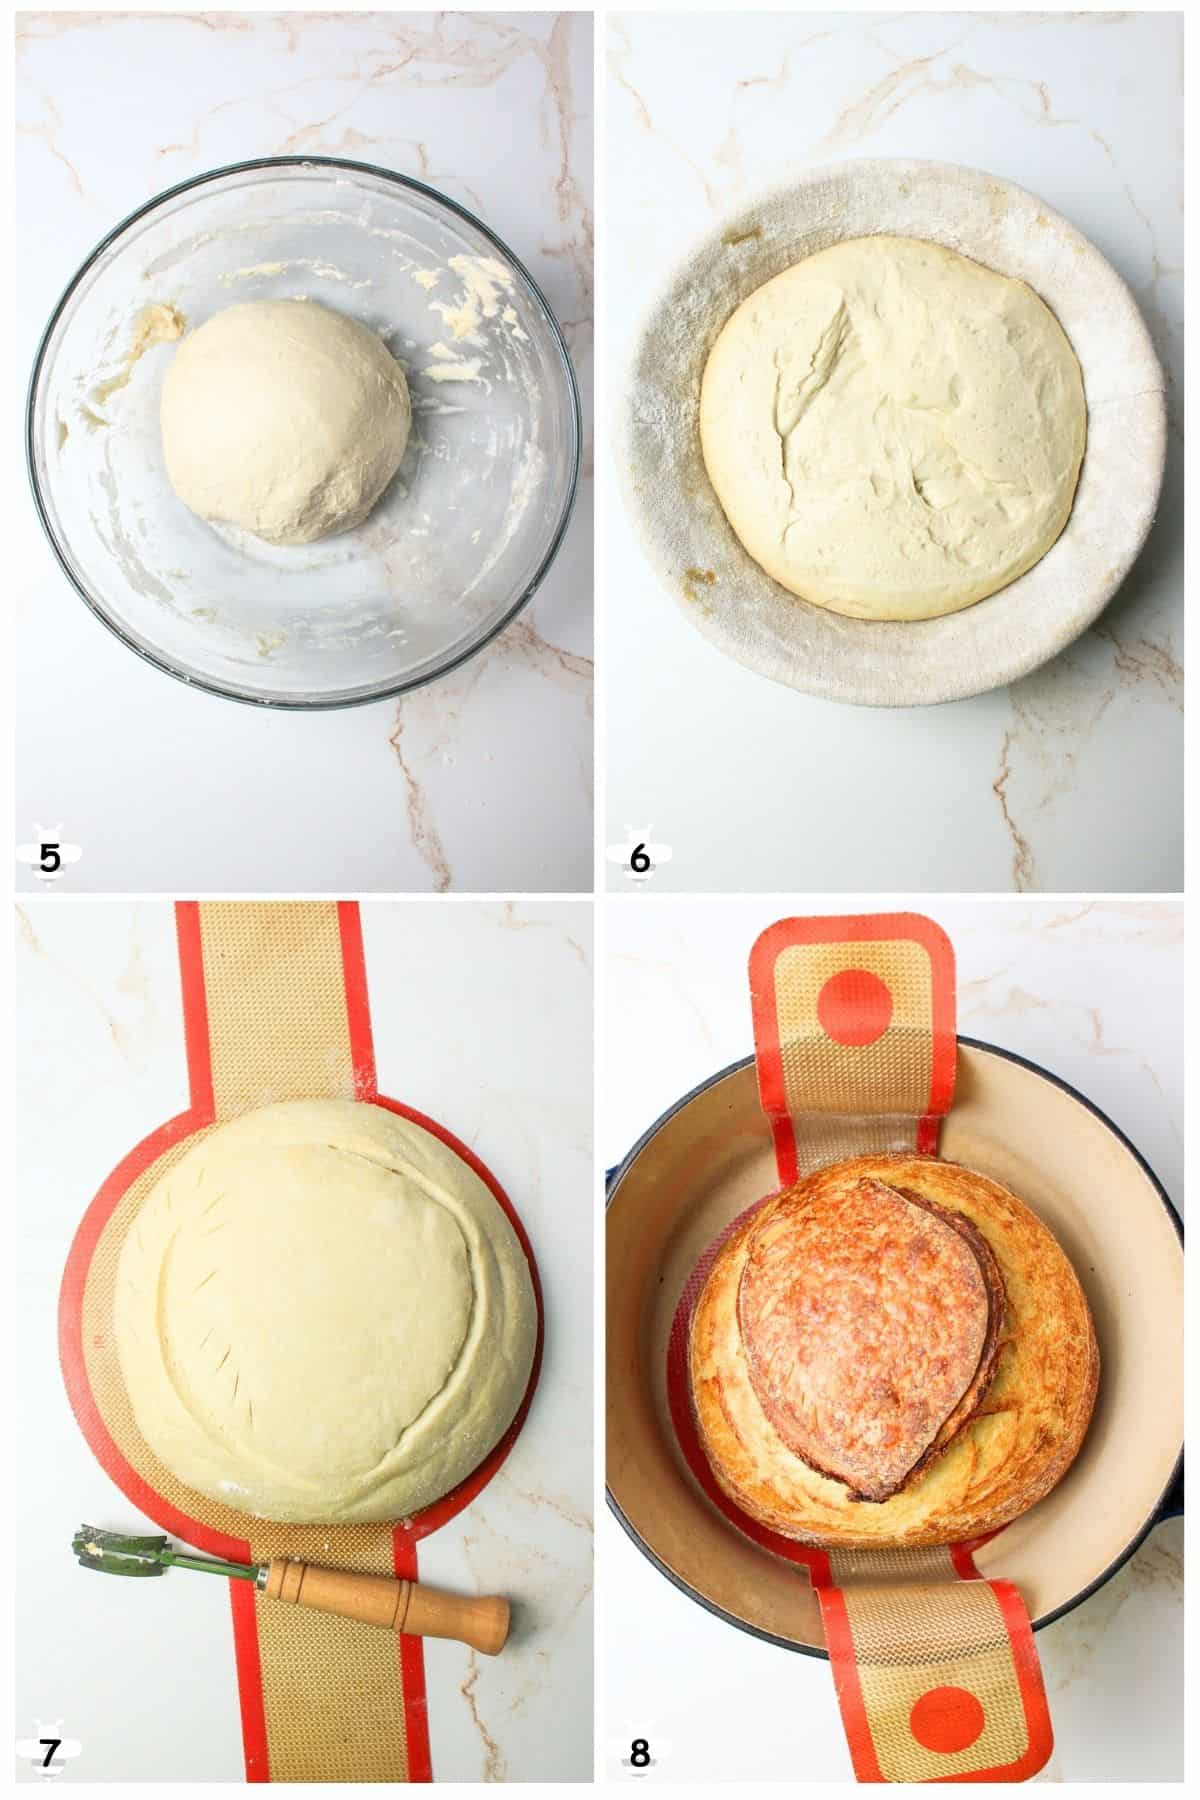
Step 3: Perform 3 more stretch and folds, spaced 30 minutes apart. This develops elasticity and helps the dough shape well (Image 5).
Step 4: Let the dough sit for another 3-4 hours at room temperature. It should look puffy, airy, and about 50-75% larger in volume (not necessarily doubled). You should see bubbles forming, and when gently shaken or poked, the dough should jiggle slightly like a pillow.
Step 5: Turn the dough onto a lightly floured surface. Stretch and fold the edges under a few times to tighten the surface. Tension the surface by gently dragging the dough toward you in small pulls while rotating, forming a smooth, taut top. Place the dough in a rice-floured banneton seam-side up (Image 6). Cover and refrigerate overnight (8-12 hours).
Step 6: Place a Dutch oven in the cold oven and preheat to 425°F. Transfer the dough onto parchment paper or a silicone sling and score the top (Image 7).
Step 7: Bake covered for 30 minutes, then remove the lid and bake an additional 15 minutes uncovered, or until the internal temperature reaches 205°F (Image 8).
Step 8: Remove the bread and cool completely (about 3 hours) before slicing and serving. Enjoy!
👩🏻🍳 Expert Tips
- Grow the hydration slowly. This is a great beginner base. As you gain confidence, increase hydration by 10 to 15 grams per bake until you are comfortable working with wetter doughs.
- Technique over numbers. Hydration matters less than technique. Stretch and folds and proper shaping are what build structure and lift, especially as dough gets wetter.
- Re score for lift. For a bigger ear and more rise, re score the dough about 7 minutes into baking.
- Add steam. For extra oven spring, add two ice cubes or a few sprays of water before covering the Dutch oven to create steam.
❄️ Storage, Reheating & Make Ahead
Storage and freezing. Keep cooled bread in a paper bag or bread box at room temperature for 2 to 3 days. For longer storage, slice and freeze in an airtight bag for up to 3 months.
Reheating. Warm wrapped slices in a 350°F oven for 10 to 15 minutes, toast for a crisp crust and warm center, or microwave for 10 to 15 seconds if needed.
Make ahead. This bread is ideal for making ahead since the overnight cold fermentation improves flavor and structure. Bake, freeze sliced, and enjoy fresh tasting bread anytime.
🥗 Side Dishes
Pairs well with soups, stews, or creamy pasta dishes. Try it with our Sourdough Chicken and Dumplings!
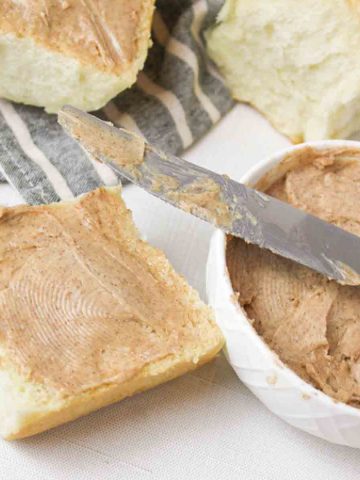
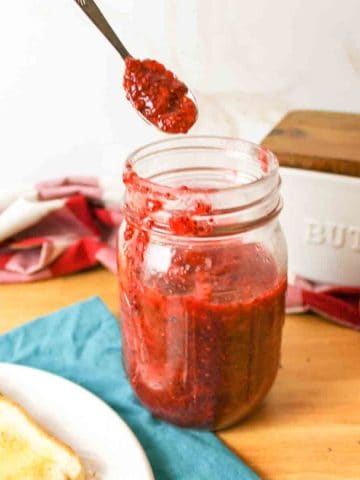
Try with avocado toast, butter, or cheese spreads for a simple snack. Our homemade jams and jellies also taste wonderful with sourdough. Check out our Watermelon Jelly, Peach Peel Jelly, and Sugar Free Strawberry Jam.


❓ Low Hydration Sourdough Bread FAQs
Salt is added to sourdough after the dough has had a head start, usually following the initial mix and a short rest, because this allows the flour and water to hydrate and the gluten to start developing without interference.
Adding salt too early can tighten the gluten and slow fermentation, so waiting ensures the dough becomes elastic, easier to handle, and develops better flavor.
Likely from shaping or uneven folding, make sure to handle gently and do proper stretch-and-folds.
The biggest mistake beginners make with sourdough bread is underestimating fermentation timing, either not letting the dough ferment long enough or letting it overproof.
Both can lead to dense, gummy bread or a loaf that collapses, because the natural yeast and bacteria need the right amount of time to develop flavor, structure, and gas for a good rise.
If you don't score the top of sourdough bread, the loaf will still bake, but it will burst and crack unpredictably as it expands in the oven. Scoring directs the expansion, creating a controlled "ear" and a more attractive, even crust, while also helping the loaf rise properly.
🍽️ More Recipes You'll Love
- Sourdough CornbreadRecipe $2.14 / Serving $0.27
- Sourdough Bread PuddingRecipe $1.98 / Serving $0.33
- Sourdough Apple MuffinsRecipe $5.09 / Serving $0.42
- Peaches and Cream Sourdough MuffinsRecipe $3.66 / Serving $0.31


🐝 If you tried this Low Hydration Sourdough Bread, please leave a ⭐️ star rating and share your buzz in the 💬 comments below. I'd truly appreciate it!
📖 Recipe
Low Hydration Sourdough Bread
Equipment
- Silicone Bread Sling *or parchment paper
Ingredients
- 500 g bread flour - ($0.87)
- 325 g water - ($0.00)
- 100 g sourdough starter (active) - ($0.09)
- 10 g salt - ($0.01)
Instructions
- Mix Dough: In a large mixing bowl, combine flour, water, and sourdough starter until a shaggy dough forms. Cover and let rest for 15 minutes.
- Add Salt & First Fold: Uncover and add salt. Perform the first stretch and fold to incorporate it: grab one side of the dough, gently stretch it up, and fold it over the center. Rotate the bowl 90° and repeat until all four sides are folded. Cover the dough.
- Stretch & Folds: Perform 3 more sets of stretch and folds, spaced 30 minutes apart. This develops elasticity and helps the dough hold its shape.
- Bulk Fermentation: Let dough rest for 3-4 hours at room temperature, until puffy, airy, and 50-75% larger in volume. It should have visible bubbles and a slight jiggle when poked.
- Shape Dough: Turn dough onto a lightly floured surface. Stretch and fold edges under a few times to tighten the surface. Create tension by gently dragging dough toward you in small pulls while rotating, forming a smooth, taut top.
- Overnight Proof: Place dough seam-side up in a rice-floured banneton. Cover and refrigerate 8-12 hours.
- Preheat & Score: Place a Dutch oven in a cold oven and preheat to 425°F (218°C). Transfer dough to parchment paper or a silicone sling and score the top.
- Bake: Bake covered for 30 minutes, then uncover and bake an additional 15 minutes, until internal temperature reaches 205°F (96°C).
- Cool & Serve: Remove bread from Dutch oven and cool completely on a wire rack, about 3 hours, before slicing and serving.
Notes
- Hydration: Start with this beginner-friendly level. Gradually increase 10-15 g per bake as you gain confidence.
- Bulk Fermentation: Let sit 3-4 hrs at room temp until puffy and airy (50-75% larger).
- Shaping: Fold edges under, create surface tension, place seam-side up in a floured banneton. No preshape needed.
- Cold Fermentation: Refrigerate overnight (8-12 hrs) for flavor and structure.
- Scoring: Score before baking; optionally re-score after 7 min in oven for bigger lift.
- Steam: Add ice cubes or mist water before placing Dutch oven in oven for crisp crust and better rise.
- Cooling: Let cool completely (3 hrs) before slicing.
- Storage: Keep at room temp in airtight container 2-3 days or freeze sliced up to 3 months.
Nutritional Information
Save This Recipe to Your Inbox
By signing up, you'll join our email list and can unsubscribe anytime.


Nicole Durham says
We make multiple loaves of this bread and keep them in the freezer so we never run out.