

Looking to add some holiday fun to your elf shenanigans? These elf sized cookies are perfect for bringing some fun and cheer in the form of a bite sized cookie.

Save This Recipe to Your Inbox
By signing up, you’ll join our email list and can unsubscribe anytime.
These mini cookies are a labor of love but always worth it! One batch of buttery cookie shortbread dough gets turned into 4 different types of Christmas cookies!
With Elf Sized Cookies, you'll get tiny chocolate chip cookies, Christmas crinkles, jam filled thumbprints, and festive mini sugar cookies with sprinkles. Four timeless Christmas cookie favorites in one batch.
For more Christmas fun, make sure to check out these Cake Mix Peanut Butter Blossoms, Spiced Orange Ginger Ale Mocktail, Cranberry Orange Sauce, and Christmas Tree Fruit Pizza.
Jump to:
💛 Why You'll Love This Recipe
- There's a lot of variety. One dough to make them all. This recipe can make several different types of traditional Christmas cookies, and you can make more of one, less of another, or try all the flavors for a great variety.
- Perfect for your Christmas elf shenanigans. These mini Christmas cookies are perfect for those of us with a little elf on the shelf hanging around. Have your elf bake up a batch while the kids sleep, or have the kids help make a batch for your elf. There are so many fun possibilities!
- Simple ingredients. We actually make a basic shortbread cookie base, which means very simple ingredients like flour, butter, sugar, and vanilla, and from that, we build off to make our tasty variations. We use this same base in our Candy Cane Shortbread Cookies, and Cranberry Pecan Shortbread Cookies.
🛒 Ingredients
Butter- You'll need butter to make the cookies rich in taste.
Granulated sugar- Add granulated sugar to the dough to make the cookies soft and sweet.
Food coloring- If desired, you can use red and green food coloring for a festive touch.
Powdered sugar- This will be used to make the dusting on the crinkle cookies.
Festive sprinkles- Use Christmas-themed or Christmas-colored sprinkles for a fun and festive touch.
Mini chocolate chips- These cookies are tiny, so you'll need tiny chocolate chips to decorate them with.
See the recipe card below for full ingredients and instructions.
🔀 Substitutions & Variations
Skip the Sprinkles. Omit the sprinkles for a simple plain sugar cookie version.
Swap the Chocolate Chips. Use mini M&Ms, crushed peppermint, or white chocolate chips instead of mini chocolate chips.
Change the Thumbprint Filling. Fill the thumbprints with lemon curd, chocolate ganache, or even Homemade Strawberry Jam for variety.
Make a Chocolate Version. Skip the food coloring and mix in 1-2 tablespoons of cocoa powder for chocolate mini cookies.
💰 Budget-Friendly Tips
Use One Dough for Four Cookies. This Elf Sized Cookies recipe stretches a single batch into multiple varieties, saving ingredients and time.
Skip Specialty Ingredients. Food coloring, sprinkles, and mini chips are optional. Plain mini cookies are still cute and taste great.
Buy Holiday Sprinkles on Clearance. Pick up sprinkles and candy after holidays when they go on sale. They keep well for next year.

🥄 Instructions for Elf Sized Cookies
Step 1: Combine sugar, butter and vanilla in a large bowl until creamy and light.
Step 2: Add in the flour and salt. Mix until combined.
Step 3: On floured plastic wrap, press into a disc shape and then wrap in plastic wrap and place in the fridge for 30 minutes.
Step 4: Remove dough from fridge and slice dough into 4 equal sized pieces. Take one portion and slice that in half. Place all of these pieces onto a plate and set in the fridge while you work on one variety at a time.
Step 5: Preheat the oven to 350 degrees and line a baking sheet with parchment paper.
Tiny Christmas Crinkles
Step 1: With the two smaller pieces add 2 drops of red food coloring to one and 2 drops to the other. Roll and mix them in your hands until the color is incorporated.
Step 2: Use a ¼ teaspoon to scoop the dough and roll it into little balls.
Step 3: Place powdered sugar into a small bowl or on a plate and roll your dough balls into the sugar before placing about an inch apart on your baking sheet.
Step 4: Bake in the oven for 8 minutes. Let rest on the pan for 1-2 minutes and then place into the powdered sugar for a second coating. Let cool.
Mini Chocolate Chip Cookies
Step 1: Take one large portion from the dough you sliced earlier and add in most of the mini chocolate chips. Roll in your hands to combine until evenly distributed.
Step 2: Use a ¼ teaspoon to scoop the dough and place it one inch apart on the prepared baking sheet. top with 1-4 mini chocolate chips for a nicer appearance.
Step 3: Bake in the oven for 8 minutes. Let cool 2-3 minutes before transferring to a plate or wire rack.
Mini Sprinkle Cookies
Step 1: Incorporate most of the sprinkles into the dough by mixing them together. Then roll the dough out to be ¼ of an inch thick on a lightly floured surface.
Step 2: Use the bottom of a frosting tip to cut out tiny circles. How well this works depends on your sprinkles of choice. If it's too difficult you can just use a ¼ teaspoon to scoop and roll the dough.
Step 3: Place an inch apart on your baking sheet and top with additional sprinkles. Bake 8 minutes and let cool 1-2 minutes.
Tiny Thumbprint Cookies
Step 1: Scoop the dough with a ½ teaspoon measuring spoon and roll into a ball. Place 2 inches apart on your baking sheet. Bake 8 minutes.
Step 2: Immediately after baking use the back end of a ¼ teaspoon to press an indent into the center of the cookie.
Step 3: Fill the indents with jam. I like to place the jam in a baggie and snip the corner to make it easier and cleaner.
Step 4: Allow all of your cookies to cool and set before storing in an airtight container for up to a week.

👩🏻🍳 Expert Tips
- Work in Batches. These Elf Sized Cookies are tiny and time-consuming. Use multiple baking sheets or let others help to speed up the process.
- Better the Next Day. They start crisp and soften slightly over time. Most taste even better on day two.
- No Spread. They barely spread, so you can fit more per tray. Leave a little space, but not much is needed.
- Keep Dough Cold. Chill dough between batches. Cold butter helps the cookies hold their shape and prevents flattening.
❄️ Storage and Make Ahead
Storage. Store Elf Sized Cookies in an airtight container at room temperature for up to 5 days. Thumbprints last about 3 to 4 days.
Make Ahead. Chill dough up to 3 days or freeze logs up to 2 months. Thaw in the fridge before baking.
🥗 Side Dishes or Pairing Ideas
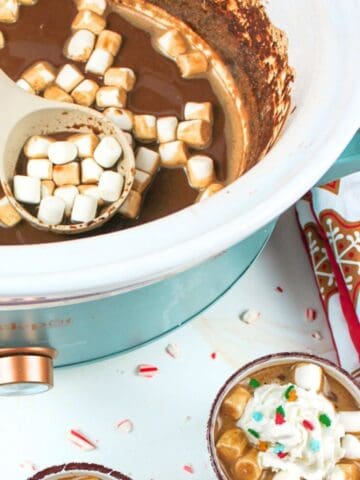
Serve Elf Sized Cookies with hot cocoa, milk, peppermint mochas, or Christmas breakfast spreads. They also pair perfectly with cookie trays, dessert boards, and Elf on the Shelf morning setups.
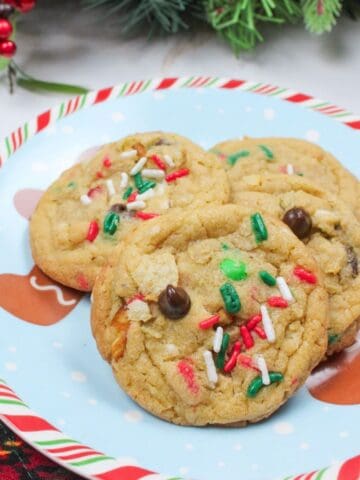
- Dairy Free Crock Pot Hot ChocolateRecipe $4.50 / Serving $0.38
- Christmas Kitchen Sink CookiesRecipe $7.68 / Serving $0.43
- Eggnog Poke CakeRecipe $5.68 / Serving $0.47
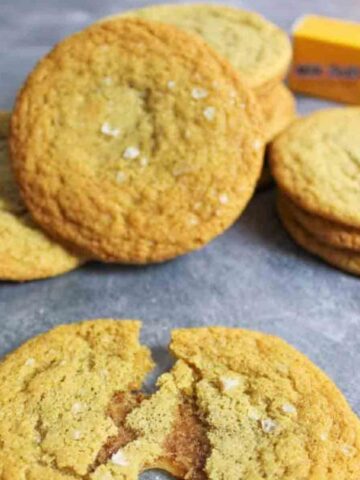
- Gingerbread CookiesRecipe $4.85 / Serving $0.10


❓ Elf Sized Cookies FAQs
The cookie dough can be made and stored up to 3 days in advance. The baked cookies will last up to a week. The thumbprint cookies will last closer to 4 days.
Yes, these cookies can be frozen after being baked. Let them cool completely and then store them in an airtight container in the freezer for up to 3 months. Thaw for a few minutes on the counter when ready to eat. I recommend having a wax paper or parchment paper layer between the thumbprint cookies to prevent sticking.

🍽️ More Recipes You'll Love
- Milk Dud CookiesRecipe $4.09 / Serving $0.11
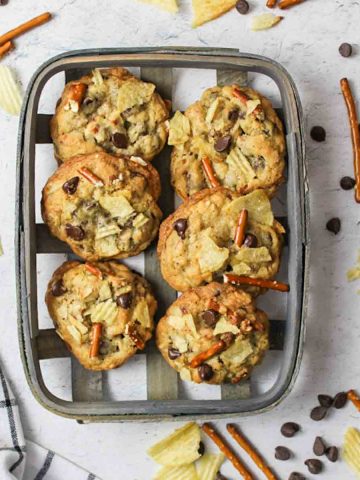
- Pretzel Potato Chip CookiesRecipe $3.51 / Serving $0.23
- Cranberry Eggnog MuffinsRecipe $4.80 / Serving $0.28
- Poor Mans Prime RibRecipe $23.28 / Serving $3.88


🐝 If you tried these Elf Sized Cookies, please leave a ⭐️ star rating and share your buzz in the 💬 comments below. I'd truly appreciate it!
📖 Recipe

Elf Sized Cookies
Equipment
Ingredients
- ½ cup granulated sugar - ($0.18)
- 1 cup unsalted butter, softened - ($1.98)
- ½ teaspoon vanilla extract - ($0.01)
- 2 cups all-purpose flour - ($0.26)
- ⅛ teaspoon salt - ($0.01)
Cookie Add-ins
- 2 drops red food coloring - ($0.02)
- 2 drops green food coloring - ($0.02)
- ½ cup powdered sugar - ($0.18)
- 1 tablespoon mini chocolate chips - ($0.07)
- 1 tablespoon festive sprinkles - ($0.16)
- ¼ cup jam - ($0.40)
Instructions
- Make dough. In a large bowl, cream together the granulated sugar, butter, and vanilla extract until light and smooth. Add the flour and salt and mix just until combined.
- Chill. Press the dough into a disc on plastic wrap, wrap tightly, and refrigerate for 30 minutes.
- Portion. Divide the chilled dough into 4 equal pieces. Cut one portion in half so you have 2 small pieces and 2 large pieces. Keep dough refrigerated while working.
- Prep oven. Preheat the oven to 350°F and line baking sheets with parchment paper.
- Tiny Christmas crinkles. Tint the two small dough pieces with red and green food coloring, kneading until evenly colored. Scoop dough using a ¼ teaspoon, roll into balls, and coat in powdered sugar. Place 1 inch apart on the baking sheet. Bake for 8 minutes. Let rest 1 to 2 minutes, then roll again in powdered sugar. Cool completely.
- Mini chocolate chip cookies. Mix most of the mini chocolate chips into one large dough portion. Scoop using a ¼ teaspoon and place 1 inch apart on the baking sheet. Press a few extra chips on top if desired. Bake for 8 minutes. Cool 2 to 3 minutes before transferring.
- Mini sprinkle cookies. Mix most of the sprinkles into the remaining large dough portion. Roll dough to ¼-inch thickness and cut tiny circles using a frosting tip or scoop with a ¼ teaspoon. Top with extra sprinkles. Bake for 8 minutes and cool briefly.
- Tiny thumbprints. Scoop dough using a ½ teaspoon, roll into balls, and place 2 inches apart on the baking sheet. Bake for 8 minutes. Immediately press an indent into the center and fill with jam. Cool completely before storing.
Notes
- Texture. Cookies soften by the next day after baking.
- Spacing. These cookies spread very little; 1 inch spacing is sufficient.
- Make ahead. Dough can be refrigerated for up to 3 days.
- Storage. Store cookies in an airtight container for up to 7 days. Thumbprints are best within 4 days.
- Freezing. Freeze baked cookies for up to 3 months with parchment between layers.
Nutritional Information
Save This Recipe to Your Inbox
By signing up, you'll join our email list and can unsubscribe anytime.


Chanel Pugh says
Congratulations! You've created Christmas Cookie Crisp Cereal.
Nicole says
Hahaha that sounds like a great idea