

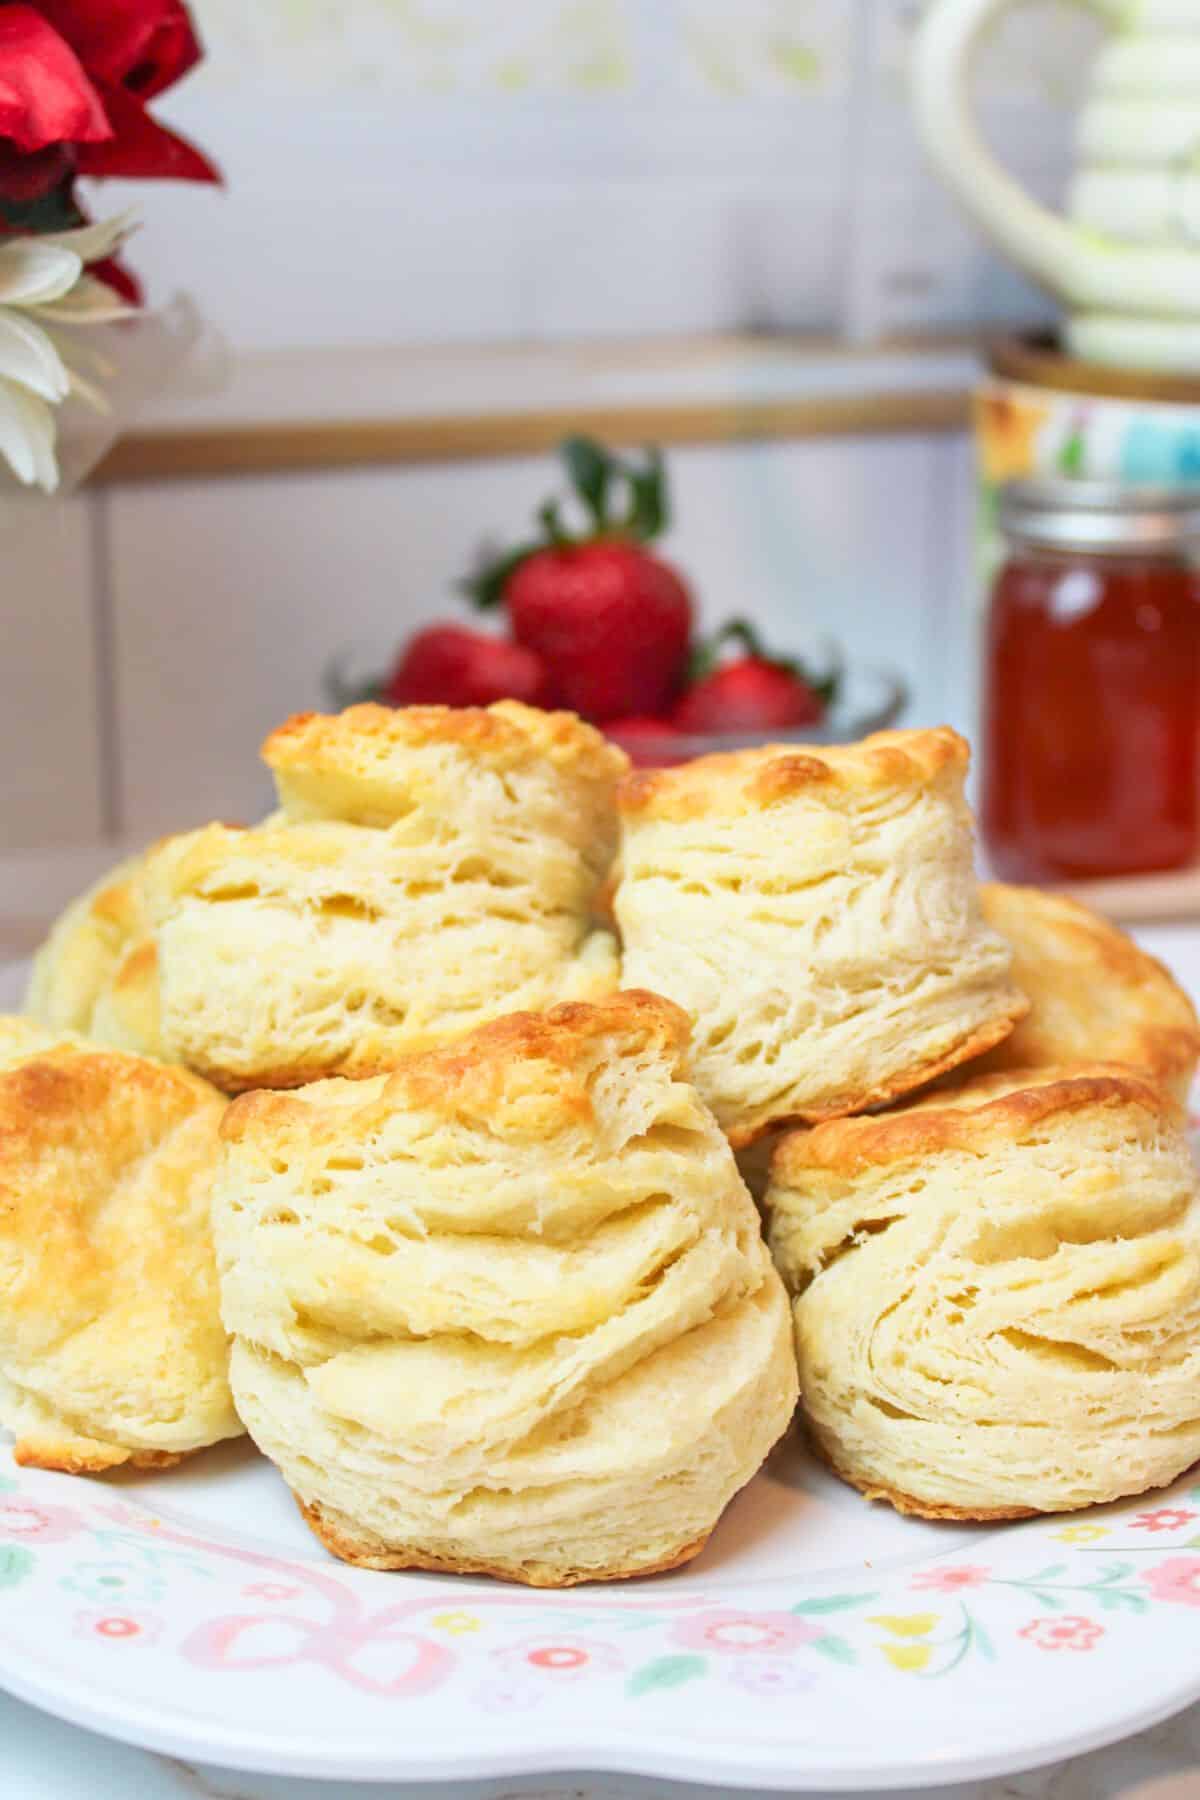
These delicious and buttery 3 Ingredient Biscuits are made tender and tall! Top them with honey or jam and enjoy a soft biscuit that melts in your mouth.
Save This Recipe to Your Inbox
By signing up, you’ll join our email list and can unsubscribe anytime.
These 3-ingredient biscuits are a testament to the beauty of simplicity in cooking. Made with self-rising flour, butter, and buttermilk, they are a classic Southern staple known for their fluffy texture and rich, buttery flavor.
These southern biscuits are best served warm, either on their own with a pat of butter or as a side to your favorite meals. The simplicity of this recipe makes it a versatile and quick addition to any breakfast or dinner table.
For more biscuit recipes, be sure to check out my Jalapeno Cheddar Biscuits, Air Fryer Canned Biscuits, and Baking Powder Biscuits.
Jump to:
⭐⭐⭐⭐⭐ The Buzz From Readers
"I bake about 30 of these biscuits for a restaurant for Sunday brunch.
Everyone raves about how good these biscuits are.
Thank you for sharing your recipe."
- Suzette
💛 Why You'll Love This Recipe
- Minimal ingredients. You only need three ingredients, which keeps shopping simple, costs low, and prep easy.
- Fast to make. These from scratch biscuits come together quickly, making them a great last minute side. They take a bit longer than Air Fryer Canned Biscuits or Easy Easter Bunny Biscuits, but the homemade flavor is worth it.
- Flaky and soft. Using frozen butter creates tender, flaky layers with rich buttery flavor.
🛒 Ingredients
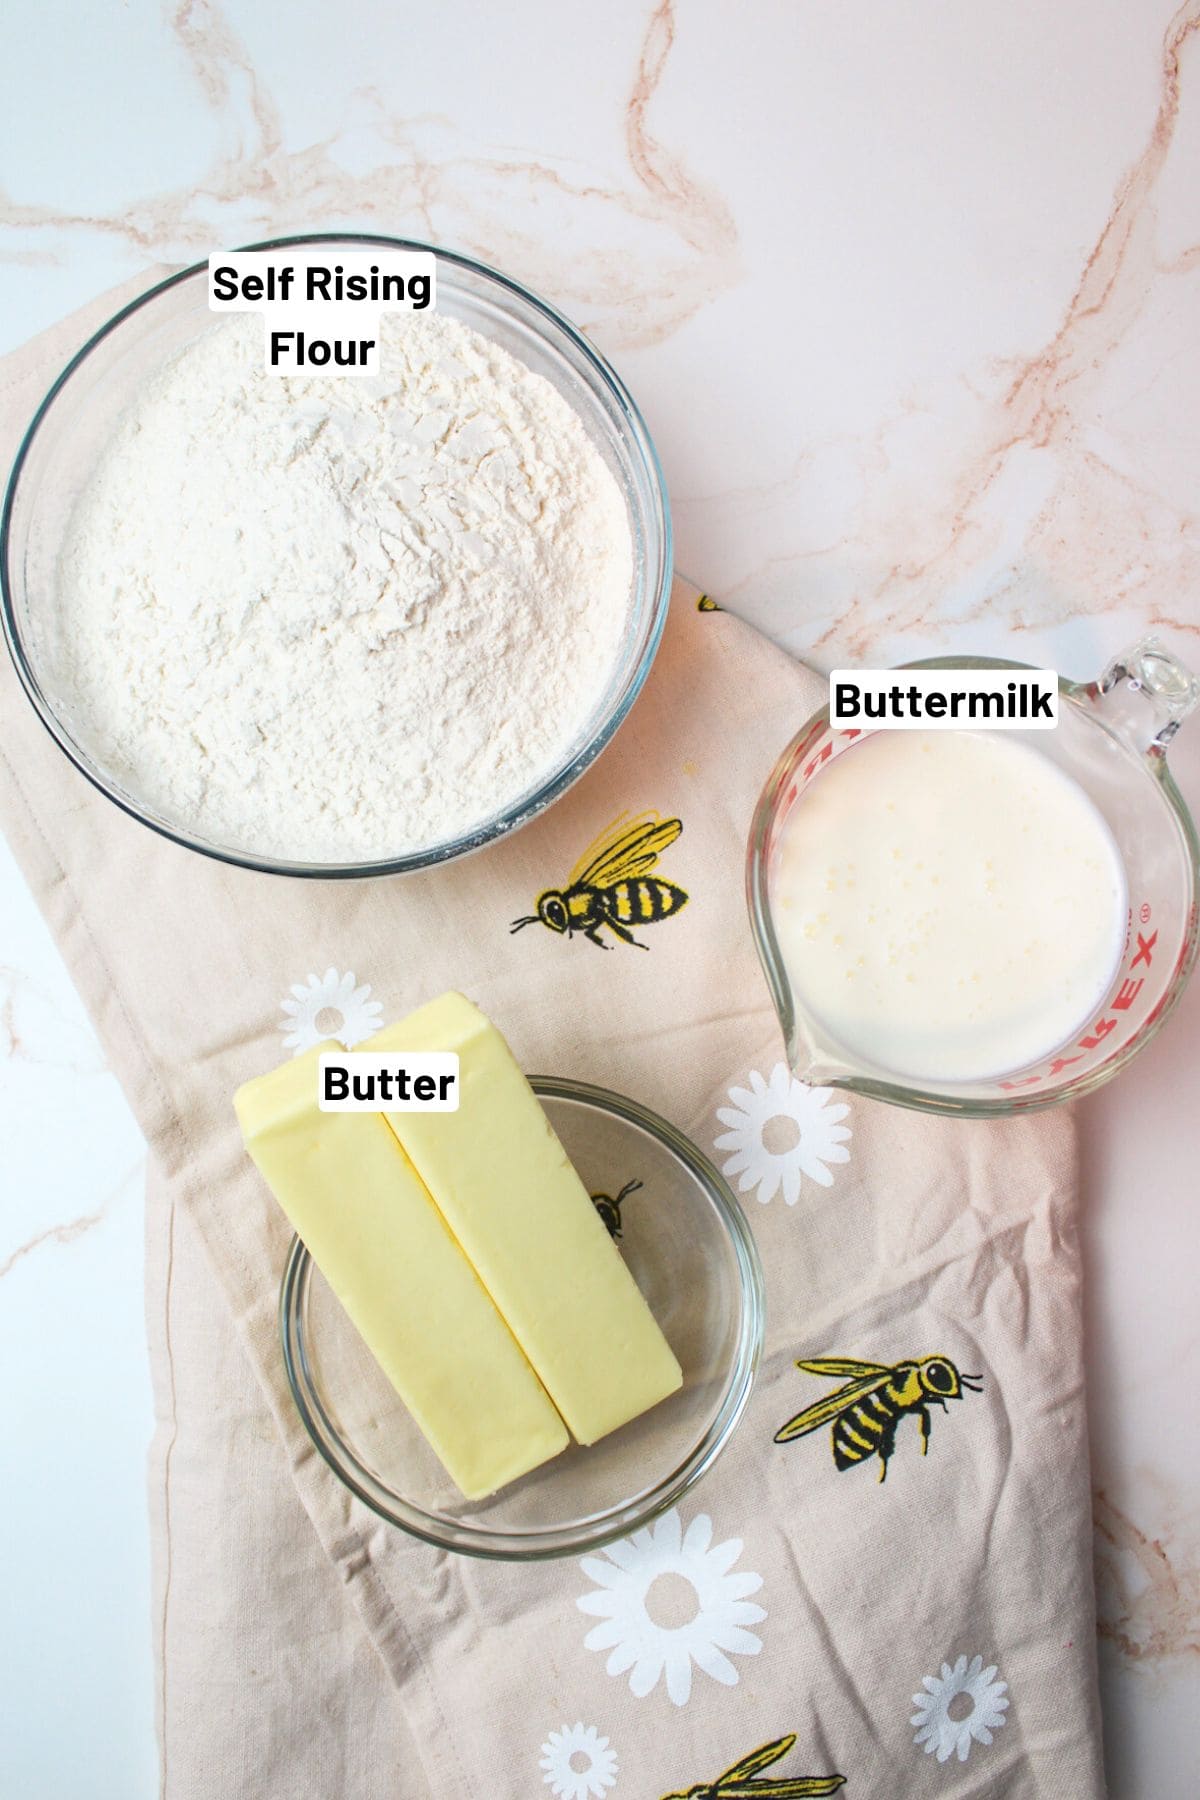
Self rising flour. Provides the leavening so there's no need to measure baking powder or salt separately. We also use it in our 4 Ingredient Scones and Jalapeno Cheddar Beer Bread.
Buttermilk. Adds flavor and helps create a light, tender biscuit with a subtle tang.
Butter. Use cold or frozen butter to create flaky layers and rich flavor.
See the recipe card below for full ingredients and instructions.
💰 Budget-Friendly Tips
Buy butter in bulk when on sale. Butter freezes well, making it easy to stock up for baking.
Buttermilk substitute option. If you don't have buttermilk, regular milk with a splash of vinegar or lemon juice works in a pinch and is cheaper than buying buttermilk.
🥄 Instructions for 3 Ingredient Biscuits
Step 1: Freeze your butter for at least 1 hour before use.
Step 2: Preheat your oven to 475°F. (Yes, I know that's very hot. Trust me.)

Step 3: Measure out and sift 3 cups of self rising flour into the mixing bowl (Image 1).
Step 4: Grab the cheese grater and the butter. Shred the butter on the largest cheese shred setting (Image 2). Stir into the flour using a fork until the large butter clumps have been stirred away (Images 3 & 4). Don't pastry blend just mix them in.
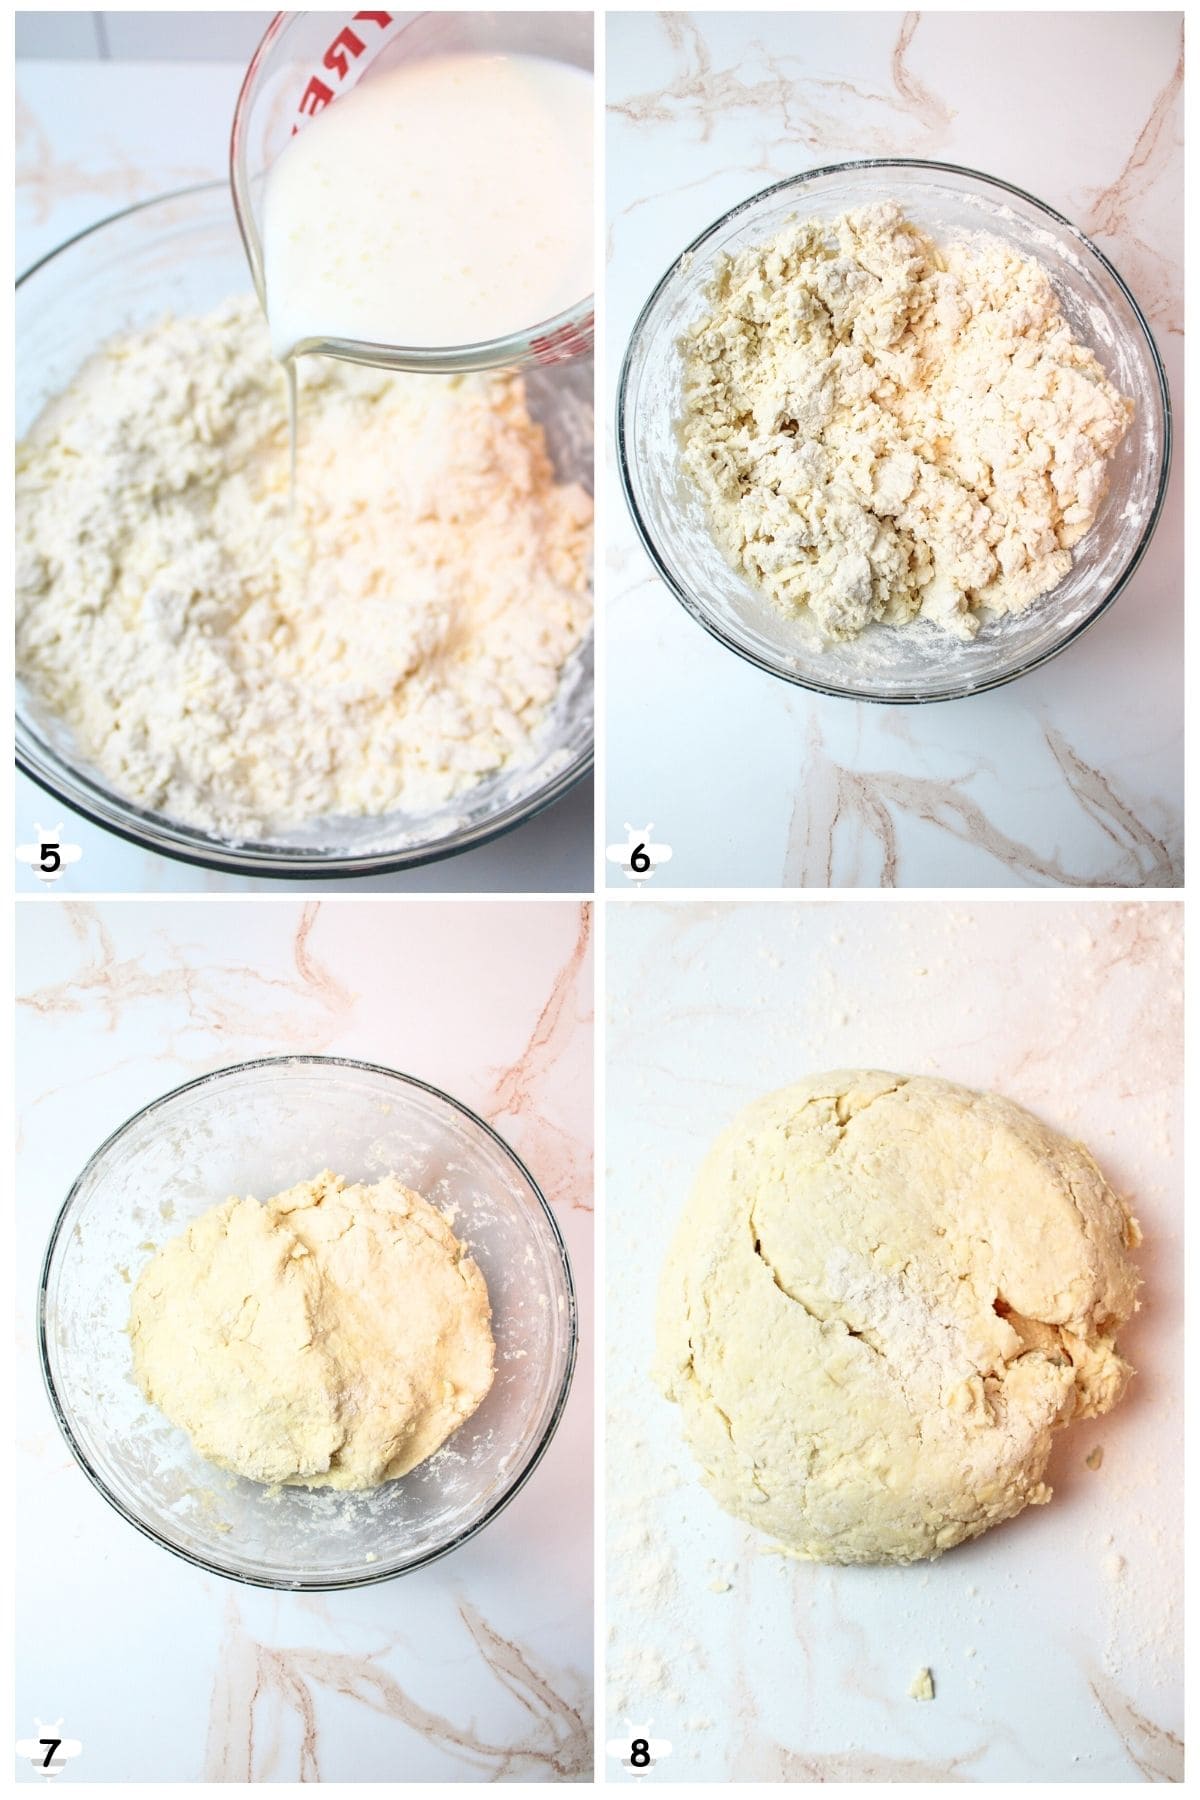
Step 5: Measure out 1 cup of cold buttermilk, you may not need it all. I use anywhere between ½ cup to 1 cup everytime I do this recipe and it varies on a lot of things. Slowly add in the buttermilk and mix with a fork (Images 5 & 6). Continue as needed.
Step 6: Once the dough has formed a ball that pulls away from the sides (Image 7), flip it out onto a lightly floured surface (Image 8).

Step 7: Roll the dough out and laminate it a few times. This means sprinkle a little flour to prevent rolling pin from sticking, fold it into thirds like a letter and repeat about 3 or 4 times (Image 9). This creates the biscuit layers.
Step 8: For a final time, roll the dough out to ½ an inch thick. Using a biscuit cutter or a wine glass, cut out the biscuits using a straight up and down motion DO NOT TWIST!
Step 9: Place the biscuits about 2 inches apart on a baking sheet (Image 10) and bake for 10-14 minutes. (They don't change much in texture or appearance during this time, so pick a number and it's fine.)
Step 10: Remove from oven and brush the tops with melted butter (Image 11)(honey butter is a great option too if you want it sweet.) Brush some on the sides of the biscuits too. Be generous.
Step 11: Let cool (Image 12) and serve as desired. Enjoy.
Optional Step: Set your warm oven to broil. Place the biscuits back in the oven for up to 1 minute. This gives them a nice golden top. Keep a careful eye as they can go from golden to burnt in a real hurry.
👩🏻🍳 Expert Tips
- Roll thicker. For taller, fluffier biscuits, roll the dough thicker before cutting. They will rise and expand as they bake.
- Golden tops. After brushing with butter, broil for about 1 minute for a golden brown finish. Watch closely, as they brown fast.
- Cut straight. Don't twist the cutter. Press straight down and lift to allow the biscuits to rise properly.
❄️ Storage and Make Ahead
Storage: Store baked 3 Ingredient Biscuits in an airtight container at room temperature for up to 2 days or in the fridge for up to a week.
Make Ahead: Freeze unbaked biscuit rounds or fully baked biscuits for up to 3 months; thaw and bake or reheat as needed.
🥗 Side Dishes or Pairing Ideas
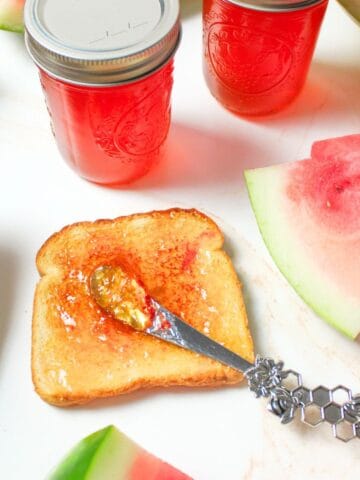
These 3 Ingredient Biscuits pair well with eggs and breakfast meats, sausage gravy, soups and stews, butter and jam, or served alongside hearty dinners.
- Watermelon JellyRecipe $8.66 / Half Pint $1.73
- Scrambled Eggs with Spinach and TomatoesRecipe $2.25 / Serving $1.13
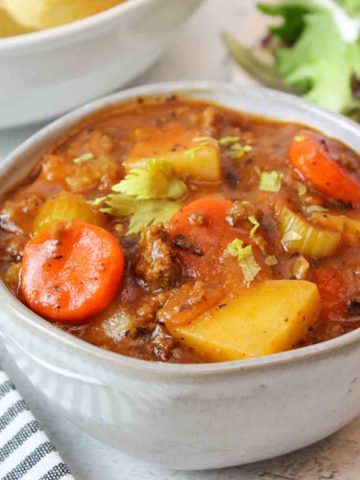
- Poor Man's Beef Stew (Stove Top)Recipe $9.84 / Serving $1.64
- Stove Top Beef StewRecipe $13.07 / Serving $2.17


❓ 3 Ingredient Biscuits FAQs
Absolutely! These biscuits can be frozen as cut dough rounds or as fully baked biscuits. To bake after cutting out the dough, freeze it flat on a baking sheet before transferring it to an airtight container. Then thaw and bake as directed.
Southern style biscuits do not contain eggs or sugar. They're usually packed with buttery goodness and flavor with a bare minimum of ingredients.
Technically, no. But, I highly recommend it as the less contact you have with the butter the better. Using a cheese grater for the frozen butter means that you can avoid cutting in the butter and simply stir, add buttermilk, and move on more quickly and with less chance of softening the butter.

🍽️ More Recipes You'll Love
- 20 Delicious Summer Squash Recipes
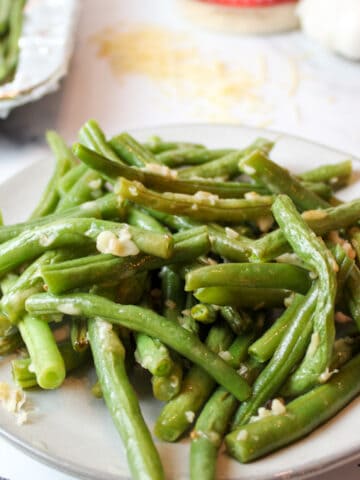
- Garlic Parmesan Roasted Green BeansRecipe $4.54 / Serving $0.76
- Old Fashioned Creamed CornRecipe $2.75 / Serving $0.34
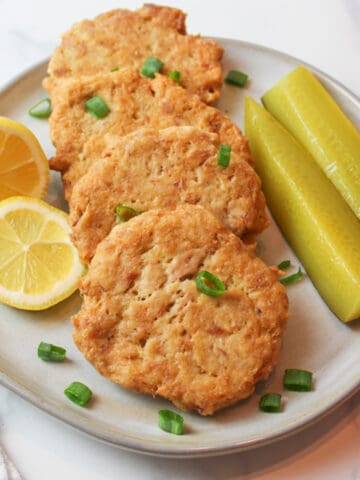
- Crispy Fried Tuna PattiesRecipe $3.51 / Serving $0.44


🐝 If you tried these 3 Ingredient Homemade Biscuits, please leave a ⭐️ star rating and share your buzz in the 💬 comments below. I'd truly appreciate it!
📖 Recipe

3 Ingredient Biscuits
Equipment
- Sifter (optional but recommended)
Ingredients
- 1 cup butter, frozen (2 sticks) - ($1.98)
- 3 cups self rising flour - ($0.78)
- 1 cup buttermilk - ($0.73)
Instructions
- Prep for Cold Dough: Freeze the butter until solid, about 1 hour. Place a mixing bowl and cheese grater in the refrigerator to chill.
- Preheat the Oven: Preheat the oven to 475°F.
- Mix the Flour: Sift the self rising flour into the chilled mixing bowl.
- Grate the Butter: Using the large holes of a cheese grater, grate the frozen butter directly into the flour. Gently stir with a fork until the butter is evenly distributed. Do not overmix or pastry blend.
- Add Buttermilk: Slowly add the cold buttermilk, stirring with a fork, until the dough comes together and pulls away from the sides of the bowl. You may not need the full cup.
- Laminate the Dough: Turn the dough onto a lightly floured surface. Roll it out, fold into thirds like a letter, and repeat this process 3 to 4 times to create layers.
- Cut the Biscuits: Roll the dough to about ½ inch thick. Cut biscuits using a biscuit cutter or glass, pressing straight down without twisting.
- Bake: Place the biscuits about 2 inches apart on a baking sheet. Bake for 10 to 14 minutes until risen.
- Butter the Tops: Remove from the oven and brush the tops and sides generously with melted butter or honey butter if desired.
- Optional Broil: For extra color, turn the oven to broil and return the biscuits for up to 1 minute. Watch closely to prevent burning.
- Serve: Serve warm and enjoy.
Notes
- Thickness Options: Biscuits can be cut between ¼ inch and 1 inch thick. Thicker biscuits will rise taller and bake slightly longer.
- Cutting Tip: Always cut straight down without twisting to help the biscuits rise evenly.
- Golden Tops: Broiling after buttering adds color quickly, so monitor closely.
- Freezing: Freeze unbaked biscuit rounds on a baking sheet, then store in an airtight container. Bake from frozen as directed. Fully baked biscuits may also be frozen.
- Storage & Reheating: Store in an airtight container for up to 1 week. Reheat biscuits in the microwave for 15 to 20 seconds before serving.
Nutritional Information
Save This Recipe to Your Inbox
By signing up, you'll join our email list and can unsubscribe anytime.


Suzette Tucker says
I bake about 30 of these biscuits for a restaurant for Sunday brunch
Everyone raves about how good these biscuits are
Thank you for sharing your recipe. Suzette Tucker