

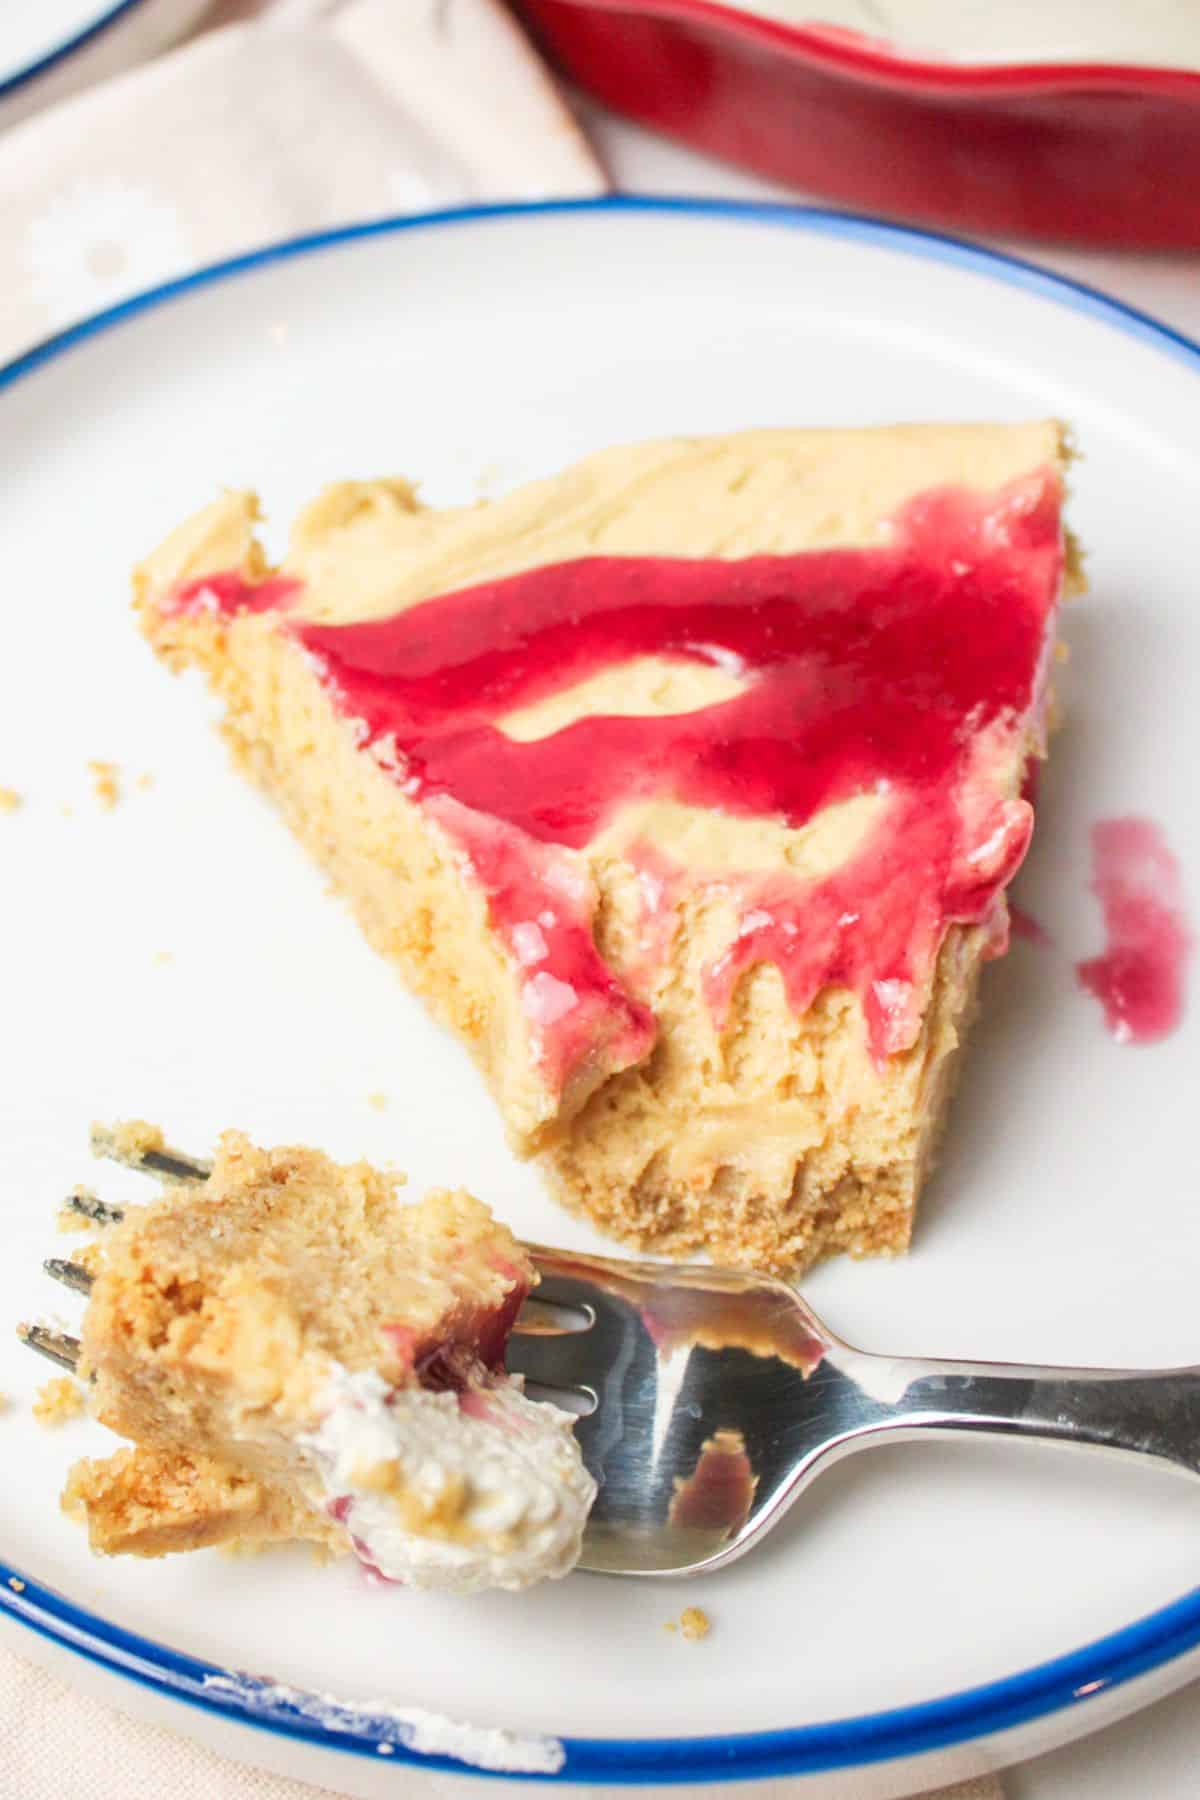
This no bake peanut butter and jelly pie is one of my family's absolute favorites. From the buttery graham cracker crust to the soft, creamy peanut butter mousse and sweet jelly on top, it's a nostalgic dessert that's both kid-friendly and grown-up approved.

Save This Recipe to Your Inbox
By signing up, you’ll join our email list and can unsubscribe anytime.
If you love easy desserts, check out my No Bake Graham Cracker Crust for a super simple base, and consider topping this pie with my Homemade Grape Jelly Recipe or Canned Strawberry Jam for a truly from-scratch experience.
We are big fans of the PBJ flavor combo and have tons of unique recipes featuring peanut butter and jelly to prove it. From our Peanut Butter and Jelly Bread Pudding to our Frozen Peanut Butter and Jelly Sandwiches, we find a way to enjoy it whenever we can.
Looking to fill the dessert table? This tasty Peanut Butter and Jelly Pie also pairs wonderfully with my No Bake Cool Whip Cheesecake and whimsical No Bake Kool Aid Pie, perfect for hot summer days or quick party treats!
Jump to:
💛 Why You'll Love This Recipe
- Nostalgia in Every Slice. It tastes just like a peanut butter and jelly sandwich, but in pie form. Kids and adults will love the playful twist on a classic flavor combo.
- Only 15 Minutes of Prep. No baking needed unless you want a firmer crust. You can make this in advance and pull it out when you're ready to wow your guests.
- Crowd-Pleasing and Budget-Friendly. The ingredients are simple pantry staples, and the pie stretches well into 8 servings, perfect for gatherings or weeknight treats.
🛒 Ingredients
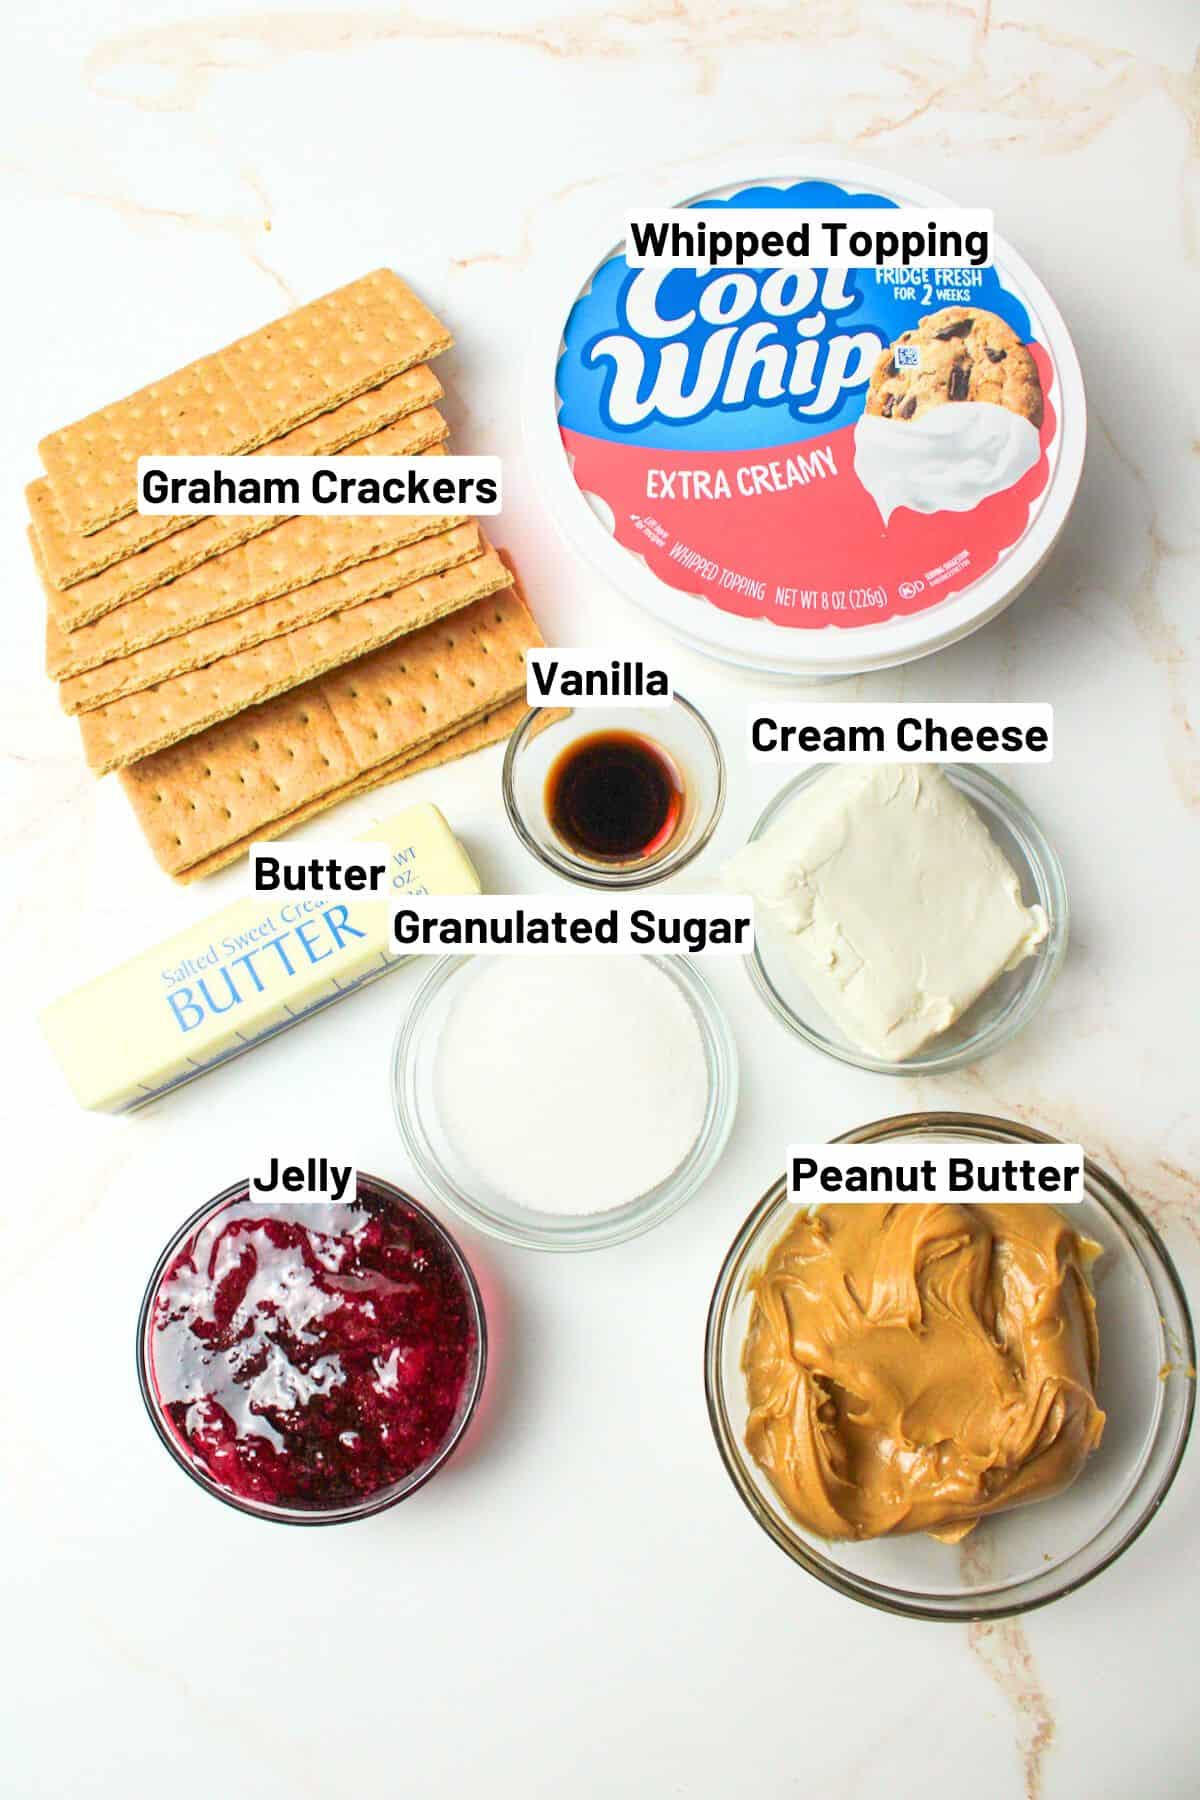
- Graham Cracker Crumbs: Provide a sweet, crumbly base. Crushed cereal like Cheerios also works in a pinch!
- Creamy Peanut Butter: The star flavor, choose shelf-stable over natural for a smoother texture.
- Cream Cheese: Balances the sweetness and adds a stability factor that helps the pie to maintain its shape when sliced.
- Whipped Topping: Creates a light mousse-like texture.
- Jam or Jelly: Sweet and fruity topping that completes the PB&J feel.
See the recipe card below for full ingredients and instructions.
🔀 Substitutions & Variations
Peanut Butter: You can use almond or sunflower seed butter for allergy-friendly or different flavor profiles. Just make sure it's not too runny.
Whipped Topping: Homemade whipped cream works well, just whip 1 cup of cold heavy cream with 2 tablespoon powdered sugar until stiff.
Graham Cracker Crust: Crushed pretzels or Oreos make a fun salty or chocolatey twist.
💰 Budget-Friendly Tips
Use store-brand peanut butter, cream cheese, and whipped topping to cut costs without sacrificing taste.
Make your own Graham Cracker Crust from pantry staples. It's cheaper than buying premade.
Jelly often goes on sale; grab extra and use it in recipes like Homemade Grape Jelly.
This Peanut Butter and Jelly Pie is rich, so smaller slices still satisfy. Stretching servings makes it even more frugal.
🥄 Instructions for Peanut Butter and Jelly Pie
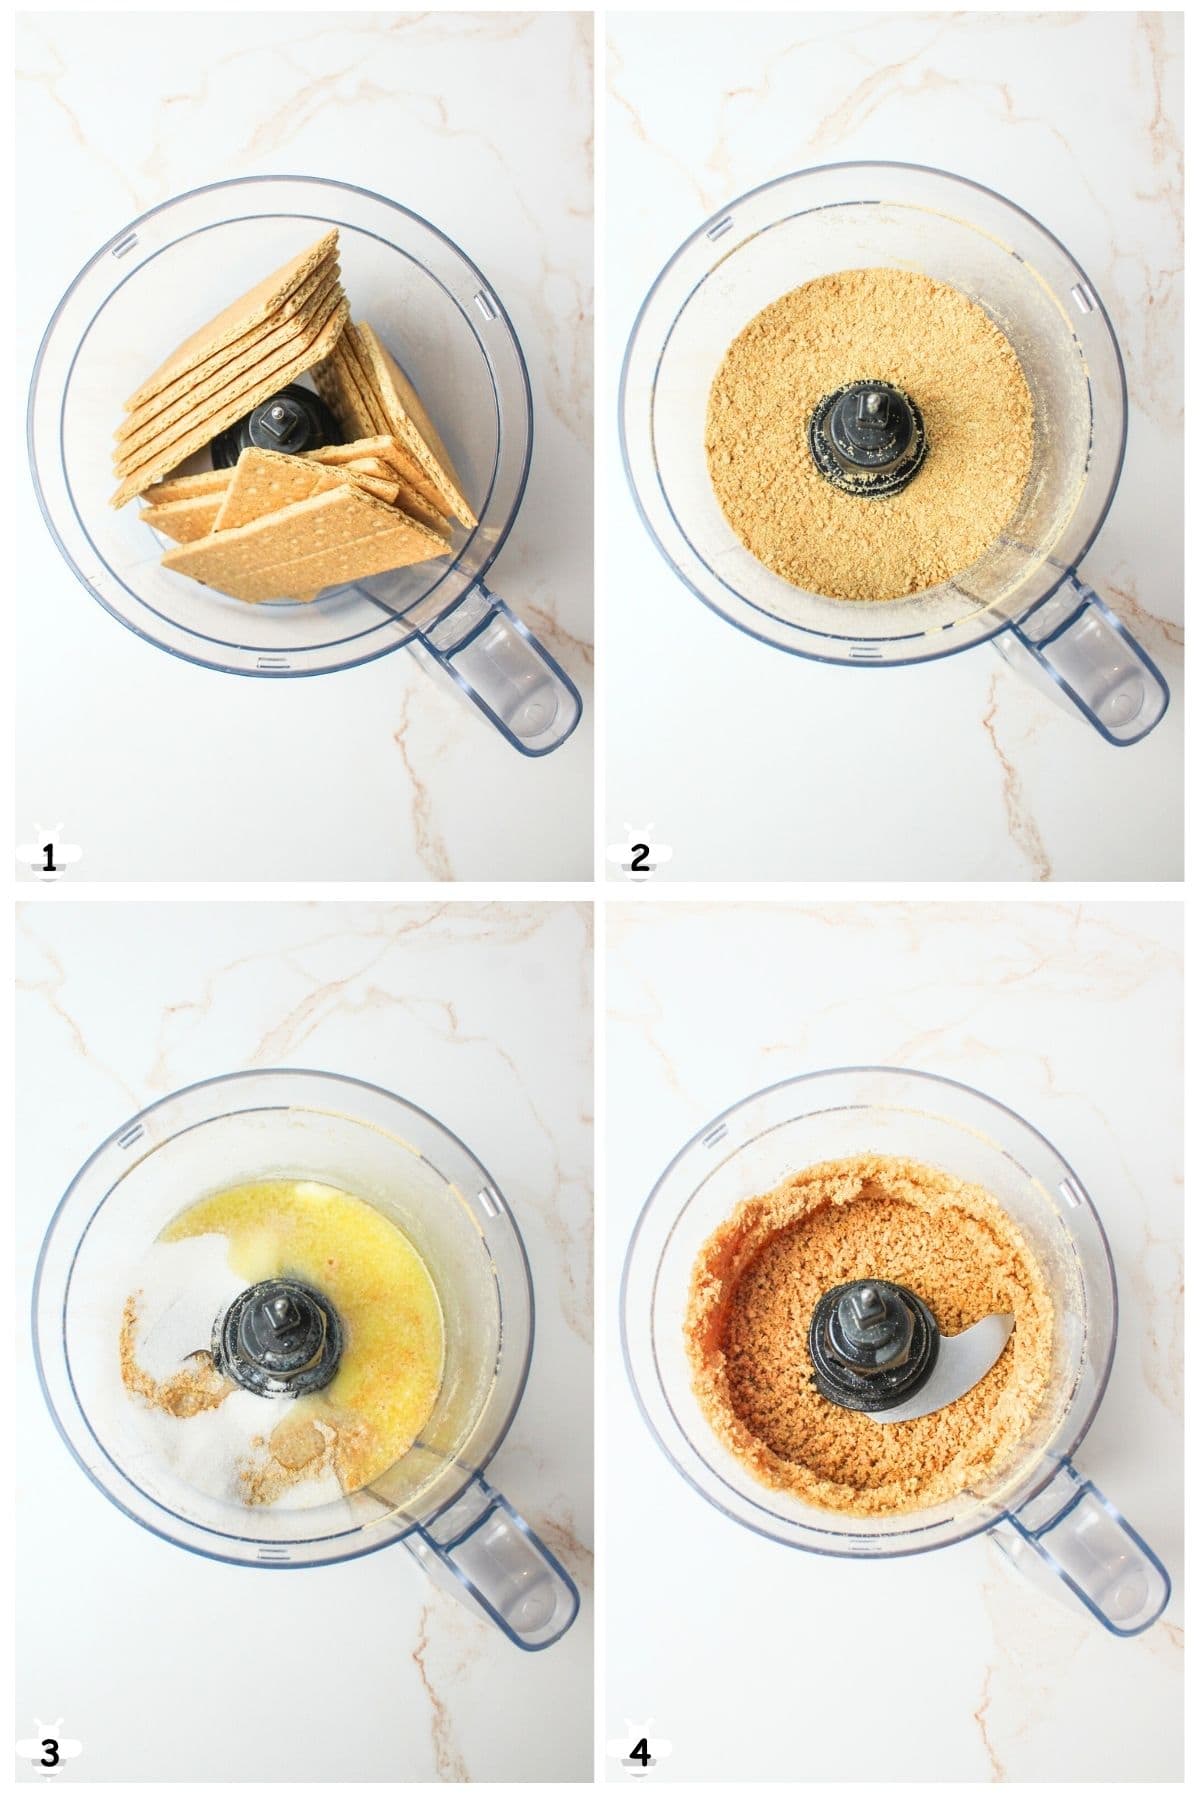
Step 1: Place the graham crackers into a food processor (Image 1) and pulse until fine crumbs. (Image 2).
Step 2: Add in the sugar and melted butter. (Image 3). Mix again to combine. (Image 4).
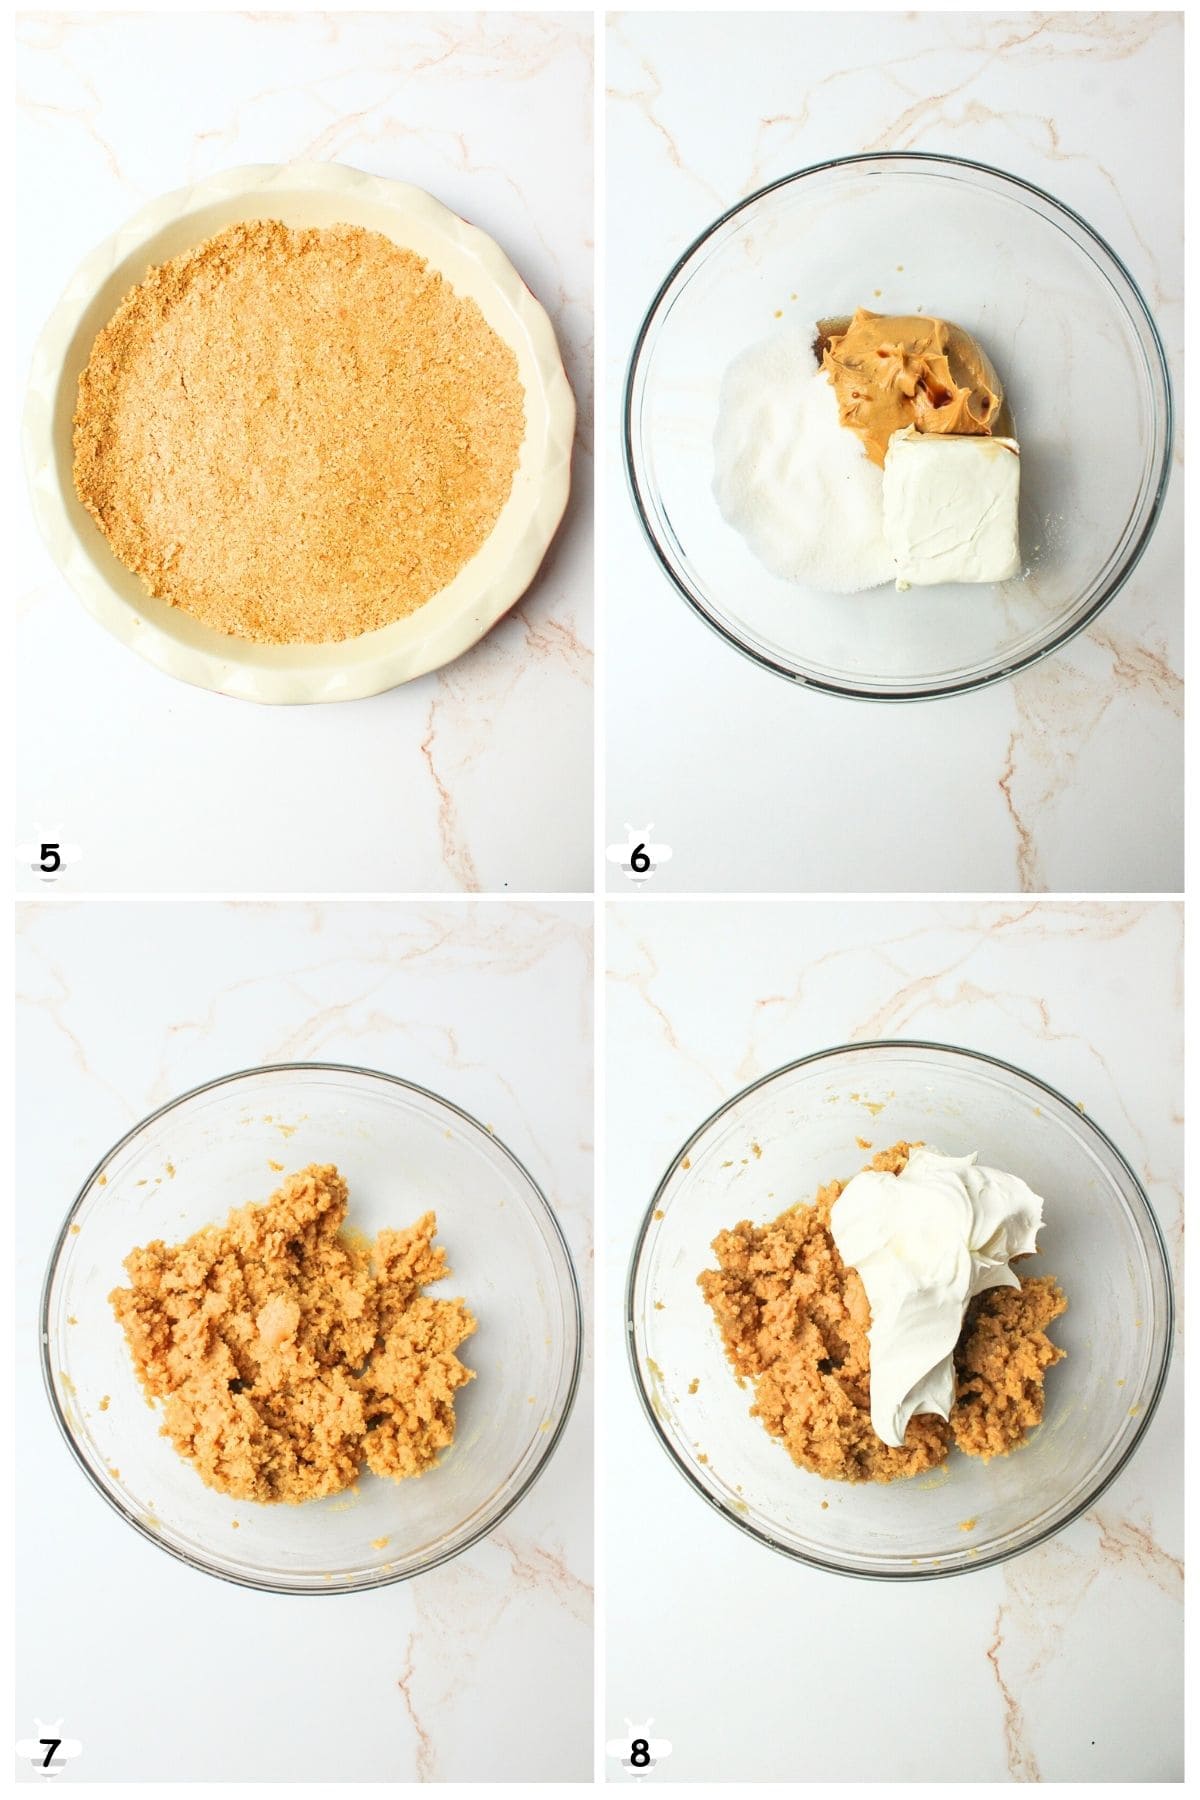
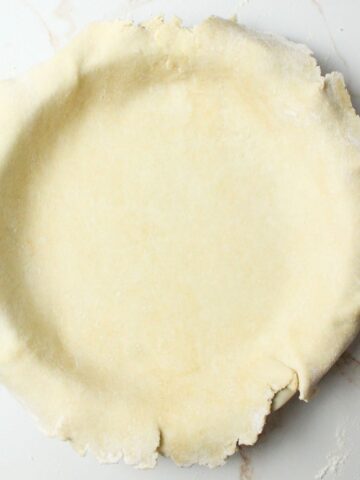
Step 3: Press the crust mixture into the bottom of a 9 inch pie plate. (Image 5). You can then choose to bake at 350°F for 8-10 minutes or chill for 1 hour in the fridge if you want a no bake pie. This will solidify the crust so it holds up when sliced later.
Step 4: Add the peanut butter, softened cream cheese, sugar, and vanilla to a bowl. (Image 6). Beat with an electric mixer until smooth or well mixed. (Image 7).
Step 5: Fold in one cup of whipped topping. (Image 8) This will help to create a lighter filling, and it's a lot easier to fold it in in 2 steps instead of one because you're less likely to push out all of the air this way.
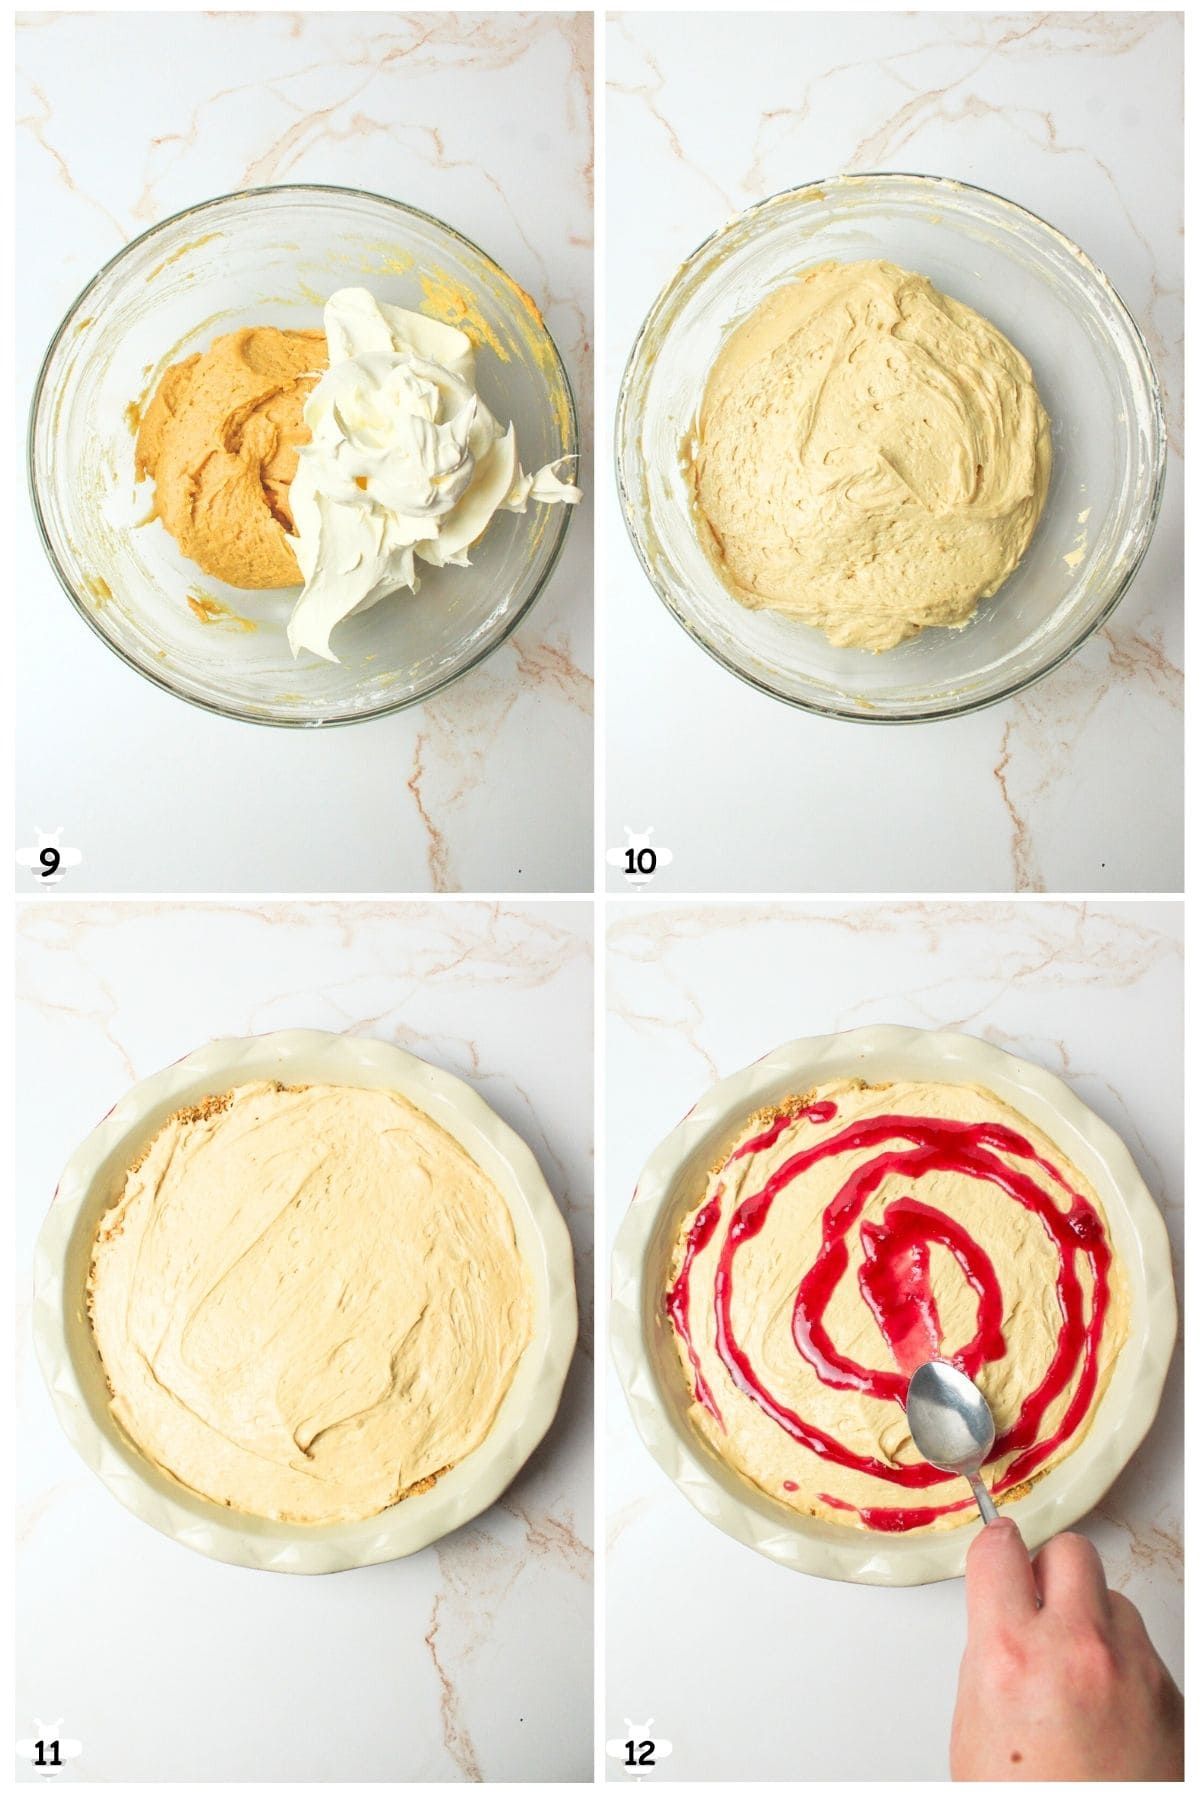
Step 6: Fold in the remaining whipped topping (Image 9) until light and fluffy. (Image 10).
Step 7: Spread the filling evenly into the crust. (Image 11). Make sure the crust was 100% cooled (if baked), or else the filling will melt.
Step 8: Warm your jelly for a few seconds in the microwave so that it is easier to spread. Gently spoon it over the filling or swirl it over the top of the peanut butter layer. For a marbled look, use the back of a butter knife or spoon to swirl it. (Image 12).
Step 9: Refrigerate for at least 4 hours (or overnight) until set. Slice, serve, and enjoy!
👩🏻🍳 Expert Tips
- Don't skip chilling! The filling needs time to set so the pie slices cleanly.
- Use room-temperature cream cheese to avoid lumps in the filling.
- Microwave the jelly just slightly to help it spread evenly without tearing the mousse layer underneath.
- If using natural peanut butter, be sure it's well-stirred to avoid oily separation.
❄️ Storage and Make Ahead
Fridge: Cover and refrigerate your Peanut Butter and Jelly Pie for up to 5 days.
Freezer: Freeze whole or in slices, tightly wrapped, up to 1 month. Thaw overnight in the fridge.
Make Ahead: Best when made the night before so the filling has plenty of time to set.
🥗 Side Dishes or Pairing Ideas
This pie is sweet and creamy, so it pairs wonderfully with a cup of coffee, tea, or a cold glass of milk. For a fun dessert spread, serve it alongside light and fruity treats like No Bake Kool Aid Pie or something chocolatey like brownies.
- Homemade Grape Jelly RecipeRecipe $8.56 / Half-Pint $1.22
- Apple Jelly (for Canning)Recipe $7.13/ Half-Pint $1.46
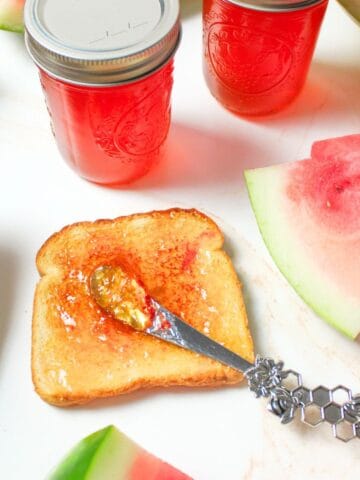
- Watermelon JellyRecipe $8.66 / Half Pint $1.73
- Peach Peel JellyRecipe $5.23 / Half Pint $1.31


❓ Recipe FAQs
Yes! This is a fantastic make-ahead dessert. It's even better the next day once fully chilled.
Absolutely, just warm slightly to help it spread and be gentle when layering.
Use plant-based cream cheese and coconut whipped topping. Choose a peanut butter without added dairy.
🍽️ More Recipes You'll Love
- Mixed Berry Pie FillingRecipe $7.91 / Serving $0.99
- Apple Pie with Graham Cracker CrustRecipe $7.16 / Serving $0.90
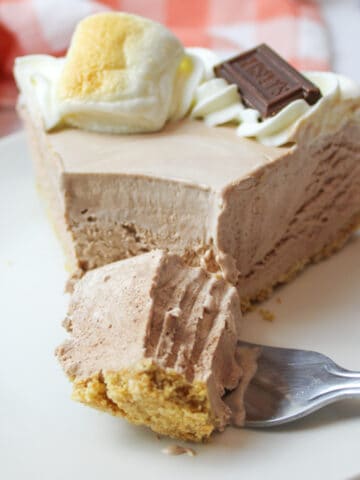
- Smores Ice Cream PieRecipe $6.89 / Serving $0.86
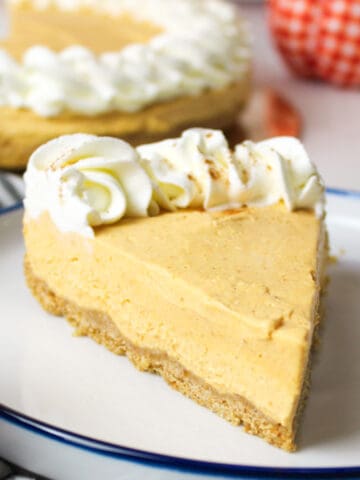
- No Bake Pumpkin CheesecakeRecipe $5.52 / Serving $0.46


🐝 If you tried this Peanut Butter and Jelly Pie, please leave a ⭐️ star rating and share your buzz in the 💬 comments below. I'd truly appreciate it!
📖 Recipe

Peanut Butter and Jelly Pie
Ingredients
Crust
- 1 ½ cups graham cracker crumbs - ($0.94)
- ¼ cup granulated sugar - ($0.11)
- 6 tablespoons unsalted butter, melted - ($0.74)
Peanut Butter Filling
- ¾ cup creamy peanut butter - ($0.64)
- 4 ounces cream cheese, softened - ($0.98)
- ½ cup granulated sugar - ($0.22)
- 1 teaspoon vanilla extract - ($0.02)
- 8 ounce whipped topping, thawed - ($1.12)
Jelly Layer
- ½ cup jelly or jam - ($0.66)
- 1 tablespoon water, optional
Instructions
- Make the crust. Add the graham crackers to a food processor and pulse into fine crumbs. Add the sugar and melted butter and pulse until combined. Press firmly into a 9-inch pie plate. Bake at 350°F for 8 to 10 minutes or refrigerate for 1 hour for a no-bake crust. Cool completely.
- Make the filling. In a large bowl, beat the peanut butter, cream cheese, sugar, and vanilla until smooth. Fold in half of the whipped topping, then gently fold in the remaining whipped topping until light and fluffy.
- Assemble. Spread the filling evenly into the cooled crust.
- Add the jelly. Warm the jelly briefly until spreadable. Stir in the water if needed. Spoon or swirl the jelly over the filling using the back of a spoon or knife.
- Chill. Refrigerate for at least 4 hours or overnight until fully set.
Notes
- Crust texture. If the crust is crumbly, mix in 1 to 2 additional tablespoons melted butter.
- Peanut butter. Use regular creamy peanut butter for best texture. Avoid natural styles.
- Folding tip. Fold whipped topping gently to keep the filling light.
- Make ahead. Best when chilled overnight.
- Clean slices. Dip a knife in warm water and wipe between cuts.
- Whipped topping swap. Substitute 1 cup homemade whipped cream made from ½ cup heavy cream and 1 tablespoon powdered sugar.
Nutritional Information
Save This Recipe to Your Inbox
By signing up, you'll join our email list and can unsubscribe anytime.


Nicole Durham says
This pie doesn't last long around here, everyone goes crazy for it so make sure to set your own slices aside in advance.