

We love to make our own yogurt, and this Instant Pot Yogurt recipe is our favorite way of doing it because it's so convenient. One pot to heat, cool, and store the yogurt as it does its thing. A few hours later, it's ready to sweeten, eat, or flavor however we want!
Save This Recipe to Your Inbox
By signing up, you’ll join our email list and can unsubscribe anytime.
Homemade yogurt is a fantastic way to take control over the ingredients in your food and reduce waste from store-bought containers. Whether you're making it plain or adding flavor later, homemade yogurt is a delicious and cost-effective staple in our kitchen.
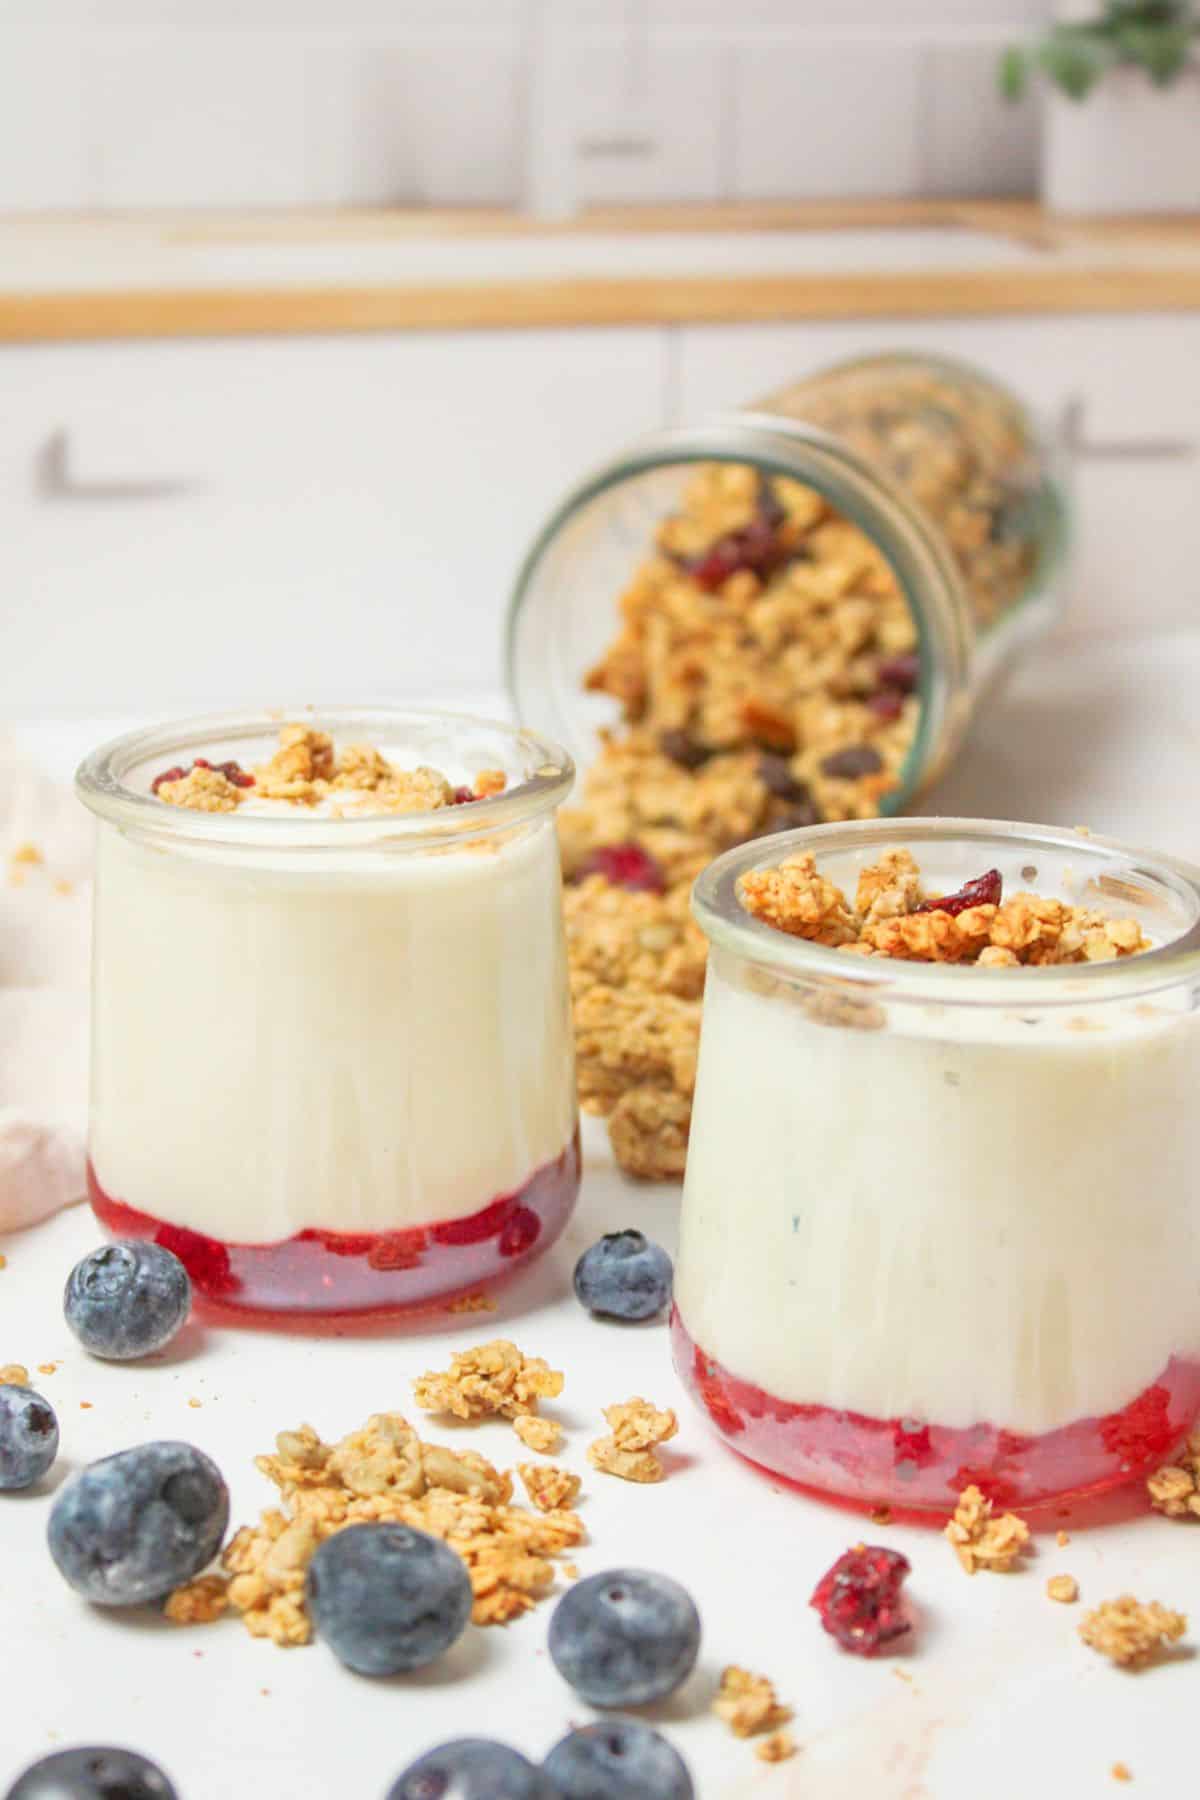
One of our favorite things to do is stir in a spoonful of our Homemade Strawberry Jam, Small Batch Orange Marmalade, Apple Jelly, or Watermelon Jelly for fruity goodness. Adding homemade or store-bought jams/jellies is a great way to make it sweeter and flavorful.
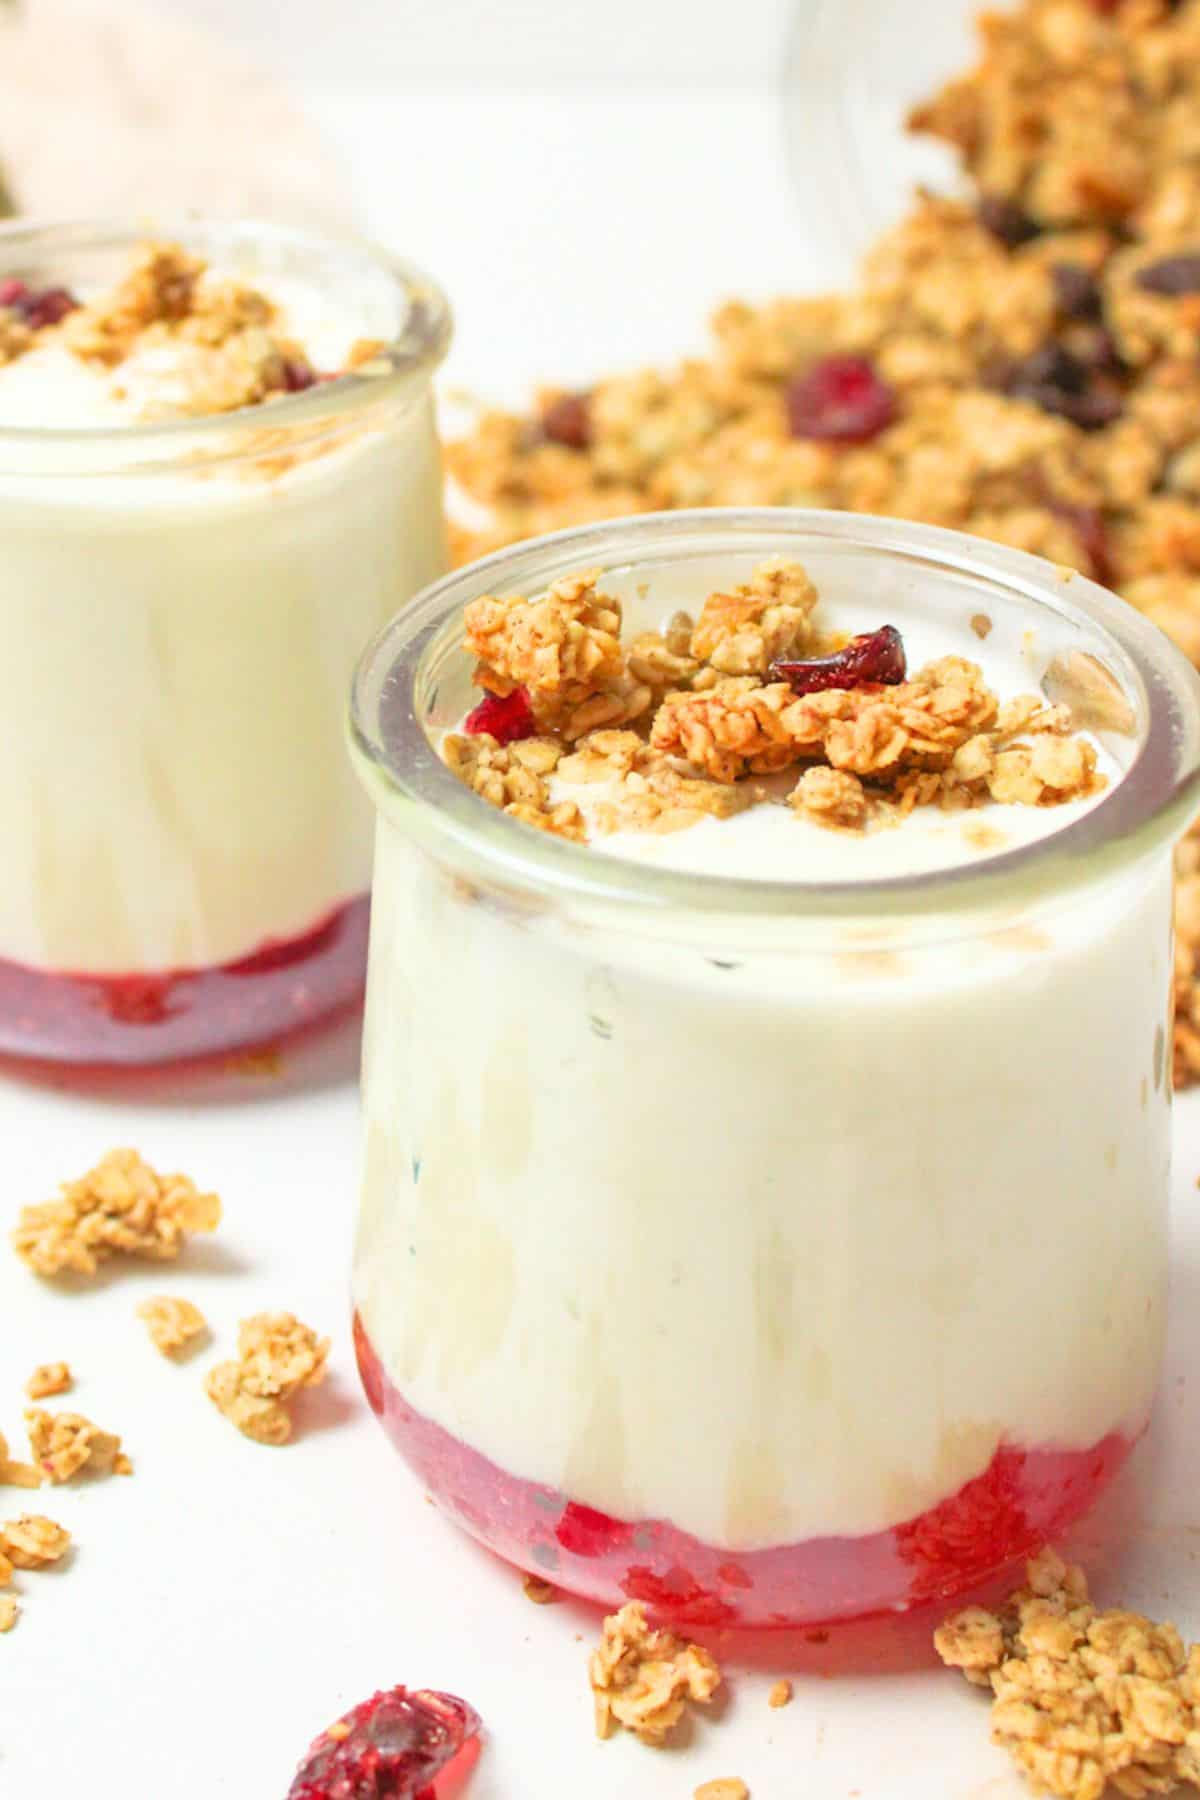
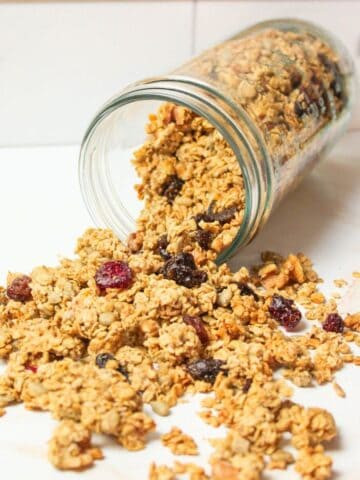
For a crunchy topping, we love our Sourdough Discard Granola mixed in for added texture and flavor.
Instant Pot Yogurt also keeps giving, just save a bit from each batch as your starter for the next round (we like to freeze it until ready), making each batch more affordable than the last.
If you're trying to reduce waste, eat more real food, or stretch your grocery dollars, this Instant Pot Yogurt recipe is a game-changer. It's low-cost, low-waste, and endlessly adaptable to your family's tastes.
Whether you eat it with homemade jams or use it in place of sour cream, this yogurt deserves a permanent spot in your fridge.
Jump to:
- 💛 Why You'll Love This Recipe
- 🛒 Ingredients
- 🔀 Substitutions & Variations
- 🧾 Sweetener Options
- 💰 Budget-Friendly Tips
- 🥄 Instructions for Instant Pot Yogurt
- 👩🏻🍳 Expert Tips
- ❄️ Storage and Meal Prep
- 🐢 Slow Cooker Version
- 🥗 Side Dishes or Pairing Ideas
- ❓ Instant Pot Yogurt FAQs
- 🍽️ More Recipes You'll Love
- 📖 Recipe
- 💬 Comments
💛 Why You'll Love This Recipe
- One-Pot Convenience. Everything happens right in the Instant Pot; no need to move milk around or dirty extra dishes. You don't even need fancy equipment.
- Healthier and Cheaper Than Store-Bought. Skip the added thickeners and sugar of store brands. This recipe gives you control over ingredients, and it's cheaper by the gallon!
- Perfect for Meal Prep. Make a big batch and portion into jars for breakfast, snacks, or smoothies all week long.
🛒 Ingredients
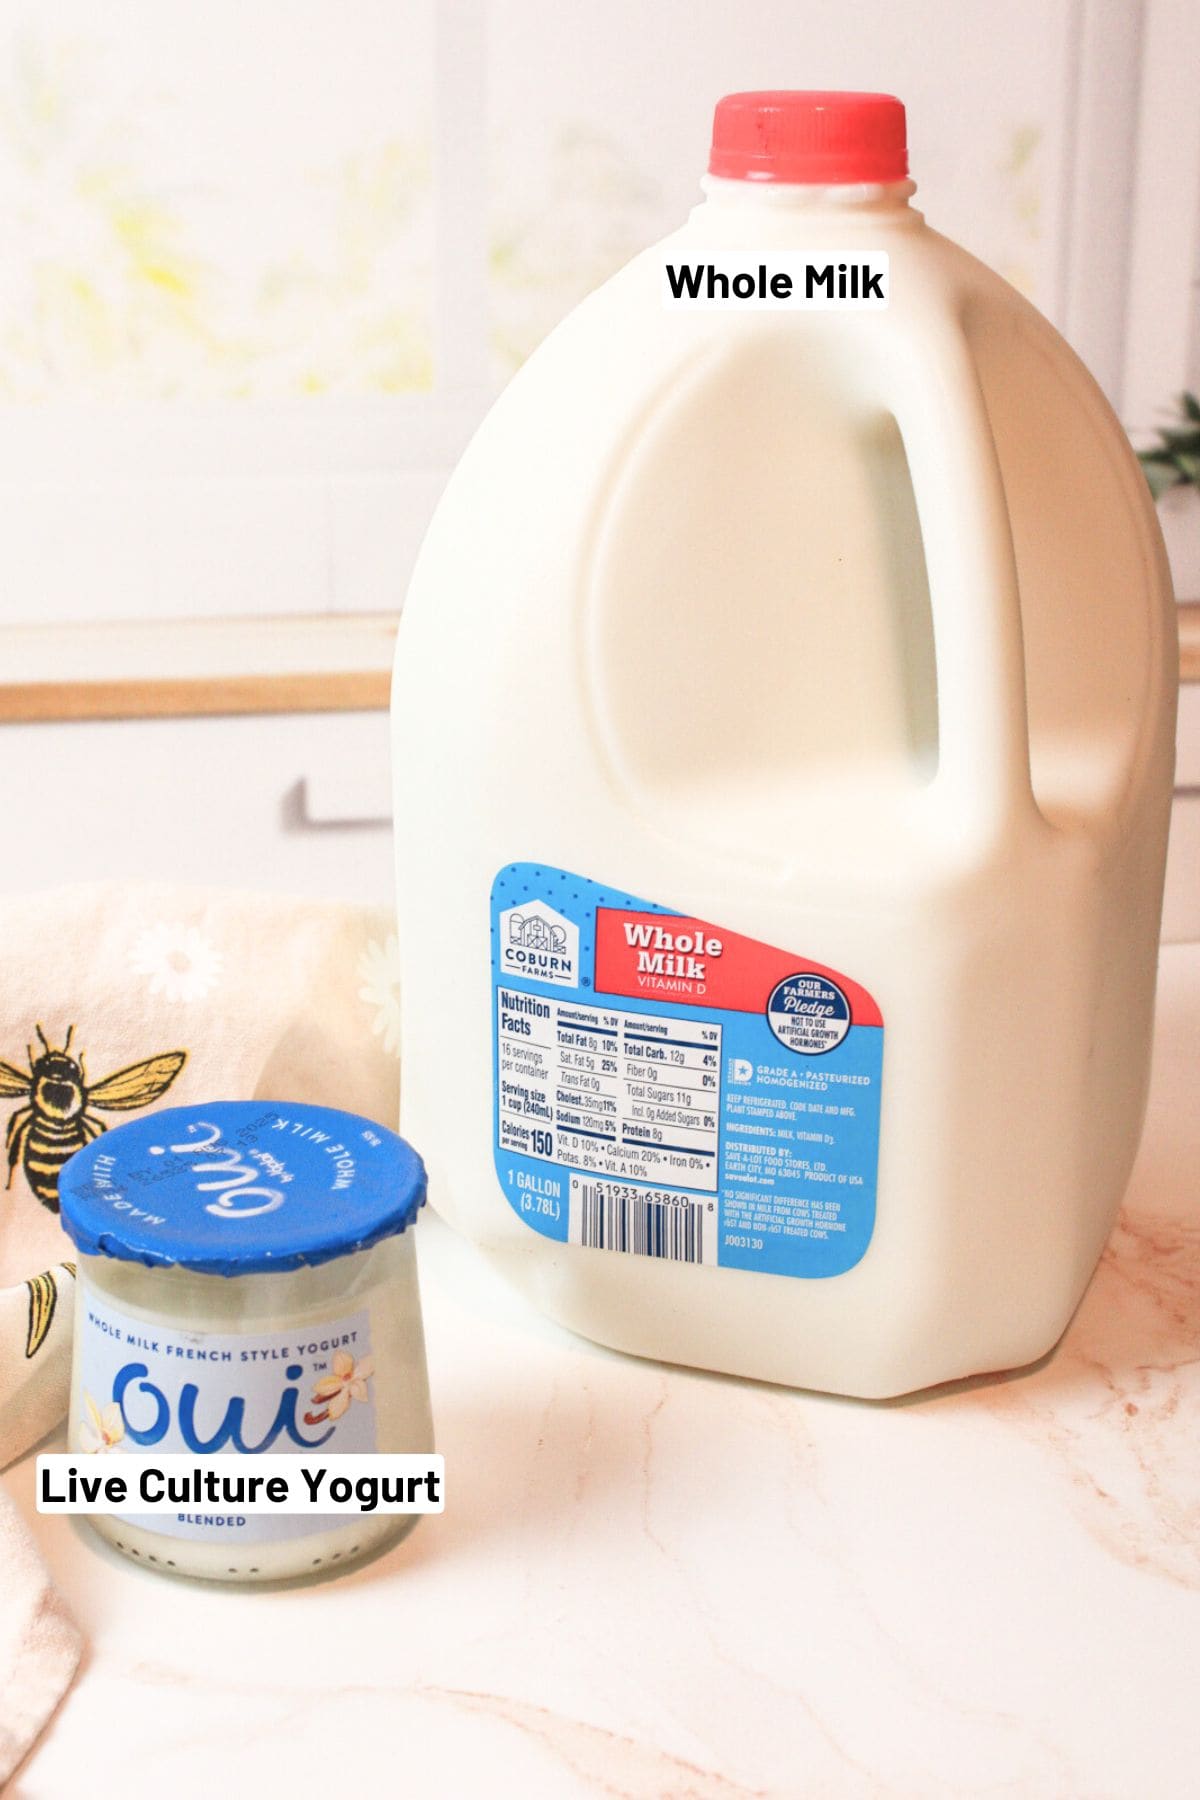
- Whole Milk (not ultra-pasteurized) - This type of milk ensures the best consistency and texture in homemade yogurt. Ultra-pasteurized doesn't culture well.
- Plain Yogurt with Live Cultures - This acts as your starter culture. It seeds your milk with good bacteria to ferment it into yogurt. If you can't find plain yogurt, vanilla yogurt will work fine in a pinch.
See the recipe card below for full ingredients and instructions.
🔀 Substitutions & Variations
Milk: You can use 2% or skim milk, but the texture will be thinner. Strain for best results.
Starter: Fresh homemade yogurt works great, as long as it still has live cultures. Frozen yogurt starter also works if thawed overnight.
Greek Yogurt: Strain through a cheesecloth-lined colander for 2-4 hours for thick, creamy yogurt.
Flavored Yogurt: Sweeten after incubation with honey, maple syrup, sugar, or fruit. Avoid using flavored yogurt as a starter, it can throw off the taste.
🧾 Sweetener Options
Sweeten your yogurt however you like! Stir in:
- Honey or maple syrup for a natural option
- Granulated sugar, about 1 cup for the whole batch for store-like sweetness
- Stewed fruit, jam, or preserves to customize individual servings
💰 Budget-Friendly Tips
Stretch It Further: Save 2-3 tablespoons from each batch as your starter for the next one.
Buy in Bulk: Milk by the gallon is much cheaper than single-serve yogurts.
Reduce Waste: Skip single-use plastic cups and reuse jars or tubs for storage.
Double Duty: Use leftover whey in smoothies, oatmeal, baking, or sourdough bread.
🥄 Instructions for Instant Pot Yogurt
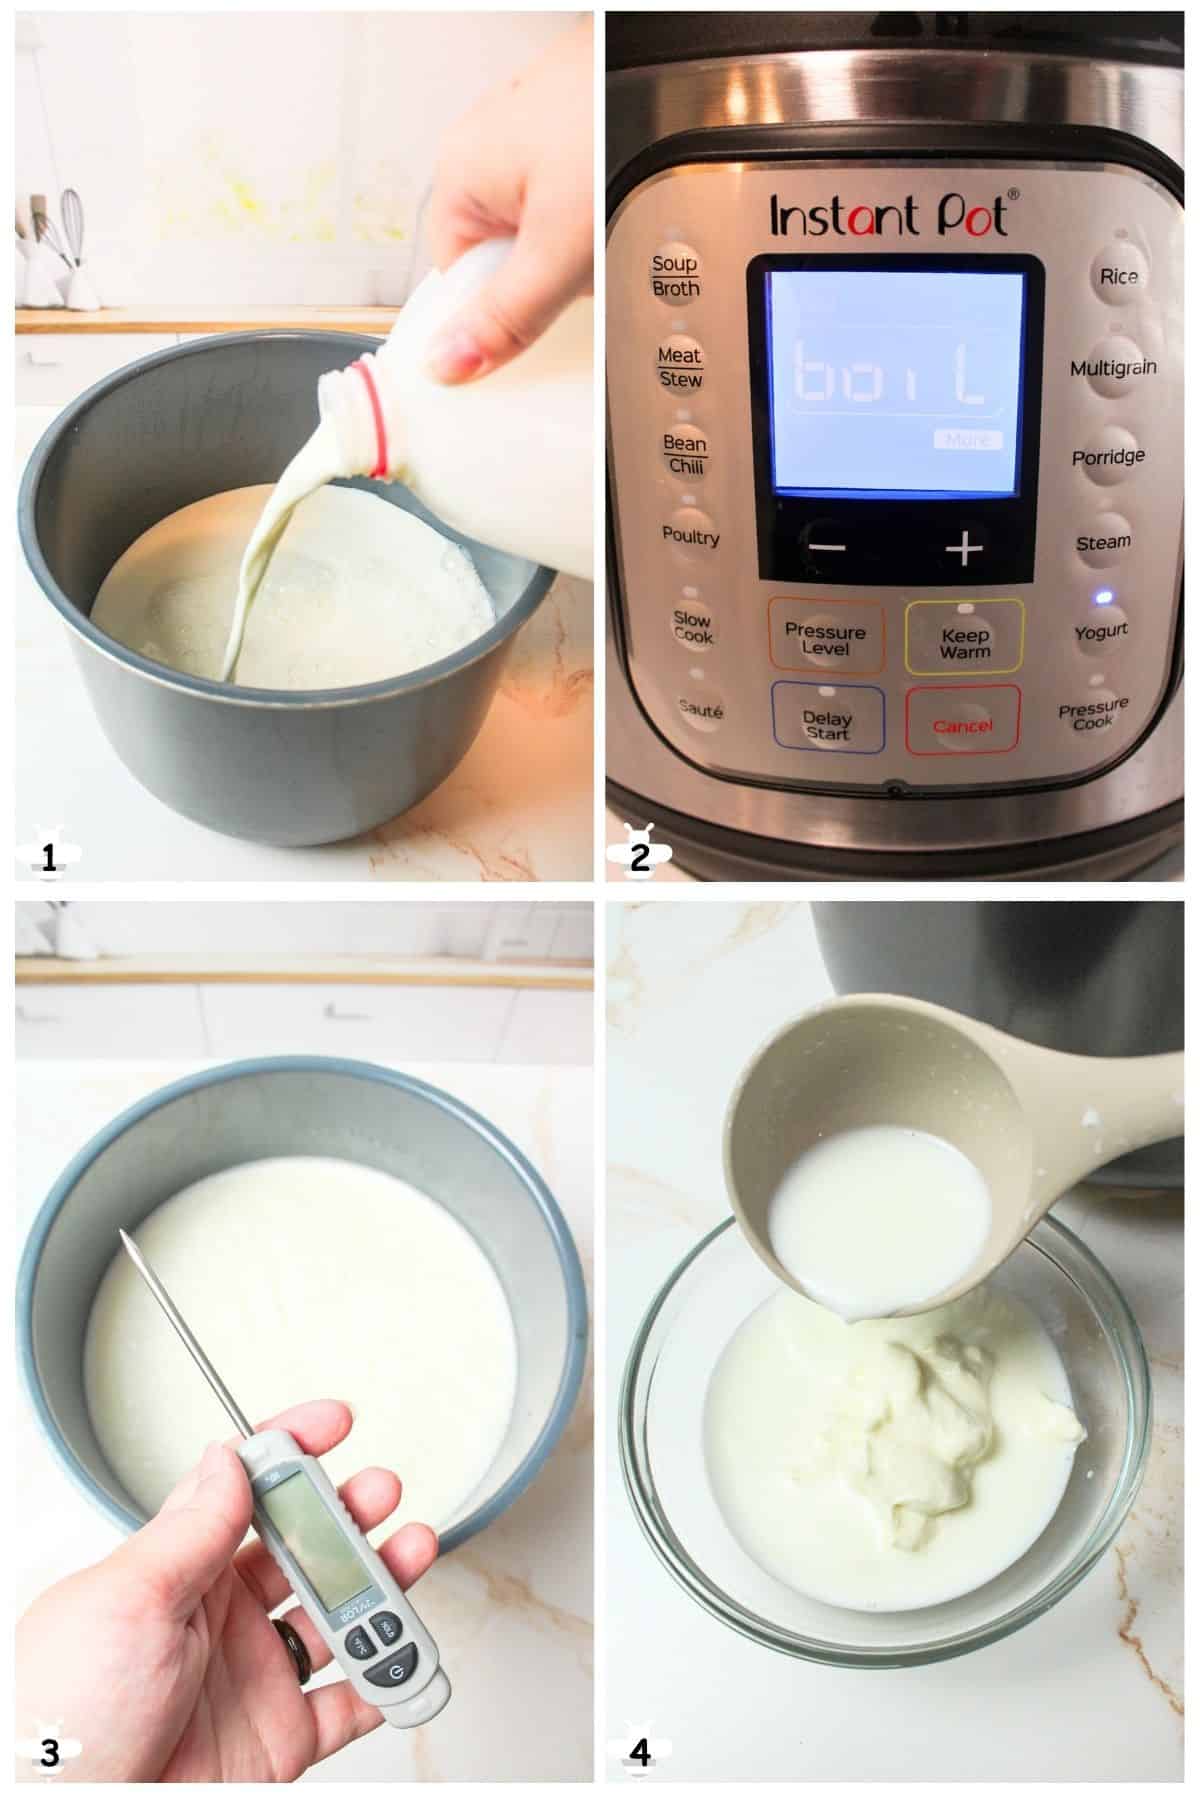
Step 1: Pour the milk into your Instant Pot (see Image 1).
Step 2: Set the Instant Pot to boil: Press the Yogurt button, then press Adjust until the display reads "Boil." (see Image 2)
Tip: The lid doesn't need to be on for this step, but you can place it on if you like, it won't seal like it does during pressure cooking.
Step 3: Heat the milk until it reaches 180-185°F. This step kills off competing bacteria and improves the yogurt's texture.
Step 4: When the Instant Pot beeps to signal it's done, use a thermometer to double-check the temperature. (see Image 3)
Step 5: Cool the milk: Carefully remove the insert and place it on a trivet or cooling rack. Let the milk cool to about 110°F, which feels lukewarm to the touch.
To speed up cooling, you can place the insert in a cold-water bath in the sink.
Step 6: Add the yogurt starter: In a small bowl, whisk 2-4 tablespoons of plain yogurt with a few spoonfuls of the cooled milk until smooth. (see Images 4&5)
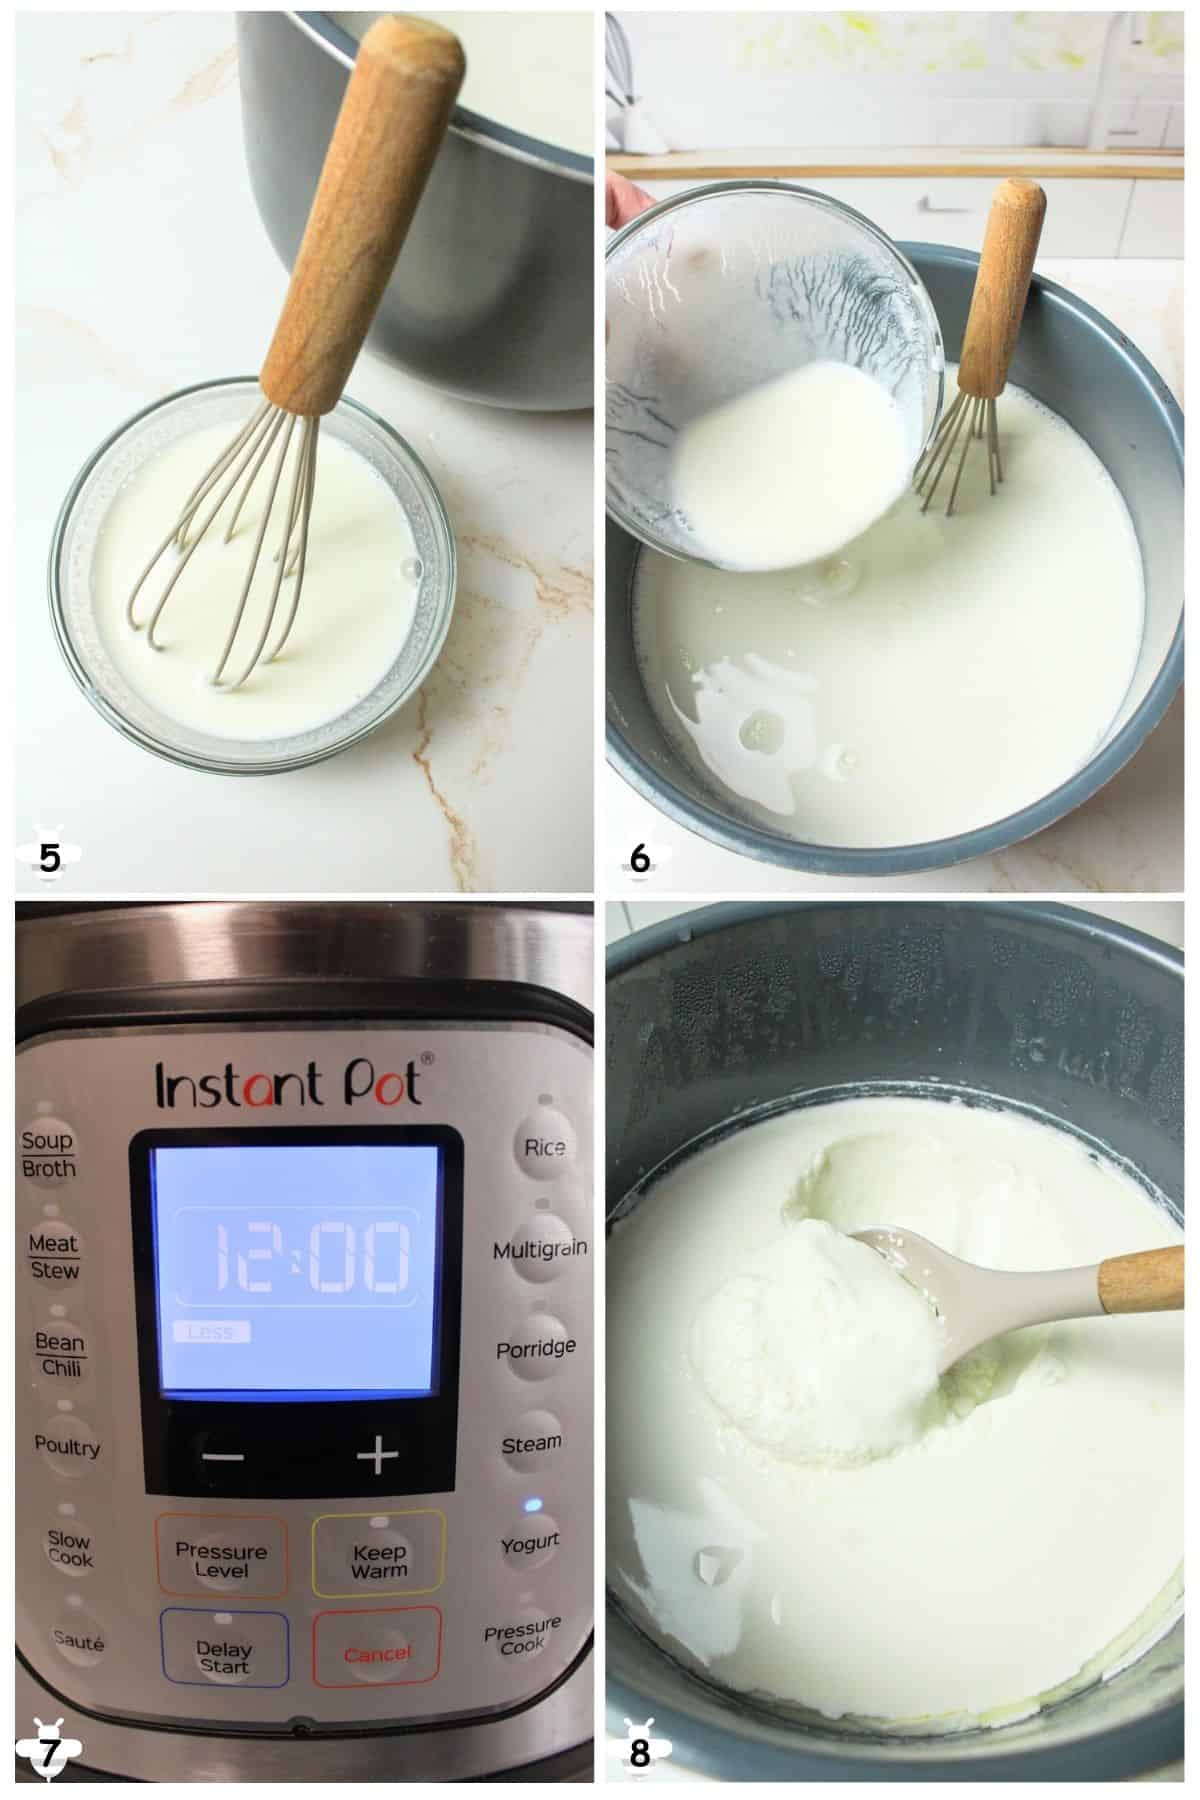
Step 7: Pour the starter mixture back into the rest of the cooled milk and stir gently to combine. (see Image 6)
Step 8: Incubate the yogurt: Return the insert to the Instant Pot. Press the Yogurt button again and adjust the time to 8-12 hours. (see Image 7)
- 8 hours = milder flavor
- 10-12 hours = tangier flavor
Step 9: Cover with the Instant Pot lid. (The vent can be closed or off, it doesn't matter during yogurt incubation.) Let it sit undisturbed for the full incubation time.
Step 10: Check and chill: When the timer is up, check the yogurt, it should be set and jiggle like custard. (see Image 8)
Step 11: Carefully remove the insert, cover it with foil or plastic wrap, and place it in the fridge to chill for at least 4 hours. This helps it fully set and thicken.
Step 12: Once the yogurt has chilled, it will be much easier to strain if you prefer a thicker, Greek-style consistency.
To strain:
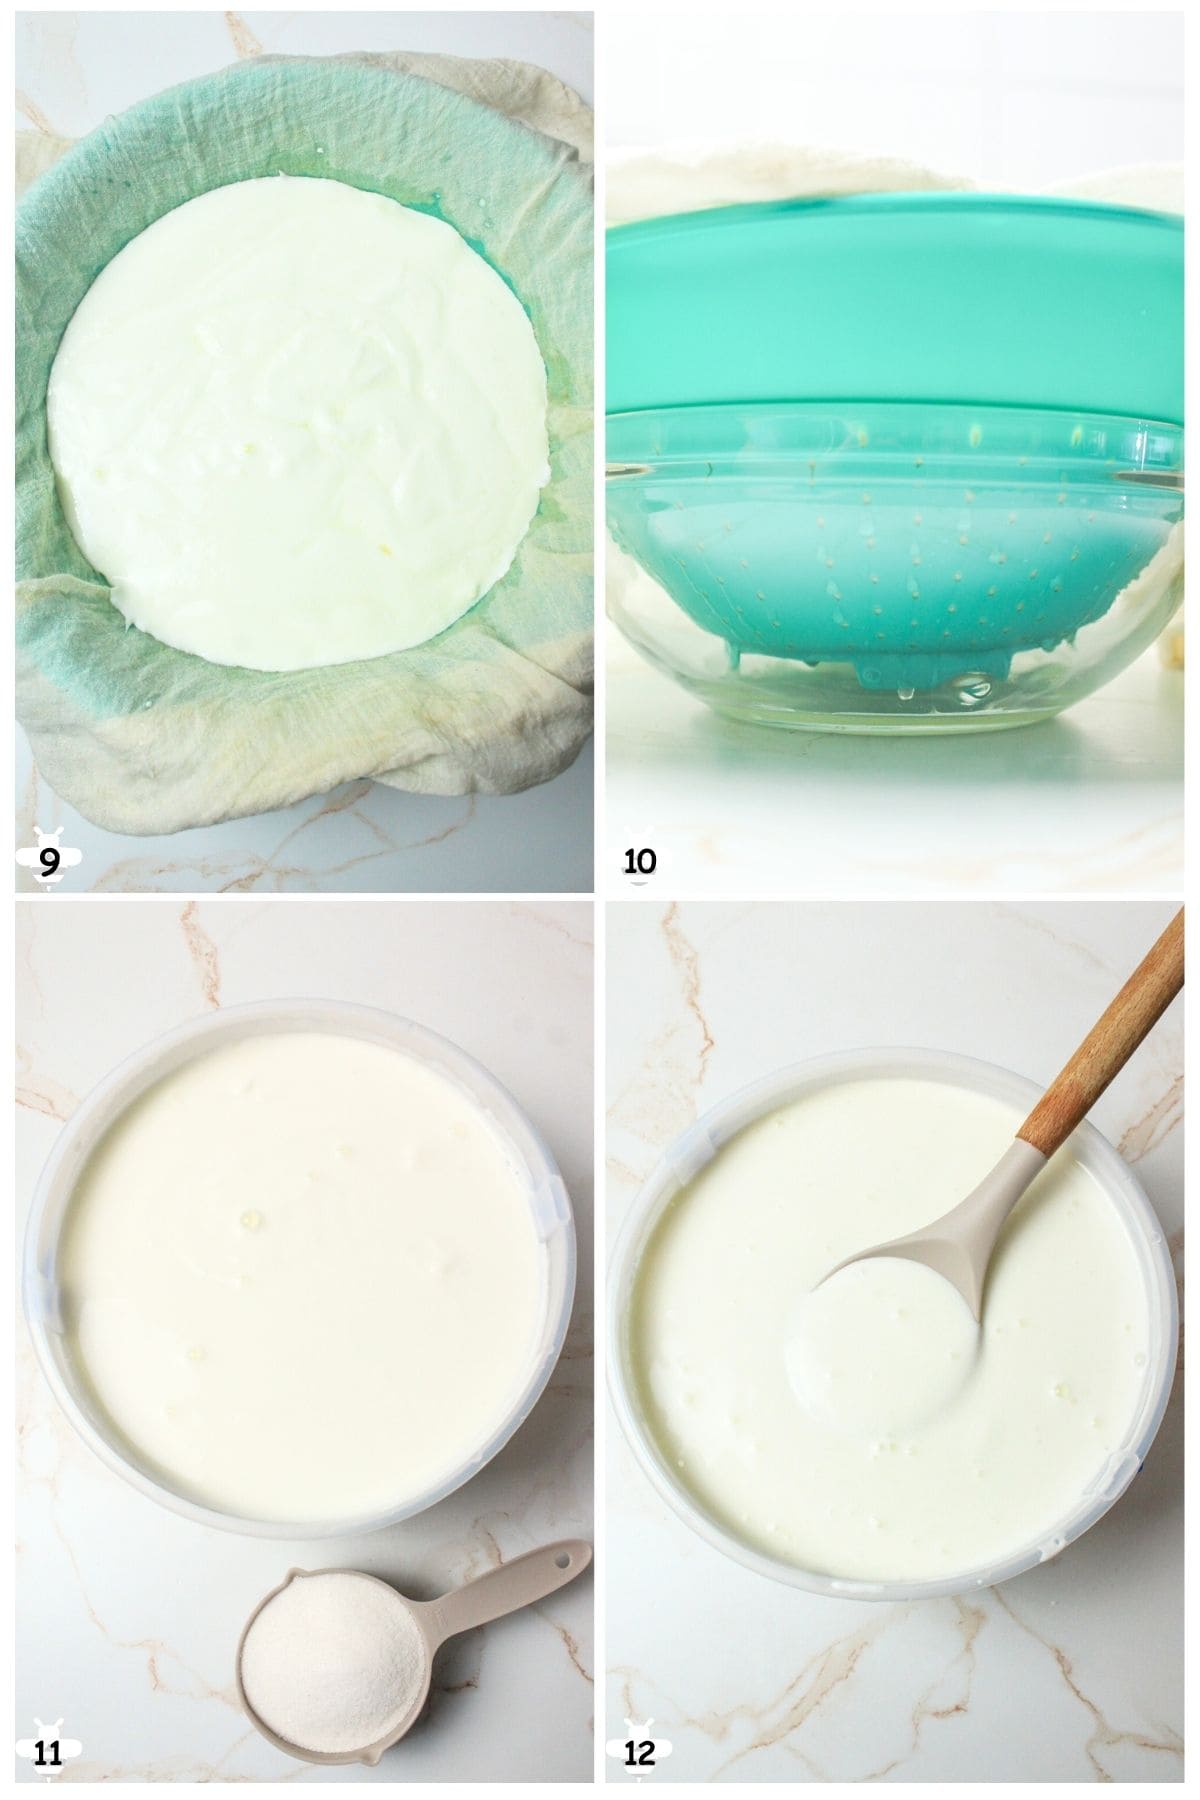
- Line a colander with cheesecloth and set it over a large mixing bowl. (see Image 9)
- Carefully pour the yogurt into the lined colander.
You'll see a clear yellow liquid dripping into the bowl; this is whey. You can save it for smoothies, baking, sourdough, or discard it if you prefer.
Depending on how thick you want your yogurt, you may need to drain the whey from the bowl periodically as it fills up quickly. (see Image 10)
Once the yogurt has thickened to your liking, transfer it to an airtight container.
Tip: Repurposed gallon-sized ice cream tubs work great for storing Instant Pot Yogurt in the fridge!
Step 13 (Optional): Want sweetened yogurt? You can sweeten individual portions or the entire batch at once.
- For a lightly sweet batch, stir in 1 cup of granulated sugar to the full batch to mimic store-bought yogurt flavor. (Images 11 &12)
- You can also mix in honey, maple syrup, or jam when serving individual portions instead.
👩🏻🍳 Expert Tips
- Be careful when handling the hot milk after boiling, it can burn if spilled.
- Your yogurt may look runny when warm, but will firm up in the fridge.
- Don't stir or jostle it during incubation, leave it alone so it sets properly.
- Want sweetened yogurt? Add up to 1 cup of sugar or sweetener after incubation (before chilling), or flavor each serving individually.
- For thicker yogurt, strain it for 2-4 hours in the fridge over a bowl using a cheesecloth-lined strainer.
❄️ Storage and Meal Prep
Fridge: Store yogurt in a covered container for up to 2 weeks.
Freezer (starter only): Freeze 2-3 tablespoons of yogurt in small containers for up to 3 months. Thaw in the fridge before using.
Meal Prep: Divide into jars for quick grab-and-go snacks. Sweeten and flavor before storing, or leave plain to customize later.
🐢 Slow Cooker Version
If you don't have an Instant Pot, you can still make Instant Pot Yogurt using a slow cooker, it just takes a bit more time and monitoring.
Heat the Milk: Pour the milk into your slow cooker. Set it to Low and let it heat for about 2½ to 3 hours, until it reaches 180-185°F.
Cool the Milk: Turn off the slow cooker and let the milk cool to about 110°F. This may take 1-2 hours at room temperature. For faster cooling, place the insert in a cold-water bath in your sink.
Add the Starter: In a small bowl, mix 2-4 tablespoons of plain yogurt with a few spoonfuls of the cooled milk. Stir until smooth, then whisk it into the rest of the milk in the slow cooker.
Incubate the Yogurt: Put the lid back on, then wrap the entire slow cooker in a thick towel or blanket to help retain heat. Let it sit undisturbed for 8-12 hours (overnight is perfect).
Alternatively, place it in your oven with the oven light on (oven off) to keep it warm during incubation.
Chill and Strain (Optional): Once the yogurt has set, move it to the fridge and chill for at least 4 hours. If you'd like a thicker Greek-style yogurt, strain it through cheesecloth or a nut milk bag after chilling.
🥗 Side Dishes or Pairing Ideas
Top your yogurt with Sourdough Granola, swirl in Homemade Strawberry Jam, or layer into a Strawberry Blueberry Parfait. It's also a great base for smoothies, fruit bowls, or savory dips.
- Sourdough GranolaRecipe $1.83 / Serving $0.37
- Strawberry Blueberry ParfaitRecipe $2.97 / Serving $1.49
- How to Make Strawberry Jam (for Canning)Recipe $9.62 / Half-Pint $1.60
- Strawberry Blueberry Fruit SaladRecipe $3.35 / Serving $0.84


❓ Instant Pot Yogurt FAQs
Yes, but the texture will be thinner. For best results with low-fat milk, strain the yogurt after incubation.
Instant Pot Yogurt lasts up to 2 weeks in the fridge, and up to 3 months in the freezer (starter portions only).
Your milk may have cooled too much before adding the starter, or your starter culture wasn't active. Make sure you're using live active cultures and that your incubation temp stayed warm enough.
Yes! As long as it fits in your Instant Pot and reaches temperature properly, you can make larger batches.
You can safely leave yogurt in the Instant Pot for up to 2 hours after incubation finishes, as long as the lid is on and the environment is relatively cool (like in an air-conditioned home).
No, you don't need to sterilize your Instant Pot before making yogurt, but it's a good idea to start with a clean pot to reduce the risk of unwanted bacteria interfering with the yogurt cultures.
🍽️ More Recipes You'll Love
- Instant Pot ApplesauceRecipe $4.17 / Serving $0.69
- Instant Pot Chicken DrumsticksRecipe $6.38 / Serving $1.07
- Instant Pot Mississippi RoastRecipe $29.14 / Serving $4.86
- Instant Pot AsparagusRecipe $4.57 / Serving $1.15


🐝 If you tried this Instant Pot Yogurt, please leave a ⭐️ star rating and share your buzz in the 💬 comments below. I'd truly appreciate it!
📖 Recipe

Instant Pot Yogurt
Ingredients
- 1 gallon whole milk - ($2.97)
- 2-4 tablespoons plain yogurt with live active cultures - ($0.79)
Instructions
- Heat the milk. Pour the milk into the Instant Pot. Press Yogurt, then Adjust until the display reads Boil. Heat until the milk reaches 180 to 185°F, checking with a thermometer if needed.
- Cool the milk. Remove the insert and allow the milk to cool to 110°F. For faster cooling, place the insert in a cold-water bath.
- Prepare the starter. In a small bowl, whisk the yogurt with a few spoonfuls of the cooled milk until smooth. Stir gently back into the pot.
- Incubate. Return the insert to the Instant Pot. Press Yogurt again and set for 8 to 12 hours. Cover with the lid and let incubate undisturbed.
- Chill. Once set, cover and refrigerate for at least 4 hours to firm up.
- Optional straining. Line a colander with cheesecloth, place over a bowl, and strain the yogurt in the refrigerator until desired thickness is reached. Transfer to an airtight container.
- Optional sweetening. Sweeten the whole batch or individual servings as desired.
Notes
- Milk choice. Whole milk gives the creamiest texture. Lower-fat milk will be thinner.
- Starter yogurt. Must contain live active cultures. Use 2 tablespoons for mild yogurt or up to 4 tablespoons for tangier results.
- Incubation time. 8 hours for mild flavor, 10 to 12 hours for tangier yogurt.
- Straining. Optional. Longer straining creates Greek-style yogurt.
- Reuse tip. Reserve a few tablespoons of yogurt to use as a starter for your next batch.
- Whey use. Whey can be used in smoothies, baking, oatmeal, or sourdough.
Nutritional Information
Save This Recipe to Your Inbox
By signing up, you'll join our email list and can unsubscribe anytime.


Nicole Durham says
We make this yogurt once or twice a month. It's such a great way to stretch our budget and keep healthier snacks in the house.