

Learn how to make the most of your summer fruits by preserving fresh peaches for long-term storage. Once you learn how to can peaches, you'll love getting to enjoy summer peaches all year long.

Save This Recipe to Your Inbox
By signing up, you’ll join our email list and can unsubscribe anytime.
Preserving foods has been around for centuries, and many families can remember their parents or grandparents in the kitchen canning things at home. As time goes on, science has helped to make the process safer and more foolproof.
I only believe in safe canning practices for the sake of my family. This recipe follows guidelines from trusted sources like Ball® and the National Center for Home Food Preservation, because safety is non-negotiable in my kitchen. Tested recipes protect our families from foodborne illness.
Below, you will find simple step-by-step How to Can Peaches instructions to help walk you through canning peaches so you can safely enjoy the best summer flavors all year long.
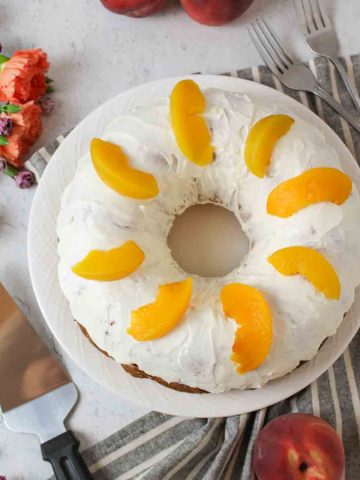
You can even use your home-canned peaches in recipes like Strawberry Peach Cobbler, Peaches and Cream Bundt Cake, and Sourdough Peach Coffee Cake.
Jump to:
- 💛 Why You'll Love This Recipe
- 🛒 Ingredients and Tools
- 🥣 Recipe Add-Ins
- 💰 Budget-Friendly Tips
- 🍑 Sugar Syrup Choices
- 📍 Water Bath Canning: Elevation Adjustments
- 🥄 Instructions for How to Can Peaches
- 👩🏻🍳 Expert Tips
- 🫙 Reprocessing
- ❄️ Storage and Make Ahead
- 🥗 Side Dishes or Pairing Ideas
- ❓ FAQs about How to Can Peaches
- 🍽️ More Recipes You'll Love
- 📖 Recipe
- 💬 Comments
💛 Why You'll Love This Recipe
- Saves Money Long-Term - Like many frugal hobbies (gardening, canning, even fishing), there's an upfront cost, but mason jars are reusable and reduce future expenses.
- Buying produce in season: You can find amazing sales on fruits like peaches in your local farmers market, the peach truck (if you live on the eastern half of America), or, if you're lucky, you may find great produce deals from your local Flashfood location. I calculated this recipe using "everyday" prices on peaches, but you can make canning more affordable by snagging great sales!
- Simple Steps - While canning takes time and repetition, the process isn't hard; just peel, slice, and boil. Even beginners can follow along and succeed.
🛒 Ingredients and Tools
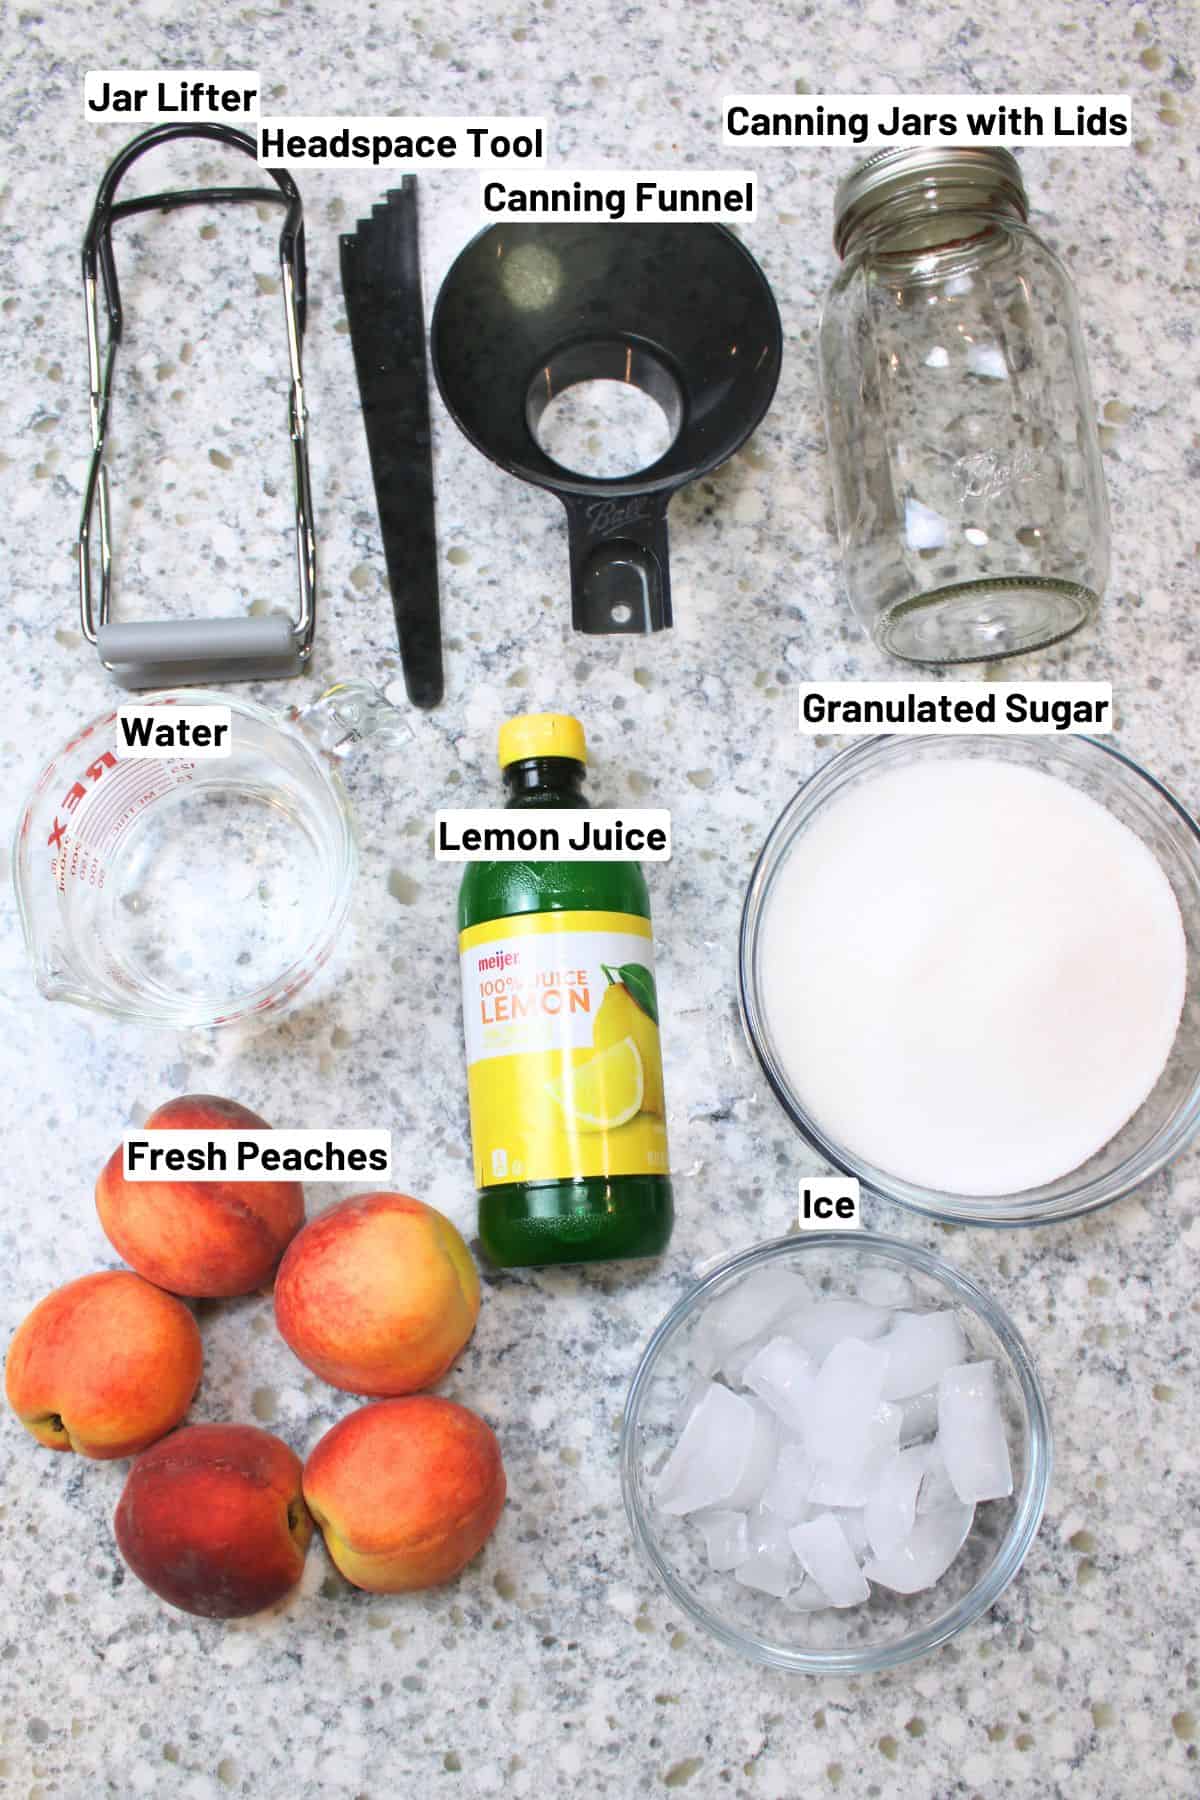
Fresh Peaches: As you read along with how to can peaches, you'll find that at a bare minimum, you will need a few pounds of peaches. A single quart sized mason jar will hold about 2-3 pounds of peaches once peeled and sliced. (7 quart sized jars will hold about 17lbs).
Lemon Juice: Having your peaches sit in lemon juice water before beginning the canning process will help to preserve their vibrant colors so that they don't brown.
Sugar: You will need granulated sugar for the syrup mixture, but you can choose between a low sugar syrup and a high sugar syrup (both are covered in detail below).
Ice Water: You will need some ice water as well.
See the recipe card below for full ingredients and instructions.
🥣 Recipe Add-Ins
- Whole cinnamon sticks (1 per jar) - adds warm spice flavor
- Whole cloves (2-3 per jar) - aromatic and subtle spice
- Lemon juice (bottled, added as acidity booster) - brightens flavor and ensures safety
- Vanilla bean pods or vanilla extract (small amounts) - adds sweet, fragrant notes (use sparingly)
- Ginger slices (thin slices) - gentle zing that pairs well with peaches
❌ Avoid adding fresh herbs, thick spices, or anything that can affect acidity or texture unpredictably, unless tested by a trusted source.
💰 Budget-Friendly Tips
Use Seasonal Fruit: Buy peaches in summer when they're cheapest, or stock up on frozen when on sale. If you're local on the eastern half of the US, you could do what I do and order peaches in bulk from The Peach Truck. Use my referral code to save an additional 10% on an order of $30.
Flashfood & Clearance - Check Flashfood or grocery clearance bins for ripe fruit. Perfect for canning since you'll be peeling and cooking them anyway.
Reuse Mason Jars - Jars are a one-time investment. Just replace the lids each season, which is much cheaper than rebuying jars. Do not reuse lids; those need to be purchased new. Thankfully, they're cheap.
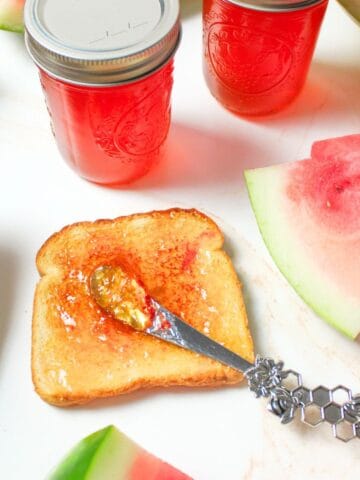
Stretch Your Batch - Use every part of the peach. Save peels and pits to make Peach Peel Jelly or flavored syrups.
Make a Light Syrup - Not only do you get more natural peach flavor and less added sugar per serving, but you save money by using less sugar per batch.
🍑 Sugar Syrup Choices
You can select any of the three syrups for your peach preservation liquid. Use more or less sugar depending on your preference. I prefer to use light syrup so my peaches aren't too sweet and I can have more wiggle-room with future recipes.
| Syrup Type | Approx. Sugar Content | Water | Sugar |
|---|---|---|---|
| Light | ~20% | 9 cups | 2¼ cups |
| Medium | ~30% | 8¼ cups | 3¾ cups |
| Heavy | ~40% | 5¼ cups | 4¼ cups |
📍 Water Bath Canning: Elevation Adjustments
Use this chart to adjust boiling water bath processing times based on your elevation. Don't know your elevation? A quick Google search can help.
| Elevation | Increase Processing Time By |
|---|---|
| 0-1,000 ft | Used in this recipe's listed time |
| 1,001-3,000 ft | Add 5 minutes |
| 3,001-6,000 ft | Add 10 minutes |
| 6,001-8,000 ft | Add 15 minutes |
| 8,001-10,000 ft | Add 20 minutes |
🥄 Instructions for How to Can Peaches
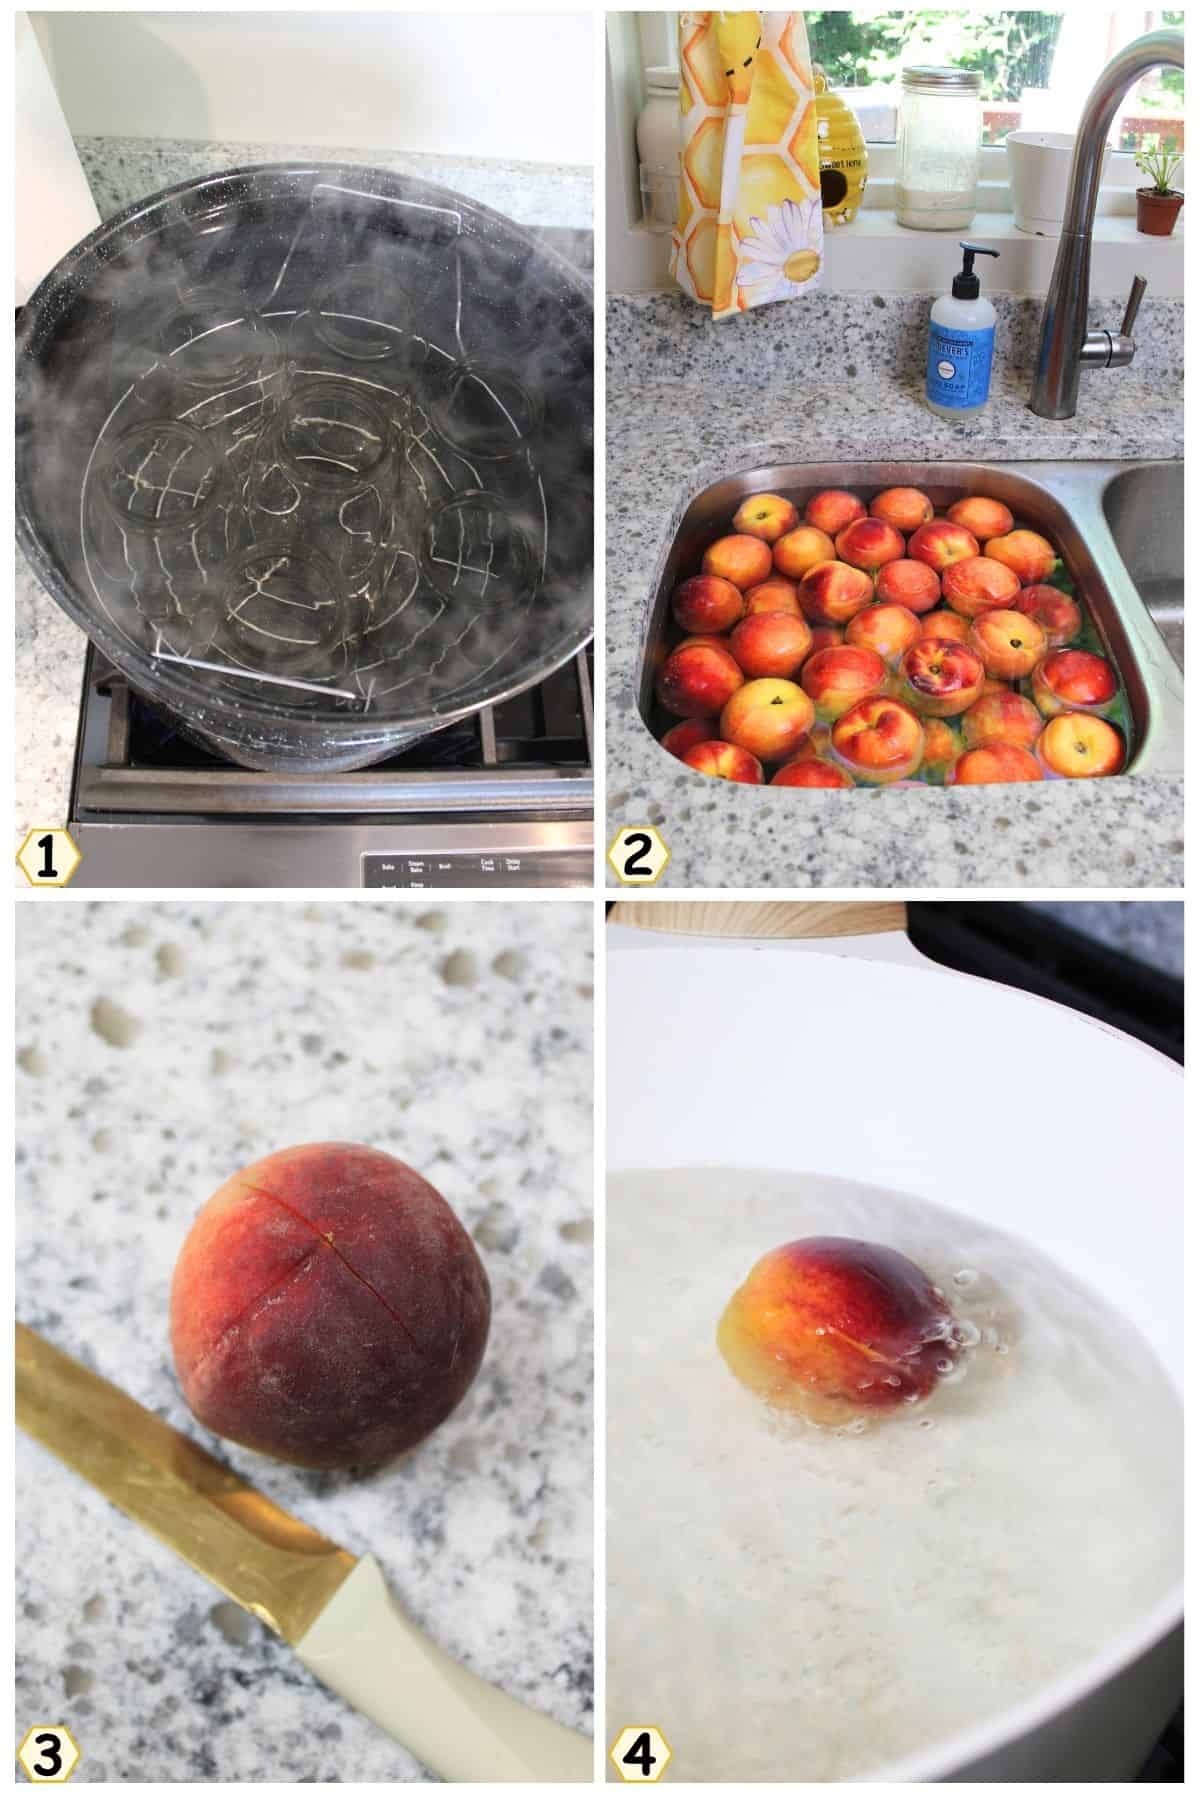
Step 1: Wash your jars, lids, and metal rings in hot, soapy water and rinse well. Set aside the lids and rings, but put your jars in a large pot of water and bring them to a boil or simmer while you prep the peaches. Your pot must be large enough to cover the tops of the jars by 1-2 inches of water. (Image 1)
If your jars are clean, an alternative is to place them in the dishwasher (without soap) and run a hot water cycle to keep them warm.
Step 2: Bring a large pot of water to a boil (for blanching the peaches). While the water gets hot, prep the peaches. Wash them all well under cool running water to remove any dirt. Or soak in 1 part white vinegar (or apple cider vinegar) with 3 to 4 parts water for 10-20 minutes. (Image 2)
Step 3: Slice an X mark with a sharp knife on the bottom of each peach. This mark shouldn't be too deep. (Image 3).
Step 4: Dip the peaches in boiling water for 30-60 seconds in the boiling pot of water from step 2 (Image 4), and then scoop them up with a slotted spoon.
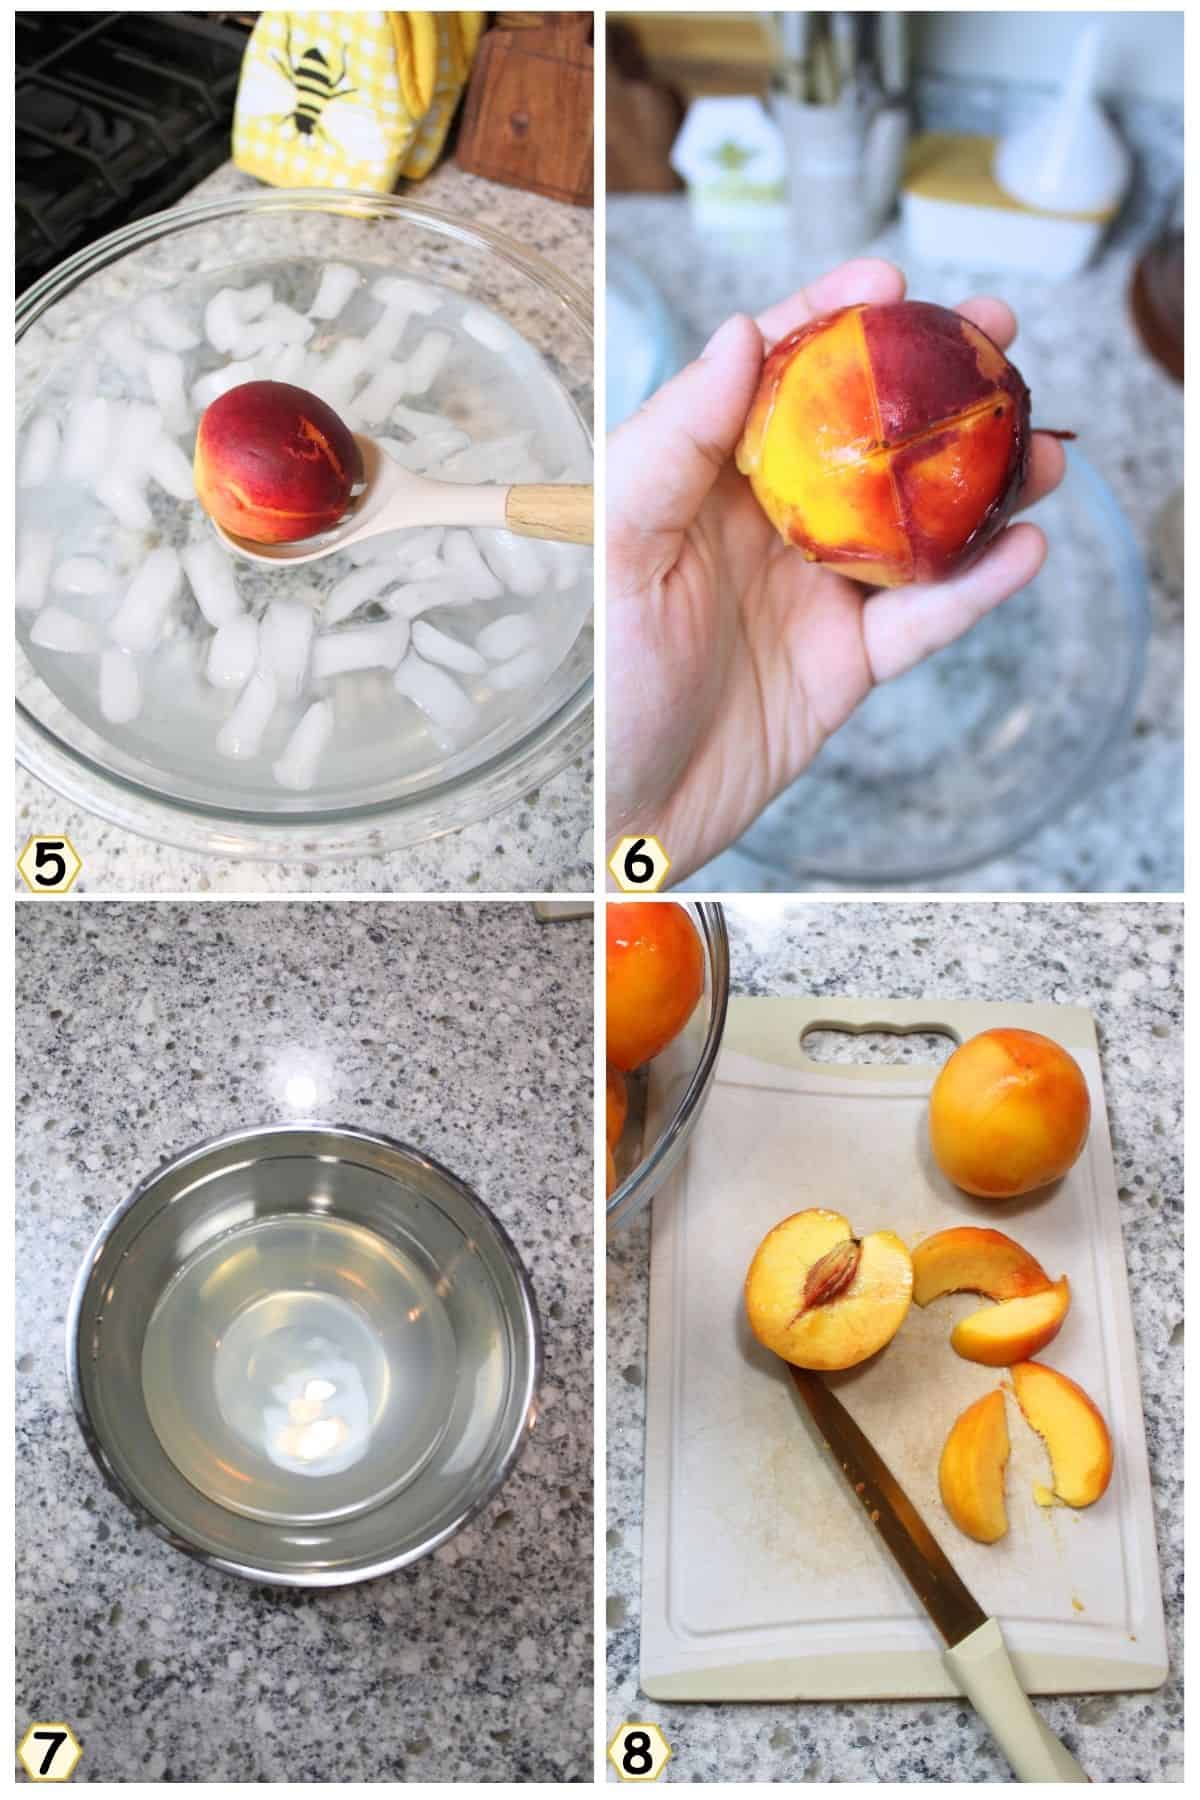
Step 5: Immediately place the boiled peach into a large bowl filled with ice water. (Image 5).
Step 6: Peel the skin off the peaches using your fingers, gently rubbing the now loose skin off the boiled peach. (Image 6). It should peel off pretty easily. If any skin is too thin or doesn't want to peel, rubbing the skin while holding the peach under cold running water helps tremendously!
Step 7: Repeat the boiling, chilling, and peeling until several peaches (or all of them) are done.
Step 8: Fill a large mixing bowl with 4 cups of water + 1 Tablespoon of bottled lemon juice (not freshly squeezed). (Image 7)
Step 9: Place a cutting board in front of you and put the peeled peach down. Slice in half and remove the pit. Then slice each half into 4 or so even slices. (Image 8).
Note: Don't toss those peach skins and pits! Save them in a separate container to make Peach Peel Jelly. A safe canning recipe that lets you use every part of the fruit. It's a delicious way to stretch your peaches and get the most value out of your batch.
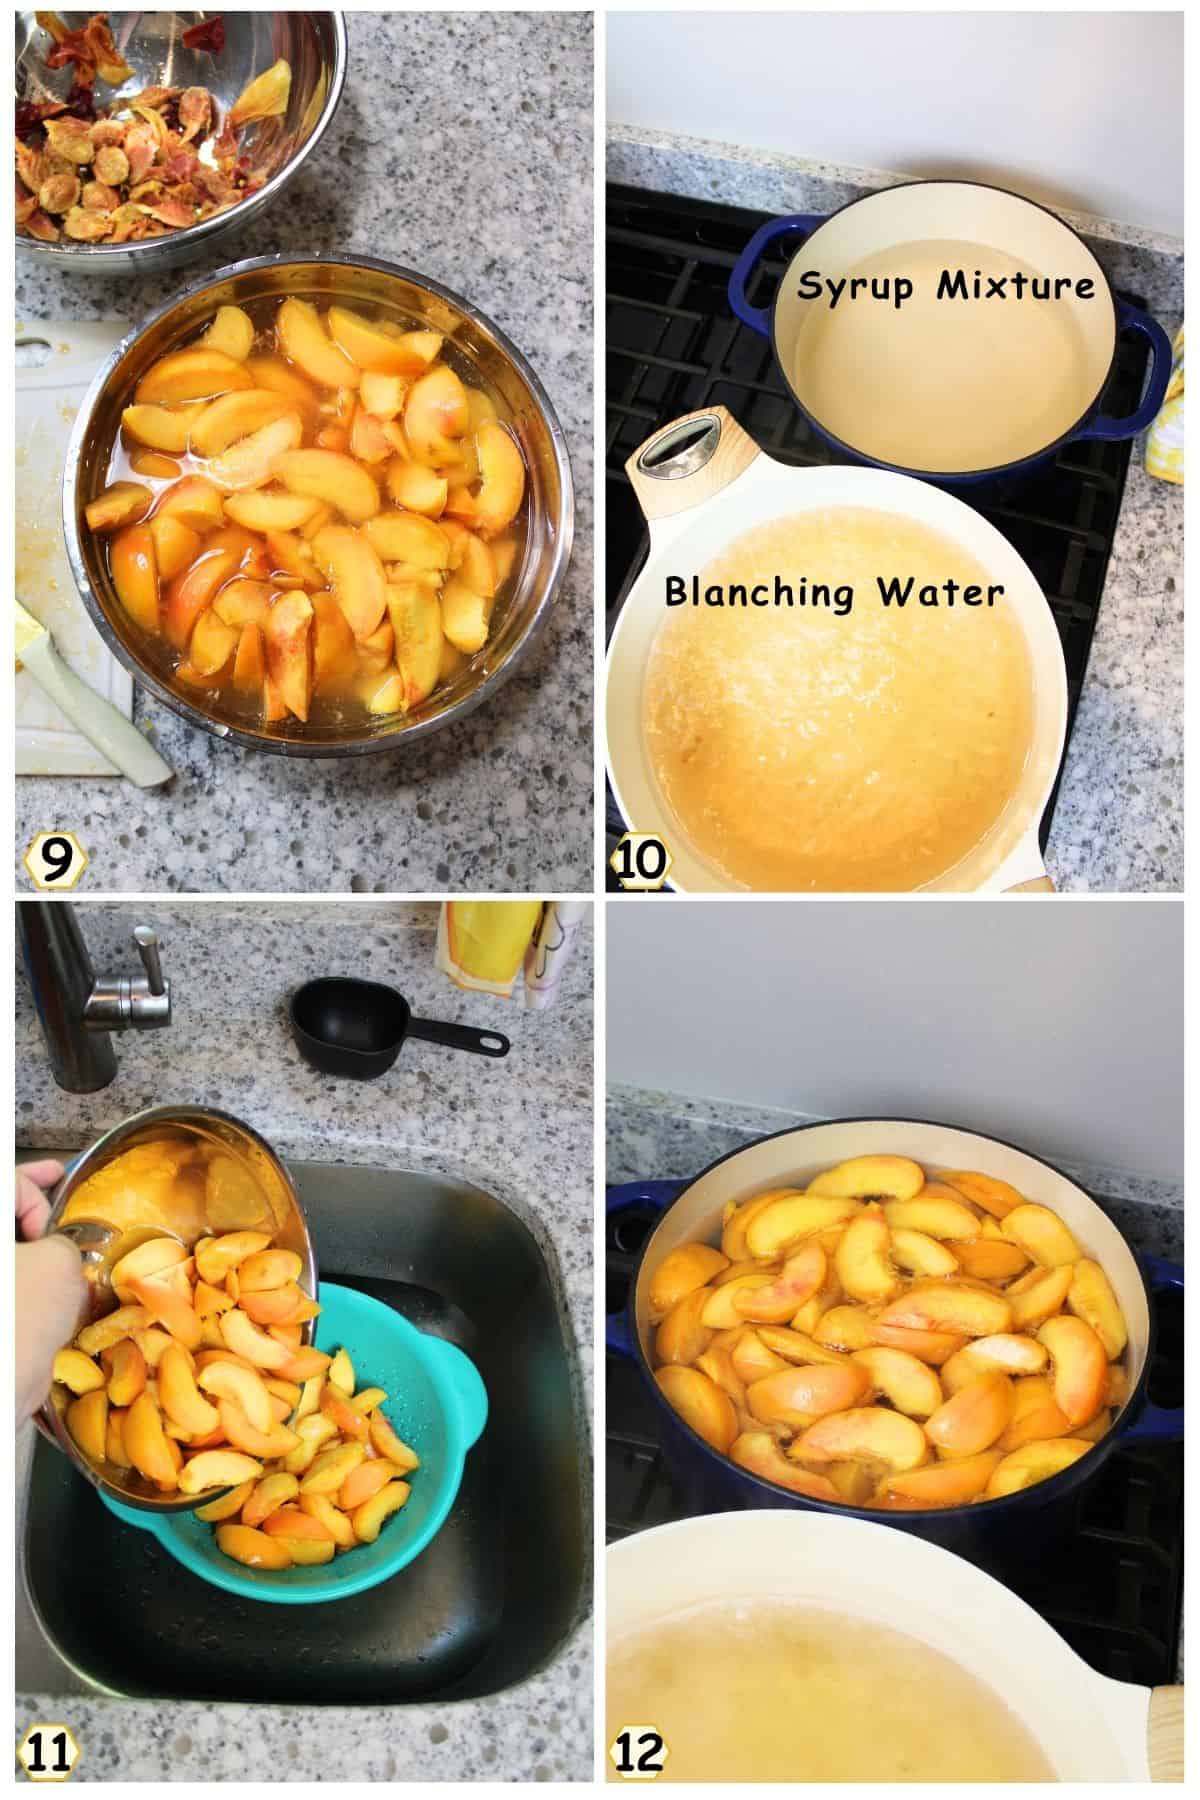
Step 10: Place your sliced peaches into the prepared lemon water and let soak for at least 30 seconds or more. (Image 9)
Step 11: Bring another large pot to a boil, filled with the sugar and water for syrup. (Image 10) Light Sugar= 9 cups water + 2 ¼ cups sugar, or Medium Sugar= 8 ¼ cups water + 3 ¾ cups sugar, or Heavy Sugar= 5 ¼ cups water + 4 ¼ cups sugar. Keep this syrup hot.
Note: If you've finished boiling/peeling all of the peaches, you can wash out that large pot and use it for this.
Step 12: Drain your peaches from the lemon water (Image 11), and then place them into the boiling syrup. (Image 12). Return to a gentle boil and set the timer for 5 minutes while stirring every so often.

Step 13: Carefully lift and remove warm jars from the large pot (Image 13) and place them onto a towel-lined counter. This will help to prevent cold shock from hot glass+cold counters (it also helps to absorb the water drips for a smaller mess later). (Image 14)
Step 14: Use a slotted spoon to remove the peaches from the pot and place them into your warm, prepped glass jars. (Image 15). You can add as many as you can fit, but keep in mind that you should stop adding peaches by the time they reach the neck of the jar to ensure that they can be covered by the liquid later. Repeat until all jars are filled.
Step 15: Use a ladle to scoop the hot syrup into each jar. You want there to be ½ inch of headspace left, measuring from the top of the glass jar downward. (Image 16).
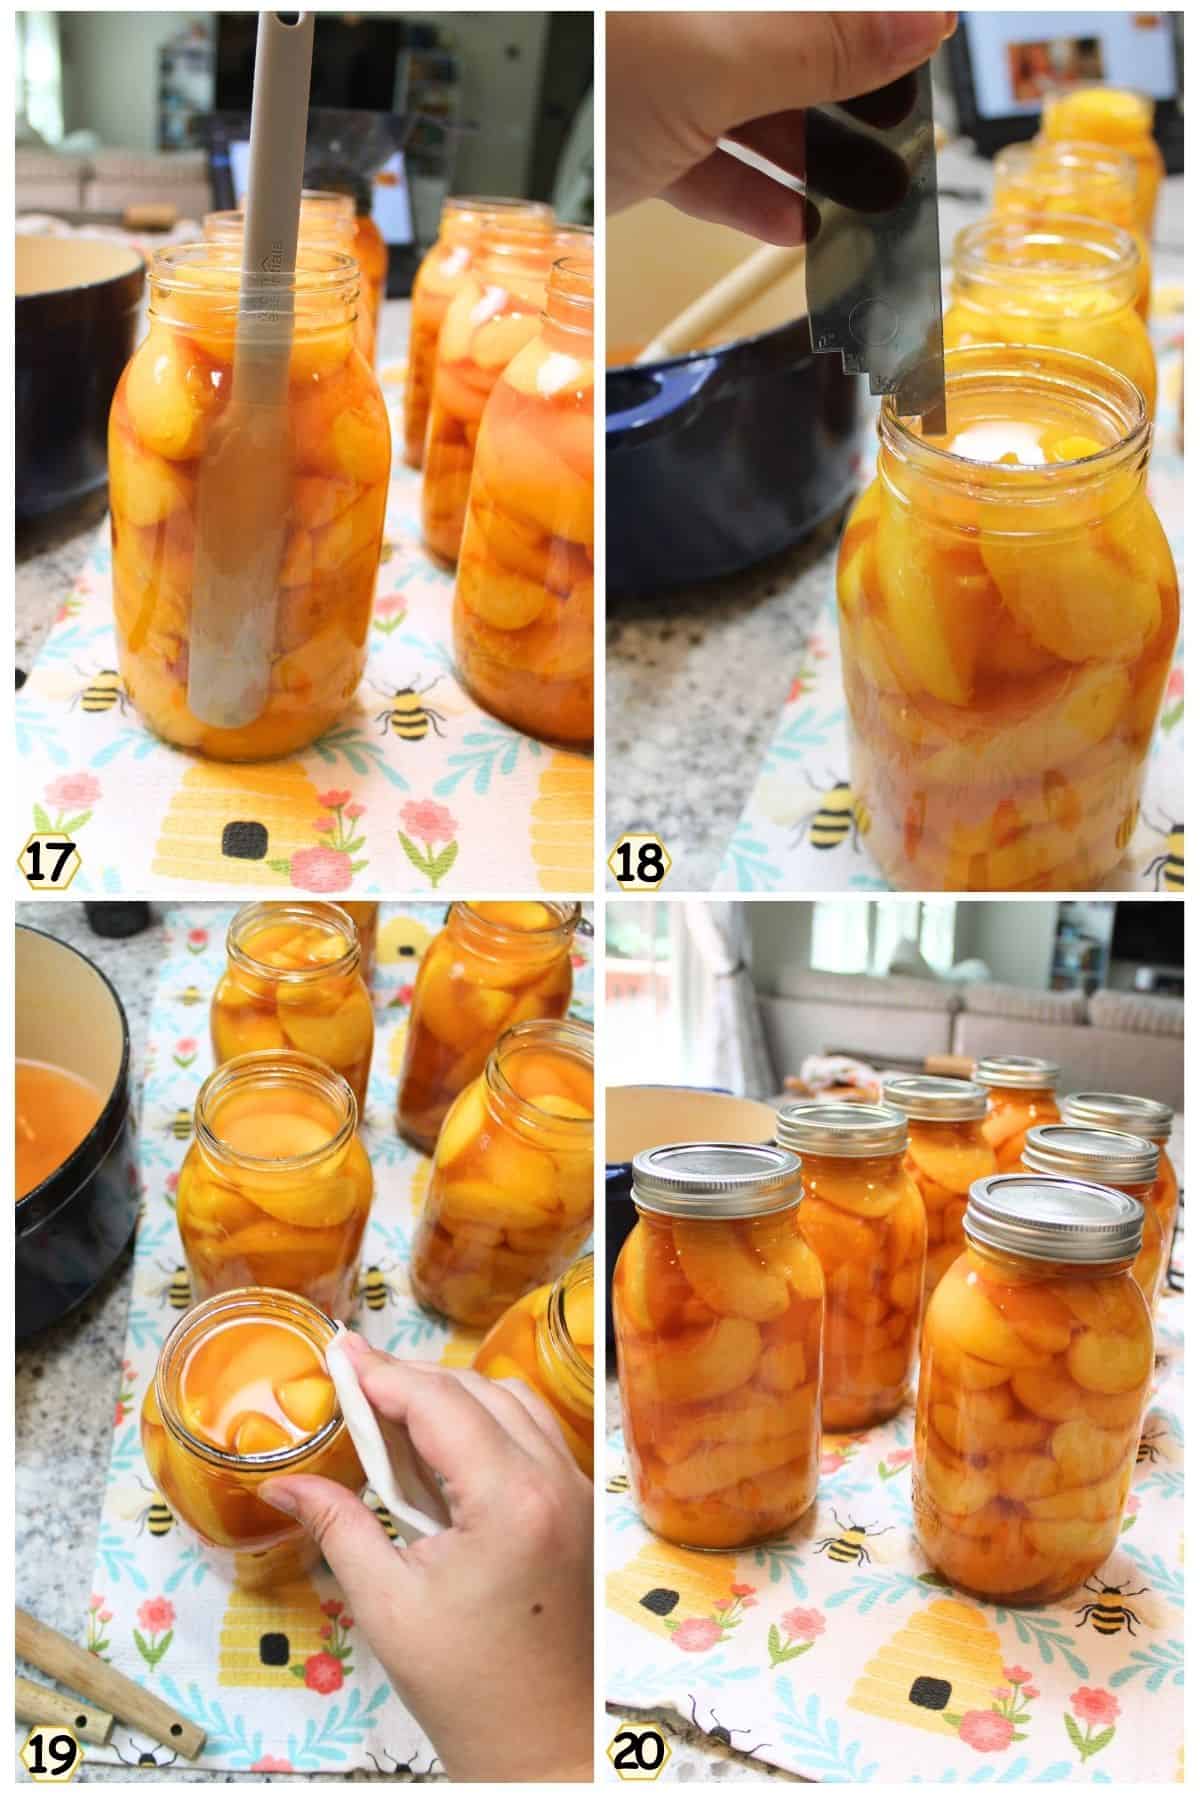
Step 16: Remove the air bubbles from inside the jars. This can be done by placing a silicone spatula or the headspace measuring tool into the sides of the jar (Image 17), gently moving it around can allow air bubbles to lift up to the top. You'll notice the headspace getting bigger as more bubbles come up. Add more syrup to make up the difference and bring you back to exactly ½ inch. (Image 18)
Step 17: Wipe the rims of the jars clean. (Image 19). Even if they don't look messy, there can be hidden sticky syrup or mess, and any mess around the rim can prevent the jars from sealing properly.
Tip: I've found that a wet paper towel works better than a wet dishrag because it can fit better into the nooks and crannies along the side of the rim.
Step 18: Place the metal lids on the top of the jars, and then place the metal rings around the lids. You need to be careful with tightening them; too loose and they won't work right, and too tight, and they won't seal. (Image 20). A good rule of thumb is finger-tight. Turn the lids just enough to feel secured, but do not do any additional turning.
Tip: Using your non-dominant hand can help to keep you from overtightening the rings.
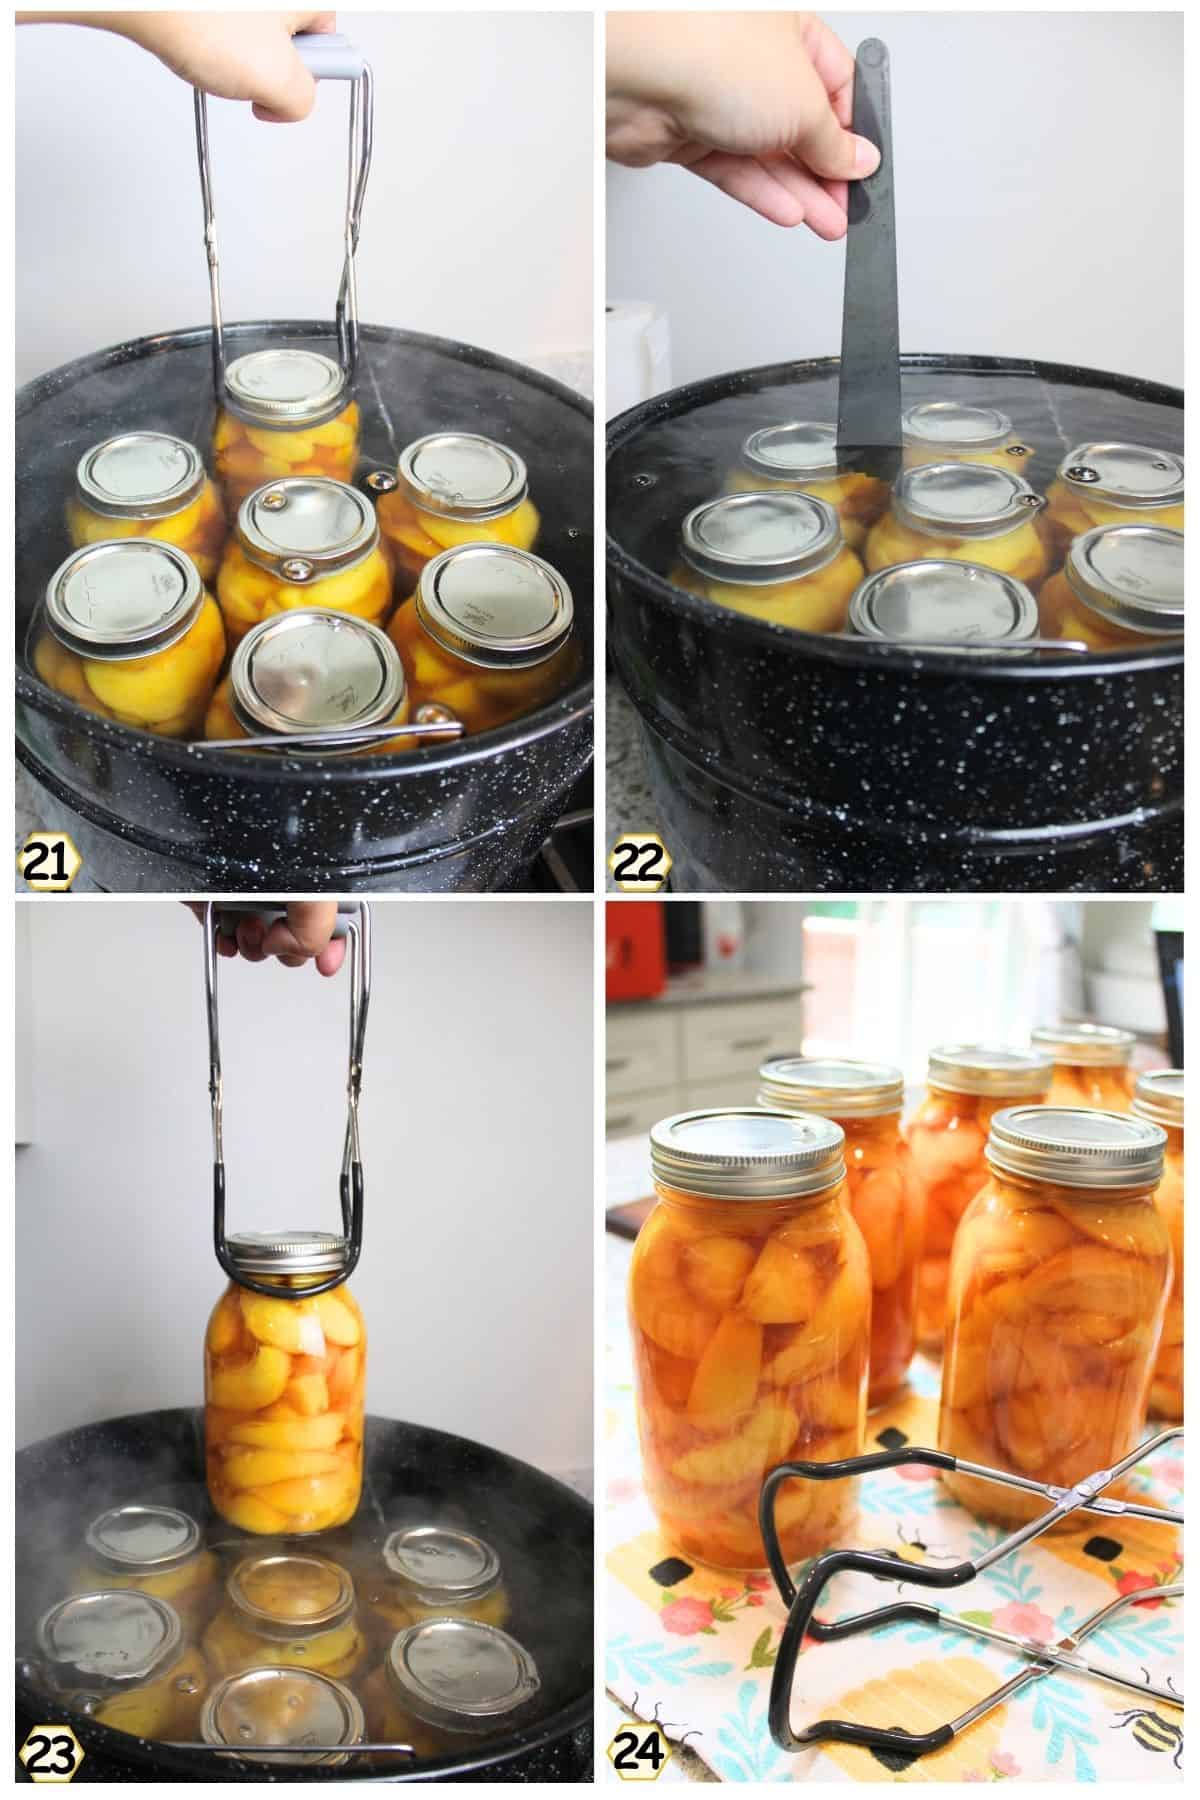
Step 19: Hopefully, by now, your large canning pot has come to a boil. Carefully place your jars into the pot (Image 21) and make sure that 1-2 inches of water sits above the lids. (Image 22).
Step 20: Once the water has returned to a rolling boil, start timing. Set the timer for 25 minutes. After the processing time is up. Turn off the heat and set the timer again for 5 minutes.
Step 21: After the timer is up, carefully remove the jars from the water (Image 23) and place them onto a towel. (Image 24). Let it sit undisturbed for 12-24 hours.
Step 22: Remove the rings and check the centers of the jars. The centers of the lids should be concave and not click when pressed. This means there was a good seal.
Step 23: Wipe the jars clean and then label and date the top metal lid with the contents. You won't be able to reuse the metal lids (it's unsafe to do so), so use a permanent marker. Keep stored in a cool, dark place (50-70°F).
Note: It is now recommended to store jars without the rings attached. This prevents trapping moisture that would cause rust to the metal and also allows bad seals or signs of spoilage to become more obvious over time. When your jar has been sealed and washed, remove the metal rings and store as desired. Rings can be reused. I keep mine in a drawer and pull them out as needed (like when we need to close a jar after opening it).
👩🏻🍳 Expert Tips
- Why We DON'T Boil Lids Anymore. Since 2014, canning guidelines changed. Lids no longer need boiling. Just wash in soapy water and use at room temp. The sealing compound was reformulated, and preheating can actually weaken the seal.
- Why You Should Lay Towels on Counters. Towels protect hot jars from breaking on cold counters and make cleanup easier, just toss them in the wash instead of scrubbing sticky messes.
- Only use yellow peaches. White flesh peaches are not acidic enough to be safely canned at home with water-bath canning, so only select yellow flesh peaches.
- There's a difference between freestone peaches and clingstone. Freestone peaches have pits that come out easily. They are easy to peel and slice. Clingstone peaches have pits that stick tightly to the fruit. They are harder to peel and slice.
🫙 Reprocessing
- After following along with how to can peaches, if jars do not seal after the first processing, remove the contents from the jars and reheat them to a boil before repacking.
- Use fresh, sterilized jars and new lids for reprocessing.
- Process again using the full recommended processing time.
- Do not reuse old lids, and make sure jars are clean and hot before refilling.
❄️ Storage and Make Ahead
Storage - Store sealed jars in a cool, dark, dry place for up to 12-18 months for best quality. Once opened, refrigerate and use within 5-7 days. You can keep them stacked for condensed storage. To do this, I recommend keeping them in the cardboard jar box and not stacking them more than 2 or 3 rows high. Use your best judgment to prevent risk.
Make Ahead - Peel and prep peaches up to 24 hours in advance, keeping them submerged in a lemon-water solution to prevent browning. You can also prepare the syrup or packing liquid ahead of time and keep it warm until use. Wash and sterilize jars and lids a day early to save time on canning day.
🥗 Side Dishes or Pairing Ideas
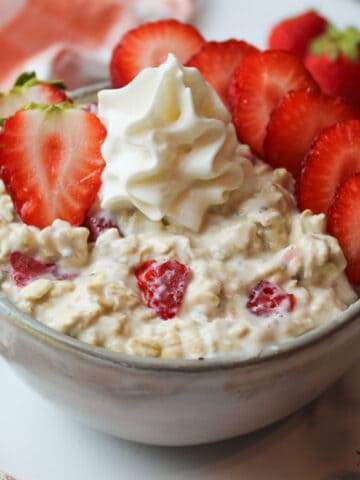
Canned peaches are wonderfully versatile! Serve them chilled in Strawberries and Cream Overnight Oats (instead of strawberries) or layer them into a Strawberry Blueberry Parfait for a simple breakfast or snack.
They make a sweet side for pancakes, waffles, or Sourdough Bread Pudding, and pair beautifully with grilled chicken or pork chops for a fresh, fruity contrast.
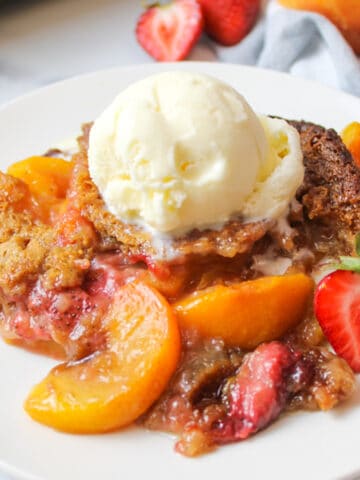
Once you learn how to can peaches, you'll find you can even use them in desserts like cobblers, crisps, or as a topping for Instant Pot Yogurt.
- Strawberries and Cream Overnight OatsRecipe $0.79
- Strawberry Blueberry ParfaitRecipe $2.97 / Serving $1.49
- Sourdough Bread PuddingRecipe $1.98 / Serving $0.33
- Instant Pot YogurtRecipe $3.76 / Serving $0.24


❓ FAQs about How to Can Peaches
To prevent browning, soak peeled peaches in a lemon juice and water solution or use ascorbic acid before packing. This helps stop oxidation and keeps the fruit looking fresh.
Freezing preserves a fresher flavor and is quick to do, but peaches become soft after thawing. Canning offers longer shelf life and pantry storage but changes the texture to softer and cooked.
You can eat canned peaches once the jars have completely cooled and sealed, usually within 12 to 24 hours. Flavor often improves after a week or two of storage.
Yes, you can cold pack peaches by packing raw slices into jars, but hot packing (heating peaches before packing) reduces floating and improves texture. Not only that, but because the peaches are warm and soft, you can fit significantly more into each jar.
Peeling peaches is recommended for better texture and clearer syrup, though it's not absolutely necessary. Peeling also helps the fruit absorb syrup flavors better.
To reduce floating, use the hot pack method by heating peaches before packing, pack them tightly without crushing, remove air bubbles, and fill jars with hot syrup or juice. There will always be some level of floating peaches in your jars, but this helps to reduce it.
It usually takes about 3 to 4 medium peaches, or 2 to 2½ pounds of peaches, to fill one quart jar. For smaller peaches, don't be surprised to see 6-10 peaches fit in each jar when using the hot pack method.

🍽️ More Recipes You'll Love
- Strawberry Peach CobblerRecipe $7.37 / Serving $0.92
- Homemade Peach Pie FillingRecipe $3.70 / Serving $0.46
- Peaches and Cream Bundt CakeRecipe $9.09 / Serving $0.76
- Peach Peel JellyRecipe $5.23 / Half Pint $1.31


🐝 If you tried this How to Can Peaches, please leave a ⭐️ star rating and share your buzz in the 💬 comments below. I'd truly appreciate it!
📖 Recipe

How to Can Peaches
Equipment
- Large Pot (for blanching peaches)
- Large bowl (for ice water bath)
- Large Mixing Bowl (for lemon water soak)
- Water bath canner (or large stockpot with rack)
- Clean towels (for counter and drying jars)
- Permanent marker (for labeling lids)
Ingredients
- 17 pounds fresh yellow peaches, preferably freestone - ($40.29)
Syrup, choose one
- Light syrup: 9 cups water and 2 ¼ cups granulated sugar - ($0.86) (used in price calculation)
- Medium syrup: 8 ¼ cups water and 3 ¾ cups granulated sugar
- Heavy syrup: 5 ¼ cups water and 4 ¼ cups granulated sugar
Lemon water
- 1 tablespoon bottled lemon juice per 4 cups water
Instructions
- Prep jars. Wash jars, lids, and rings. Keep jars hot in a simmering water bath or a hot dishwasher cycle.
- Blanch and peel. Bring a large pot of water to a boil. Wash peaches and score a small X on the bottom of each. Boil for 30 to 60 seconds, then transfer to ice water for 1 minute. Rub off skins.
- Slice and prevent browning. Halve peaches, remove pits, and cut into quarters. Place slices in lemon water until ready to can.
- Make the syrup. In a large pot, combine the water and sugar for your chosen syrup. Bring to a boil, stirring until the sugar dissolves. Keep hot over low heat.
- Heat peaches. Drain peaches from lemon water and add to the hot syrup. Bring to a gentle boil and simmer for 5 minutes.
- Fill jars. Pack hot peaches into hot jars, leaving ½-inch headspace. Ladle hot syrup over the fruit, maintaining ½-inch headspace. Remove air bubbles and adjust syrup if needed.
- Seal. Wipe rims clean, apply lids, and tighten bands fingertip-tight.
- Process. Place jars in a boiling water bath with 1 to 2 inches of water covering the jars. Once boiling, process for 25 minutes. Turn off heat and let jars rest in the canner for 5 minutes.
- Cool and store. Remove jars and cool undisturbed for 12 to 24 hours. Check seals, remove rings, label, and store.
Notes
- Peach type. Use yellow peaches only. White peaches are not acidic enough for safe canning.
- Freestone vs clingstone. Freestone peaches are easier to pit and give cleaner slices.
- Lids. Modern lids do not need boiling. Wash and use at room temperature.
- Reprocessing. If a jar does not seal within 24 hours, reheat contents, repack into a clean jar with a new lid, and reprocess for the full time.
- Storage. Store sealed jars in a cool, dark place for up to 1 year. Refrigerate after opening and use within 1 week.
- Scrap use. Peach skins and pits can be saved for peach peel jelly.
Nutritional Information
Save This Recipe to Your Inbox
By signing up, you'll join our email list and can unsubscribe anytime.


Nicole Durham says
There's nothing better than freshly canned peaches