

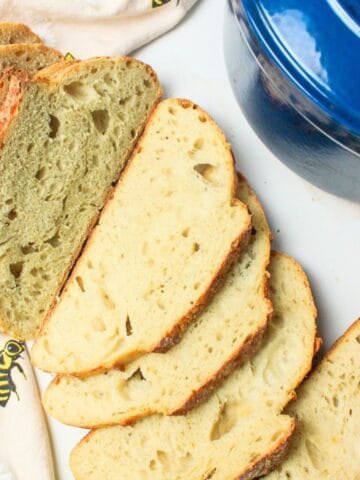
This easy Rustic Sourdough Discard Bread is the perfect way to use up extra sourdough discard without any complicated steps. With a crusty exterior and chewy, flavorful crumb, it's ideal for beginners and busy bakers alike.

Save This Recipe to Your Inbox
By signing up, you’ll join our email list and can unsubscribe anytime.
Making a rustic loaf of sourdough discard bread is a budget-friendly and satisfying project, especially when you're working toward low-waste baking goals.
If you're looking for ways to use up your sourdough starter discard, this no-knead recipe is a must-try. It comes together with pantry basics and minimal effort, just stir, rise, and bake!
This Rustic Sourdough Discard Bread recipe is also a fantastic stepping stone for learning about sourdough. Unlike full sourdough loaves, it includes a little yeast to help with rise and consistency. Looking to build your skills? Check out my Cranberry Orange Sourdough Bread and my Sourdough Banana Discard Muffins, and Low Hydration Sourdough Bread.
Jump to:
💛 Why You'll Love This Recipe
- Minimal Ingredients - This bread comes together with just a handful of basic pantry staples. No milk, no butter, or fancy tools required. If you have a mixing bowl, a spoon, and a Dutch oven, you're good to go. It's simple, approachable, and perfect for any skill level.
- No Kneading Needed - Forget sore arms and floured countertops. This dough requires no kneading at all. Just stir the ingredients until combined, let it rest and rise, then shape and bake. The Dutch oven creates a steamy environment that gives you that artisan-style crust with zero fuss.
- Zero-Waste Friendly - If you're tired of tossing your sourdough discard every time you feed your starter, this recipe is your solution. It gives that discard new life by turning it into a hearty, flavorful loaf, helping you stretch your ingredients further and waste less in the kitchen.
🛒 Ingredients

Sourdough Discard - Adds depth of flavor, a little tang, and helps reduce waste from your starter feedings.
Bread Flour - High protein content builds structure and chewiness in the final loaf.
Instant or Active Dry Yeast - Gives the bread a reliable rise, especially helpful when discard is slightly older.
See the recipe card below for full ingredients and instructions.
🔀 Substitutions & Variations
Sourdough Discard: Unfed or active discard both work. Avoid discard that smells off or has been sitting too long-2 weeks max if refrigerated.
Yeast: Omit the yeast for a fully sourdough-leavened loaf, but expect longer rise times (up to 12 hours or more) and less predictable results.
💰 Budget-Friendly Tips
Use affordable flour: Bread flour gives the best texture, but all-purpose works well too if that's what's in your pantry.
Bake in bulk: Double the batch and freeze one loaf for later. You'll save energy and time by baking once for multiple meals.
Stretch every meal: Use slices for sandwiches, toast, breadcrumbs, or croutons to make the most of your loaf. You can turn uneaten stale loaves into Sourdough Bread Pudding or Sourdough French Toast Bake.
🥄 Instructions for Rustic Sourdough Discard Bread

Step 1: Proof your yeast in a large mixing bowl with warm water (about 100°F). Let it rest for 5 minutes. (Image 1).
Step 2: Add in the flour, salt, and sourdough discard. (Image 2).
Step 3: Mix together until well combined. The dough should be shaggy. (Image 3).
Step 4: Cover the bowl with plastic wrap and let it sit somewhere warm until the dough has doubled in size (about 1-2 hours). (Image 4). Once the dough has doubled, you can place it in the fridge to bake the following day or bake it immediately. Chilling the dough will give you a stronger flavor.
Step 5: To bake, place a large Dutch oven in your cold oven and set the temperature to 450°F. Let it rest in there as the oven preheats and you begin working on the dough.
Step 6: Lay down a silicone bread sling or a large piece of parchment paper.

Step 7: Lightly dust your hands with flour to prevent sticking, then lift the dough out of the bowl and fold the top of the dough down to the bottom, creating a round dome with a bunched-up bottom. If the dough is too wet to hold, just place it on the prepared parchment paper or sling. (Image 5).
Step 8: This step is optional; you can score the top of the bread with a razor blade. Don't worry about fancy designs, as this bread will expand and create its own open top, thereby creating a "rustic" look. (Image 6).
Step 9: Remove the Dutch oven from your hot preheated oven and take off the lid. Lift the parchment paper and carefully lift and place your bread into the Dutch oven. The paper should be long enough to come up and out of the sides for easier bread removal later. (Image 7).
Step 10: Place the lid back onto the Dutch oven. Bake in the oven at 450°F for 30 minutes. Then reduce the heat to 400°F, remove the lid, and bake for an additional 10-15 minutes. (Image 8). The bread will be finished when it has reached an internal temperature of 200-210°F.
Step 11: Carefully place the bread onto a wire rack and let it cool completely before slicing, or allow it to rest for a minimum of 1 hour. If you slice too soon, the insides may appear gummy. The resting time is essential for getting good results.
Enjoy!
👩🏻🍳 Expert Tips
Use Fresh Yeast: Make sure your yeast is fresh for the best results. If your yeast doesn't bubble after proofing, it might be old, and you'll need a new packet.
Don't Skip the Resting Time: Letting the dough rise and rest is important for good flavor. The longer you let it sit, especially if you refrigerate it overnight, the tastier it will be.
Preheat the Dutch Oven: Preheating the Dutch oven is key for getting a crispy crust. The bread will rise better and form a golden, crunchy crust if it starts in a hot pot.
Let the Bread Cool: Be patient and let the bread cool completely, or at least for an hour. If you slice it too soon, the inside might be too gummy.
Check the Bread's Temperature: Instead of just guessing, use a thermometer to check the bread's temperature. It's done when it reaches 200-210°F inside, which means it's fully baked.
❄️ Storage and Reheating
Storage: Store your Rustic Sourdough Discard Bread at room temperature in a bread bag or wrapped in a towel for up to 3 days. For longer storage, slice and freeze.
Reheating: Toast slices in the oven at 350°F for 5-10 minutes, or warm briefly in a toaster.
🥗 Side Dishes or Pairing Ideas
- Spread with honey butter, jam, or peanut butter for a quick morning bite.
- Turn into French toast or breakfast sandwiches with eggs and cheese.
- Serve alongside Tomato Soup Chili, Creamy Turkey Dumpling Soup, or Egg Drop Soup for a cozy, filling combo.
- Make grilled cheese, paninis, or open-faced melts for a satisfying lunch.
- Small Batch Orange MarmaladeRecipe $1.38 / Serving $0.69
- How to Make Strawberry Jam (for Canning)Recipe $9.62 / Half-Pint $1.60
- Tomato Soup ChiliRecipe $10.48 / Serving $2.62
- Creamy Turkey Dumpling SoupRecipe $4.47 / Serving $0.75


❓ Rustic Sourdough Discard Bread FAQs
Yes! Just reduce the yeast slightly or omit it entirely if your starter is strong.
This is a high-hydration dough, but if it feels too loose, reduce the water by 25g next time or try bread flour instead of all-purpose.
Absolutely! If you don't have a Dutch oven, you can still get a great crust by baking it "open." Place your shaped dough on a parchment-lined baking sheet or preheated baking stone.
To create steam, the key for a crusty exterior, add a casserole dish or metal pan filled with hot water to the bottom rack of your oven as it preheats. This mimics the steamy environment of a Dutch oven and helps your sourdough rise beautifully while baking.

🍽️ More Recipes You'll Love
- Sourdough Discard Banana MuffinsRecipe $4.29 / Serving $0.36
- Cranberry Orange Sourdough BreadRecipe $3.09 / Serving $0.19
- Apple Sourdough BreadRecipe $2.40 / Serving $0.15
- Sourdough Banana BreadRecipe $4.64 / Serving $0.46


🐝 If you tried this Rustic Sourdough Discard Bread, please leave a ⭐️ star rating and share your buzz in the 💬 comments below. I'd truly appreciate it!
📖 Recipe

Rustic Sourdough Discard Bread
Equipment
- Silicone Bread Sling *or parchment paper
Ingredients
- 350 g warm water, about 110°F - ($0.00)
- 7 g instant or rapid-rise yeast - ($0.63)
- 100 g sourdough discard - ($0.09)
- 500 g bread flour or unbleached all-purpose flour - ($0.86)
- 10 g salt - ($0.01)
Instructions
- Activate the yeast. In a large bowl, combine the warm water and yeast. Let rest for 5 minutes, until slightly foamy.
- Make the dough. Add the sourdough discard, flour, and salt. Mix until a shaggy dough forms.
- First rise. Cover and let rise in a warm place until doubled, about 1 to 2 hours.
- Optional cold rest. For more flavor, refrigerate the dough overnight. Otherwise, proceed to baking.
- Preheat. Place a Dutch oven with the lid on into a cold oven. Set the oven to 450°F and allow it to preheat fully.
- Shape. Turn the dough onto parchment or a bread sling. Fold the edges under to form a round loaf. Score the top if desired.
- Bake covered. Carefully transfer the dough into the hot Dutch oven. Cover and bake for 30 minutes.
- Bake uncovered. Reduce the oven temperature to 400°F. Remove the lid and bake 10 to 15 minutes more, until deeply golden and the internal temperature reaches 200 to 210°F.
- Cool. Transfer to a wire rack and cool completely, at least 1 hour, before slicing.
Notes
- Yeast check. If the yeast does not foam, replace it before proceeding.
- Flavor boost. Overnight refrigeration deepens flavor and improves texture.
- Crust. A fully preheated Dutch oven creates the best oven spring and crust.
- Cooling matters. Cutting too soon can cause a gummy interior.
- Storage. Store at room temperature wrapped in a towel or bread bag up to 3 days. Slice and freeze for longer storage.
Nutritional Information
Save This Recipe to Your Inbox
By signing up, you'll join our email list and can unsubscribe anytime.


Nicole Durham says
This is a great recipe for using up sourdough discard!